Editor’s Note: While this post shows how to install Ubuntu 20.04 LTS on a MacBook Air, a more recent article shows how to install Ubuntu 24.04 LTS or Ubuntu 24.10 on a MacBook Air.
This post is a step-by-step account of how I installed Ubuntu Desktop 20.04 LTS on a MacBook Air (13-inch) and even got the wireless card to work without a hassle. This is a MacBook Air that I bought back in 2018 and whose battery is effectively dead. Over the almost 4 years I’ve been using it, I wasn’t really impressed with the operating system, though it has its bright spots.
However, for a seasoned Linux user, the constraints of using a desktop operating system that I’m required to have an id to update the built-in software or install new ones far outweigh any bright spots. So it had to go.
If you want to follow along, here are the tasks involved:
- Download Ubuntu Desktop 20.04 LTS and write it to a USB stick.
- Back up any files you’ll like to keep to another computer or another USB stick and shutdown the MacBook Air.
- Reboot and install Ubuntu Desktop 20.04 LTS.
- If the wireless card is not detected, configure it.
- Update your MacBuntu
Ready? Let’s get started…
Step 1: Download Ubuntu Desktop 20.04
To download Ubuntu Desktop, visit the distribution’s download page. Note that while I used Ubuntu Desktop 20.04 LTS for this tutorial, it doesn’t have to be that. You may choose to download the latest, that is, Ubuntu Desktop 21.10. After downloading it, transfer it to a USB stick. There are any number of GUI tools you can use to get that done, but the simplest method is from the command line, using the following command:
# Writing an ISO file to a USB stick using the dd command

sudo dd if=ubuntu-20.04.3.iso of=/dev/sdb bs=1M conv=sync
In the command above, /dev/sdb is the device path of the USB stick. The df -h command should show all the disks connected to the system. Replace ubuntu-20.04.2.iso with the name you saved the ISO file as. Once that has completed successfully, proceed to step 2.
Step 2: Reboot and install Ubuntu Desktop 20.04
The first task in this step is to shutdown the MacBook Air, then insert the USB stick from step 1 into one of its USB ports. While holding down the option/alt key, press the power button to restart. Done correctly, the display should show something similar to what you see in Figure 2. You may have one or two disk icons labeled EFI Boot. If 2, click on the middle one. If just one, select it, then press the enter/return key or double-click on it. That will take you to the GRUB boot menu.
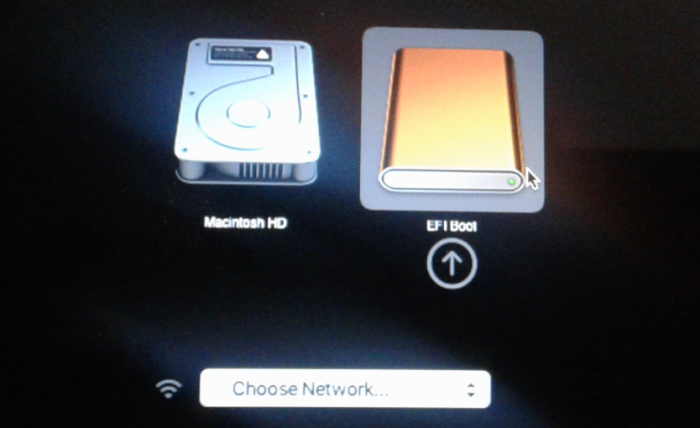
Figure 2: Booting into a MacBook Air to install Ubuntu Desktop 20.04
At the GRUB menu, shown in Fig 3, press the enter/return key.
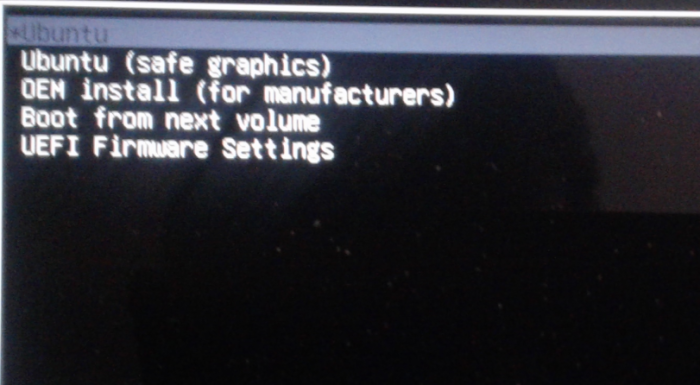
Figure 3: Ubuntu 20.04 GRUB menu.
That will trigger a check of the installation disk for errors. Best to let the check complete. If it reports too many errors, like 5 or so, odds are the installation will fail. However, if the error count is, say, 1, odds are that the installation will complete successfully. During my first attempt, errors were reported in 5 files, which I ignored. The installation failed towards the end, so I had to start all over by repeating the transfer of the downloaded installation image to another USB stick. During the second attempt, I ignored the lone error that was reported. This time, though, the installation succeeded.
After the installer check screen, you’ll see the screen shown in Figure 4. Click on Try Ubuntu. That should boot into the Ubuntu 20.04 live desktop. Play with the live desktop as much as you want. Once you’re satisfied that all will work, click on the Install Ubuntu 20.04.3 LTS icon on the desktop.
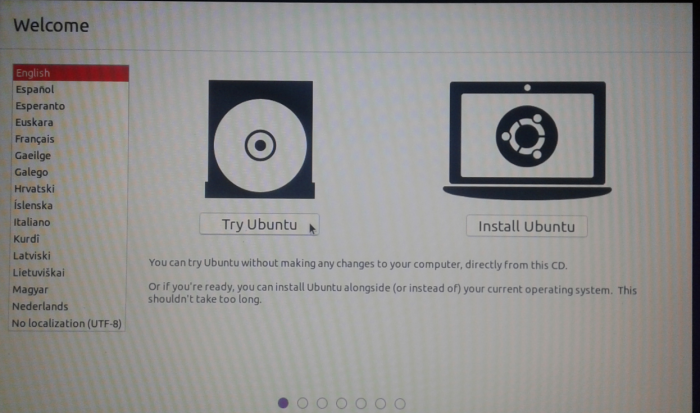
Figure 4: Booting into the Ubuntu 20.04 live desktop.
When the installer launches, click through the first few steps and when you get to the one shown in Figure 5, select “Normal installation” and “Install third-party software…” Updates won’t be installed during installation because Internet access was not configured. Click Continue.

Figure 5: You want to select a Normal installation and install 3rd party software.
Then at this next step, shown in Figure 6, select “Erase disk and install Ubuntu”. Install Now.
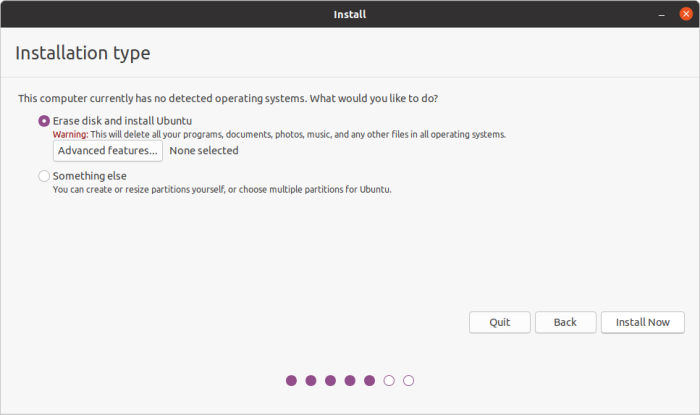
Figure 6: Select Erase disk and install Ubuntu.
Yep, write the changes to disk. Continue.
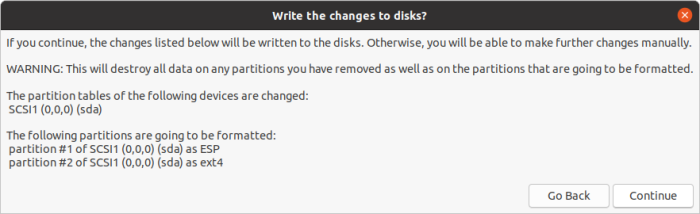
Figure 7: Write the changes to disk.
If you got to this point without the installer throwing an error, congratulations! Restart Now. Note: Be sure to remove the installation USB stick as the unit is rebooting.
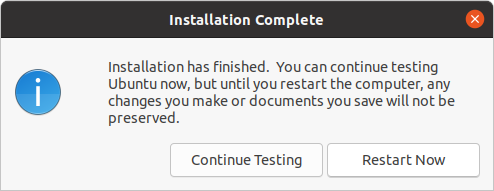
Figure 8: Restart Now.
The system should be rebooted into the new operating system. We’ll finalize the installation in the next step.
Step 3: Configure the MacBook Air’s wireless card
If all worked out in the previous step, the unit should have rebooted into the Ubuntu desktop. If Internet access works without input from you, congratulations! Proceed to step 4. However, it’s likely that Internet access is not working because drivers for the built-in Broadcom wireless card is not installed. There are any number of ways you may use to get past this step, but the absolute simplest is USB tethering with your smartphone (Android or iPhone).
Assuming you already have USB tethering set up on your smartphone (on an Android phone, navigate to Settings > Connections > Mobile Hotspot and Tethering), connect the proper end of its USB cable to it and the other end to a USB port on the MacBook Air. With the MacBook Air piggy-backing on your smartphone’s Internet access, search for Software & Updates tool in the Ubuntu launcher and click on it.
That should open the window shown in Figure 9. Click on the Additional Drivers tab and make the selection shown. Apply Changes.
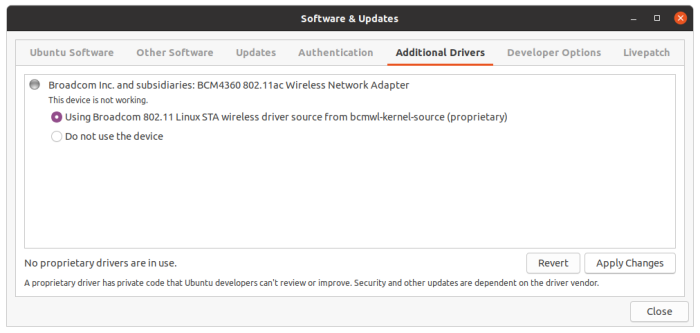
Figure 9: Installing Broadcom drivers in Ubuntu 20.04.
If the changes were applied successfully, You should now see that “1 proprietary driver in use”. Close the window.
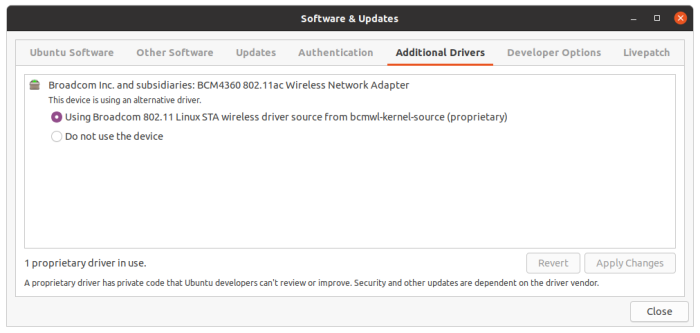
Figure 10: Broadcom drivers installed in Ubuntu 20.04.
The MacBook should now have a direct access to the Internet, so untether the smartphone from it. Note that you may have to reboot the unit for the applied changes to take effect.
Step 4: Update your MacBuntu
The final thing to do now is to update and upgrade the system. That’s accomplished with the sudo apt update & sudo apt upgrade -y command. After that’s completed, reboot one last time. Enjoy your MacBuntu! The next tutorial in this series is to set up a dual-boot with Ubuntu and Kali Linux, then follow that up with one showing how to install Fedora on the same MacBook. Stay tuned!


Good article. Only problem is: I get a LOCK with an input line, presumably for a (admin) password, and I have no idea what that is. This is an ex school machine, probably wiped: when switching it on, it flashes a FILES symbol.