This tutorial shows how to install Ubuntu 14.04 on encrypted MBR partitions. It is only slightly different from Manual full disk encryption setup guide for Ubuntu 13.10 & Linux Mint 16. The only difference: A partition mounted at /home is not part of the mix. But there’s no real reason for not creating a separate partition for home. I just wanted to demonstrate that this is possible with Ubuntu 14.04’s installer after a comment to the contrary by a site visitor.
The objective here is to install Ubuntu 14.04 by creating a custom set of encrypted partitions. To prove that this works, I first created these partitions in a virtual environment (using VirtualBox), with 250 GB of storage, then repeated the procedure on real hardware with a 320 HDD. Keep in mind that this is a general guide for creating encrypted Ubuntu 14.04 partitions on a computer with MBR partitions (Legacy BIOS) and with Ubuntu 14.04 the only OS on the hard disk drive (HDD). You should, however, be able to use this same instructions to install Ubuntu 14.04 alongside any other OS on the same HDD.
To start, download an installation image of Ubuntu 14.04 from here. Transfer it to a USB stick or burn it to a DVD. Then boot the target computer from the installation media and start the installer. Click through the first few steps until you get to the disk partitioning options step shown in this screenshot. From there, select the Something else option, then click Continue.

That should bring you to the Advanced Partitioning Tool‘s window. From here, you can create any number of partitions that you want. For this tutorial, only boot, root and Swap partitions were created. The boot partition comes first, followed by the root and swap partitions. The root and swap partitions will be encrypted. To create the first partition, select the free space, then click the + button.

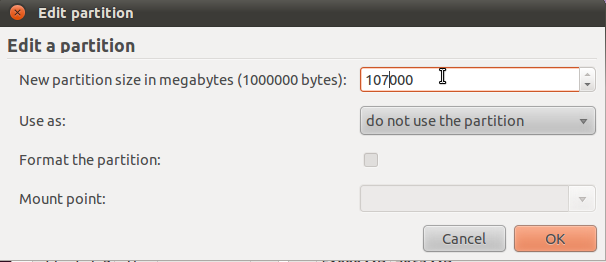
That should open the partition editor. Here, you should see the total number of free disk space available for use. The other options you have to modify or specify are the “Use as” and “Mount point” menus.

For the boot partition, a disk space of 250 MB should be enough. The mount point should be /boot. From the “Use as” menu, the default file system should be good. You may also select Ext2 or even Ext3 from the menu. Click OK after you’ve made the right selections.

The next partition will be used as the main (root) partition, but you won’t be able to specify the mount point here. You do, however, need to specify enough disk space to install and run the system. Then from the “Use as” menu, select physical volume for encryption. Then specify and confirm an encryption passphrase in the fields that appear. OK

The last partition will be used for Swap. The practice now is to allocate 2 GB (2000 MB) on a 32-bit system and 4 GB (4000 MB) on a 64-bit system. From the “Use as” menu, select physical volume for encryption. Then specify and confirm an encryption passphrase in the fields that appear. The encryption passphrase can be the same as the one you used for the previous partition, or you could specify a different one. OK.

Back to the main partitioning window, you should see all the partitions you just created. Here is where we need to specify the mount points for the encrypted partitions. To do that, double-click on any one.

For the partition that you intend to use as the root partition, select / from the “Mount point” menu. OK.

For the other partition, select swap area from the “Mount point” menu. OK.

That should do it. You may now click on the Install Now button to continue with the rest of the installation.

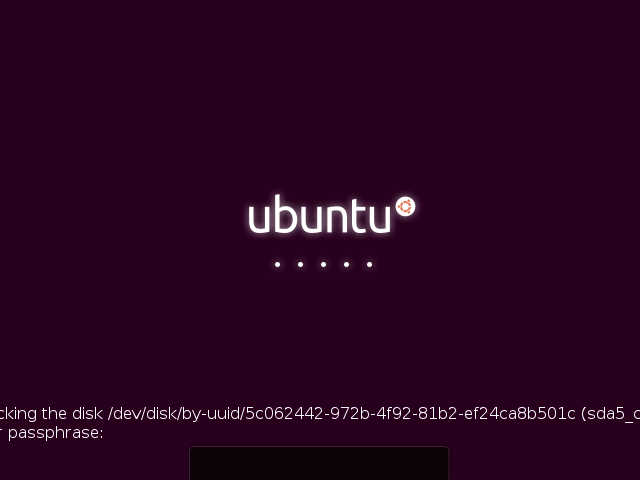
After installation and reboot, you will be prompted to enter the encryption passphrase you specified during installation. And you will have to enter the encryption passphrases for each partition you created.


This was very easy and helpful – works great with dual boot setup, just resize Windows down first, then use these docs to setup the free space for Linux.
A suggestion is not to create a separate swap partition but add a swap space within the encrypted file system. Google for swap file ubuntu and you will find some instructions from Digitalocean which will apply.
Thanks for the kind words.
Regarding setting up swap file in Ubuntu, I’ve actually written one here. The link is this page.
Salut and thank you very much for your great tutorial on how to install an encrypted Ubuntu.
You can even use this on your stick but don’t forget to set the right device to write your mbr! ;-D
Doing luks container encryption through the install without the ability to use lvm inside the container during the install is going backwards. In Linux Mint there is a much better way to do it via a script and someone in the know should be able to easily adapt it to Ubuntu (and probably) even Debian. Originally the script was used for Linux Mint Debian Edition 2 (LMDE2) but has recently been adapted to include main line (Ubuntu derivative) Linux Mint 17.1 and 17.2. The script is the one offered by Pepas and it can be located in this Linux Mint forum thread:
http://forums.linuxmint.com/viewtopic.php?f=241&t=194031&p=1069325#p1069325
or directly from here:
https://raw.githubusercontent.com/pepa65/lmdescrypt/master/lmdescrypt
I recommend you read at least the 2nd page of the forum thread for some background and familiarization. Instructions for installing and selecting your settings are included in the script you download. Just open it as text, read and make your settings changes prior to running. Keep in mind that you can change the ‘/data’ lv in the settings to be a ‘/home’ lv if you wish.
Mathetes ( above ) has the answer. Can anybody be serious about setting up a system requiring at start up a password for each encrypted partition when, by using the 12.04 alternate CD the same thing could be achieved ( by using LVM ) with one password. We have gone backwards in that respect.
I am just moving from 12.04 to 14.04 and have now probably many hours of work ahead to reseach how to achieve on 14.04 what was much easier on 12.04
Great procedure except this part:
“For the boot partition, a disk space of 250 MB should be enough.”
This is where ubuntu stores header images during kernel updates– and there are a lot of those in 14.04! You eventually run out of space. I would do a couple of GB for /boot.
Ubuntu 14.04 does not allow using LVM after encryption, then making a lvg and lv’s for /, /home, swap and other partition. Instead you need to create one encrypted partion for /, one encrypted partition for /home (using passwords or keys) and one partition for swap. LVM gives more flexibility.
What about Ubuntu Server. I have installed Ubuntu Server 14.04 minimal install and install VirtualBox on my computer to run Windows 7 virtual machine. I would like to have virtual guest snapshots, so I did it this way.
How to do the same thing as in article for Ubuntu Server. I don’t want to establish LVM and RAID – this is my PC running Ubuntu Server, so don’t have a knowledge and hardware (like multiple disks) to establish LVM/RAID.
Is there a way to do this on Ubuntu Server. I have tried creating boot partition (no problem), created root and swap partitions defining ‘physical volume for encryption’ (no problem), but now I am stuck, how to define mount point for root and swap partition?