One of the new features that shipped with Ubuntu 17.04 is support for a Swap file. So instead of the traditional Swap partition, a new installation of Ubuntu 17.04 will be configured with a Swap file, just as in a Microsoft Windows operating system.
If you’re upgrading from an older Ubuntu installation, like Ubuntu 16.10, the existing Swap partition will be retained, and a Swap file will not be created. But there’s nothing stopping you from deleting the Swap partition and setting up a Swap file in its place. I had such a system running as VirtualBox guest, so after the system was upgrade, I configured a Swap file and deleted the Swap partition. Everything seems to work fine afterwards, including putting the system in and out of suspend mode.
The rest of this article will show you how it was done. The process involves creating the Swap file first, make it a permanent feature of the system, reboot the system, then delete the existing Swap partition once you’re satisfied that it works.
Please note that this was done on a system that was not installed on an encrypted Swap partition or on an LVM partitioning scheme, so keep that in mind if you decide to use this guide.
Where’s Your Swap Partition?
Before starting, use the following commands to view the amount of disk space assigned to the Swap partition:
# This command will list the partition sued for Swap

swapon --show

> NAME         TYPE     SIZE     USED     PRIO
> /dev/sda5  partition  1.5G     3.9M      -1

# alternatively, you could use the next command to view the same info

free -h
>         total     used     free
-           -        -        -
> Swap:   1.5G      3.8M     1.5G

#
Make That Swap And Verify It
Now that we know what we have, let’s get to work by creating the Swap file using the following commands:
# Create a Swap file
# /swapfile is the name I used here, but you can call it anything
# I assigned it 2 GB of disk space, but you can change that too

sudo fallocate -l 2G /swapfile

#
If you do a long listing of the root directory and filter for the swap file you just created, you would see that it has permissions of 644. However, on a new installation of Ubuntu 17.04, the permissions are set to 600. So we need to further restrict the permissions to match what a Ubuntu 17.04 system expects it to be. Setting the permission to 600 ensures that only the root user can read and write to it. Use the following commands to perform the tasks given in this paragraph:
# Listing and changing the permissions of the Swap file
# > Indicates output

ls -lh / | grep swapfile
> -rw-r--r--   1 root root 2G May 12 18:30 /swapfile

# Then change the permissions to 600

sudo chmod 600 /swapfile

#
After that, we’ll use the next couple of commands to mark the file as Swap space, then enable it to make it usable by the system:
# Mark file as Swap space

sudo mkswap /swapfile

# Then enable it

sudo swapon /swapfile

#
Now verify that the file system can see the new Swap space using the following command:
# > indicates output

swapon --show

> NAME         TYPE     SIZE     USED     PRIO
> /dev/sda5  partition  1.5G     3.9M      -1
> /swapfile    file      2G       0B       -2

#
Make The Swap File Stick
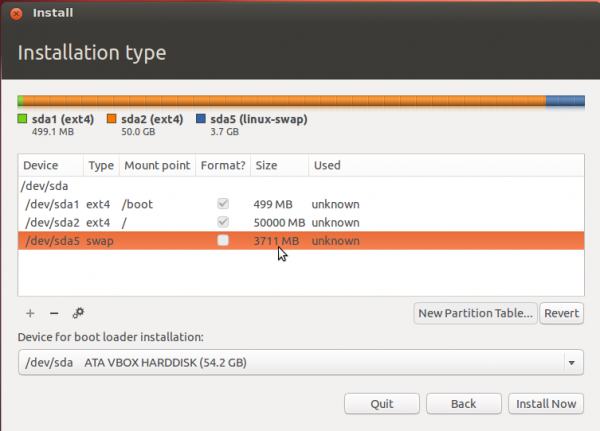
So you now have two sources of Swap space, which is really not necessary. The old Swap space needs to be deleted. However, before doing that, let’s make our new Swap file permanent, so that it will remain after the next reboot. To accomplish that, we’ll have to edit the /etc/fstab file. So open it with your favorite text editor (nano is recommended for new users). Within that file, the last, uncommented entry should be for Swap, and the last two lines should read like the following:
# swap was on /dev/sda5 during installation
UUID=9792b062-e77c-4db9-8c11-4e87bbf65b87 none            swap    sw     0         0

#
What you need to do to replace the Swap partition with the Swap file in that file, is delete the UUID=9792b062-e77c-4db9-8c11-4e87bbf65b87 part (the UUID will be different in yours), and type in /swapfile or the name you used for it. When completed, the entry for Swap will read like the following. Save and close the file:
# swap now in /swapfile
/swapfile         none      swap     sw              0       0

#
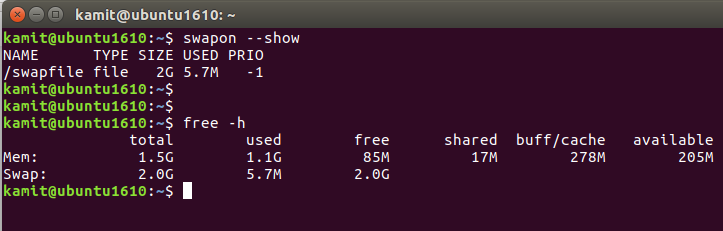
Now you may reboot the computer. Afterwards, use the following commands to verify that the system is using the Swap file, instead of the Swap partition:
# > indicates output

swapon --show

> NAME         TYPE     SIZE     USED     PRIO
> /swapfile    file      2G       8.9M       -1

# alternatively, you could use the next command to view the same info

free -h
>         total     used     free
-           -        -        -
> Swap:   2.0G      8.8M     2.0G

#
Delete The Old Swap Partition
So that’s good! The system is now using the Swap file, instead of the Swap partition, so the latter may be deleted. To delete it, launch the Disks utility from the launcher (typing “disks” will bring it up).
Three partitions will be represented – root (/dev/sda1), an extended partition (/dev/sda2), and the Swap partition (/dev/sda5). Don’t touch the root partition. Only the extended and Swap partitions will be deleted. Start by deleting the Swap partition by selecting it and clicking on the – button.
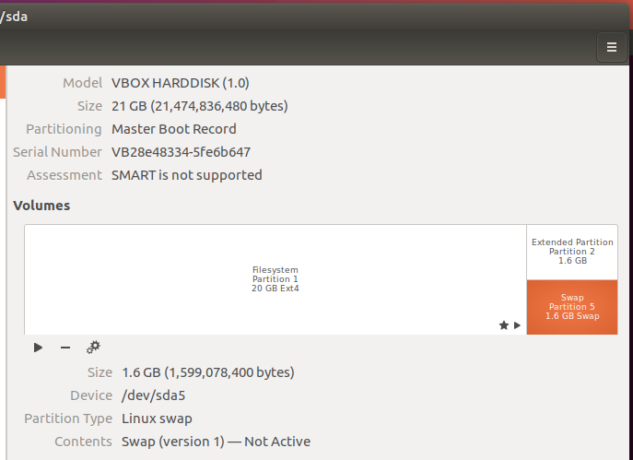
Figure 1: Using Disks to view the Swap partition in Ubuntu 17.04
You now have some extra space.
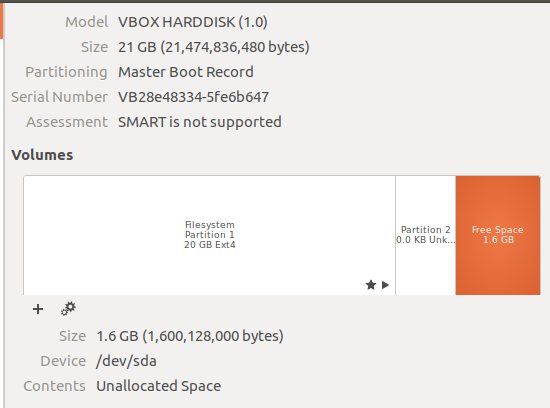
Figure 2: Deleting the Swap partition in Ubuntu 17.04
Next, delete the extended partition using the same method as above.
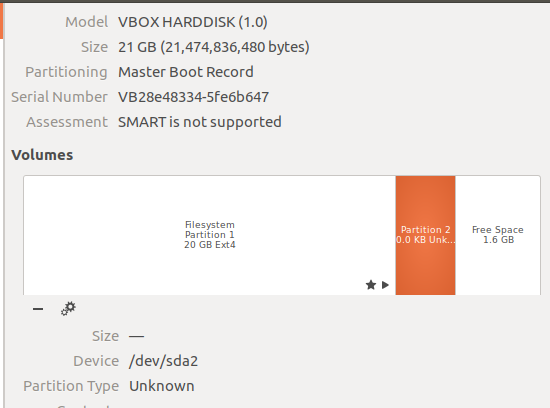
Figure 3: Deleting extra partition in Ubuntu 17.04
Now you’ve completely reclaimed the disk space once allocated to Swap. Was it worth it? Does it work? I’ll probably answer nyet for the first question, but it obviously works. Even putting the system in and out of suspend mode works.
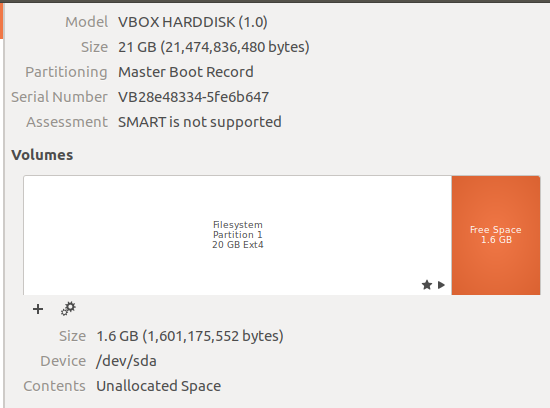
Figure 4: The root partition in Ubuntu 17.04


Helped a log!
Thanks.