 Pardus is a Linux distribution with roots in the National Research Institute of Electronics and Cryptology (UEKAE), Turkey. It is one of many distributions that does not have support for the Linux Logical Volume Manager (LVM). However, that is about to change because YALI, the installation program in the next stable version, Pardus 2011, will have full support for LVM. But better than having full support for LVM is the fact that LVM will be the default disk partitioning scheme.
This article presents a step by step guide on how to install Pardus 2011 on a custom LVM disk partitioning scheme.
If LVM is the default disk partitioning scheme, why would it be necessary to create a custom configuration? Because in the default installation of Pardus 2011 (beta), the installer creates just two logical volumes, one for / and the other for swap, and allocates all the available disk space to these two logical volumes. A configuration that defeats some of the benefits of LVM. The main objective of this tutorial is to show how to create not just a single logical volume (for /), but also one for /home, and to allocate just enough disk space to each (logical volume) needed to get the system installed. This would leave a significant percentage of the available disk space unallocated. After installation, the unallocated disk space will then be used to create additional logical volumes, or grow existing ones – if there is a need to.
Note: While this tutorial is based on an installation of a beta release, I do not see any changes being made to the installer between now and when the stable version becomes available. I did not experience any issues with the installer.
Ok, let us get started already. First, grab a copy of Pardus 2011 (beta) DVD ISO image, and boot your computer from it. As is customary for all disk partitioning tutorials that I have written, the first image comes from the step where disk partitioning starts. Steps before this one bear no relevance to this tutorial and have, therefore, been omitted. In this step, you will have to select the last option, Create Custom Layout, to start. Click Next to continue.
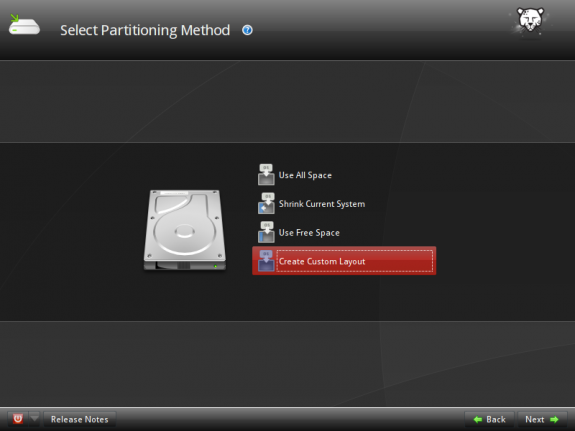
Choose partition method
If the hard drive on your computer has already been initialized, the installer will present the options shown in the image below. Select the free space and click on New > Standard > Partition.
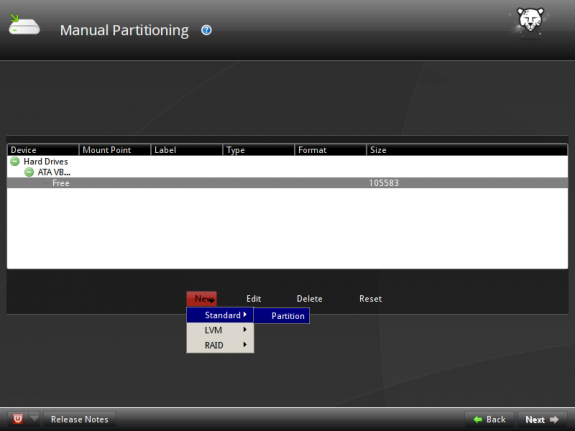
Create standard partition
When setting up LVM, the first partition to create will be a non-LVM partition for /boot. And that is what we are going to create in the step. On a new installation of Pardus 2011, the installer allocates 500 MB to /boot. That seems to be the recommended size for /boot, and I see no reason not to do the same. If, however, you are installing on an old computer with very limited disk space, you can go as low as 100 MB, even 50 MB. If you go that low, keep in mind that you could face some problems when it comes time to upgrade the kernel.
For the /boot and the logical volumes that will be created for this test installation, the default file system type is ext4, and that is what I will stick to. The other journaling file systems supported are ext3 and xfs. The mount point for this partition is, of course, /boot. Keep in mind that the installer will always create the first partition as a primary partition, so it is not necessary to enable “Force to be a primary partition.” Click OK when you are done.
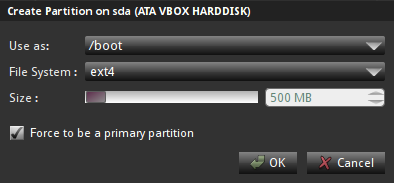
Creating /boot
Now that the non-LVM partition has been created, select the free space, then click on New > LVM > Physical Volume, to create the physical volume.
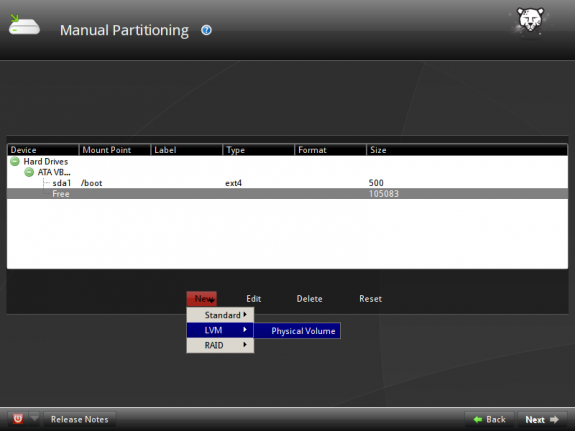
Create LVM partition
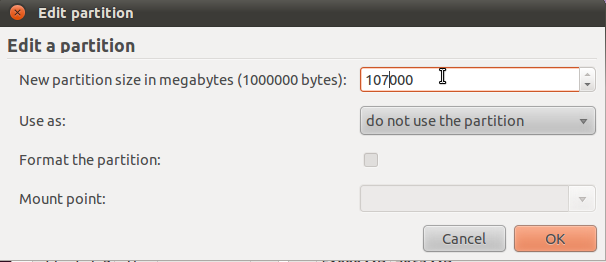
At this step, the file system will be pre-selected as lvmpv (physical volume for LVM), and I have elected to allocate the remaining disk space for use by LVM. “Force to be a primary partition” is unchecked by default, but I have also decided to enable it. If this option is unchecked, the physical volume will be /dev/sda5, and /dev/sda2 if it is enabled. Either way, it really does not matter. OK
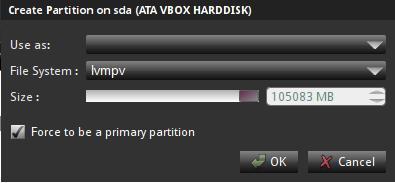
Create physical volume




Hi, I have a few questions. Is it necessary to create a boot partition if you’re dual booting from separate drives? I followed your Linux Mint partitioning guide and had problems. Then I went back and realized that guide was for a single drive setup. Doh!
Now, for Grub. I understand Pardus uses Grub Legacy whereas Mint uses Grub2. Any advice on where I should install Grub for Pardus? Or which bootloader I should let be the default. Would you happen to have any links to guides on adding entries to the bootloader I end up using? I have one for adding Mint to Grub Legacy but it seems a little complicated for a noob like me. Thank you for your time and your guides.
A boot partition is not necessary if 2 hard drives are involved, and, afaik, it does not matter which distro is on sda or sdb. Note that a boot partition makes boot recovery operations a bit easier, so it is not only when dual-booting that you need a separate partition for /boot.
If you install Pardus on sda, and Mint on sdb, by default, Mint’s installer will install GRUB 2, Mint’s boot loader, in the MBR of sda, with an entry for Pardus added automatically to the boot menu. This is the easiest way. No modifications to GRUB files needed. The reverse is also true, if you install Mint on sda and Pardus on sdb.
When dual-booting with 2 hard drives, however, I find that it is better to install each distro’s boot loader in the MBR of its own hard drive. That way, if something goes wrong with one drive, you can always boot from the other without messing with anything. And you do not have to bother about editing any GRUB files because the last distro you install will automatically add an entry for the other in its GRUB menu.
But since the boot menu of the first distro, the one on sda, will not have an entry for the distro on sdb, you may update GRUB, when logged int the first distro. That should cause it to probe the drives and add an entry for the distro on the second drive in its menu.
I’ll post a detailed tutorial on dual-booting 2 Linux distros on separate hard drives this Saturday.
Thank you for your quick and detailed response. Unless I’m misunderstanding you, it sounds like it would be helpful to have a boot partition even with dual booting. However, when I followed your guide for partitioning Mint I got a black screen and this message: The disk drive for /boot is not ready or not present. Continue to wait; or press S to skip mounting or M for manual recovery. I waited, nothing happened. I pressed M, had no idea what to do. I pressed S and was able to login normally. It just seemed pointless to have the /boot partition or that it might cause problems in the future.
I’ll just try it with a boot partition and see what happens. I can always reinstall. I’m installing over Windows. So, I’m finally getting off the MS train. I never saw this coming. Especially since I’d never heard of Linux two years ago. Thanks again. Keep up the great work.
hi i tried to dual boot pardus and windows 7..
i have dual booted many linux os with windows but with pardus i cant dual boot it,..i have already installed win 7 then installed pardus..it dint work..
then i installed pardus first and win 7 later..i tried to do dual booting ,using bcd ..i created 2 options at boot..windows 7 and pardus..win 7 boots fine..but when i select pardus nothing happens..just a black screen with a blinking cursor..could u pls make a video of this and upload in you tube..
if u cant make a video then please give all the screenshots of this installation that is DUAL BOOTING WINDOWS 7 AND PARDUS.. ,,especially for selecting the partitions and using bcd..PLS HELP ME..I LOVE THAT PARDUS OS..BUT CANT REMOVE WIN 7 SINCE MY PARENTS NEED IT..
Will try and see if I can post it by Thursday.
thanx finid for the concern and ur quick reply..
unni..
A guide on how to dual-boot Pardus 2011 and Windows 7 has just been published. View it here.