 Linux Mint 9 is a Ubuntu-based, desktop distribution that was just reviewed here. Out of the box, it is one of the most user-friendly desktop distributions available. However, like everything life, you can still customize it to suit your specific use policy. This tutorial offers a few steps you can take to customize the desktop and make using it even more fun to use than it already is.
If you are an experienced Linux user, you are probably familiar with all these tips. However, if you are not, I hope you find these tips helpful. To start this customization process, I’ll suggest that you have the Control Center, which you access from Menu > Control Center, open.
Linux Mint's Control Center
- Enable and Configure Gufw – Gufw is the graphical interface to ufw, Ubuntu’s user-friendly interface to IPTables. In the Control Center, look for the Firewall Configuration item in the System section. By default, Gufw is not enabled. Click to enable it. Because the default policy is to allow all outgoing connections and disallow all incoming connections except those that are associated with active outgoing connections, most users will not need to do anything else. Need to do more? You will find this tutorial helpful.
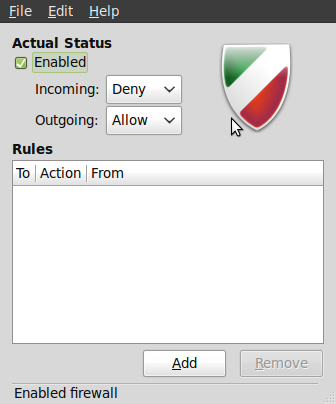
Gufw in the enabled state
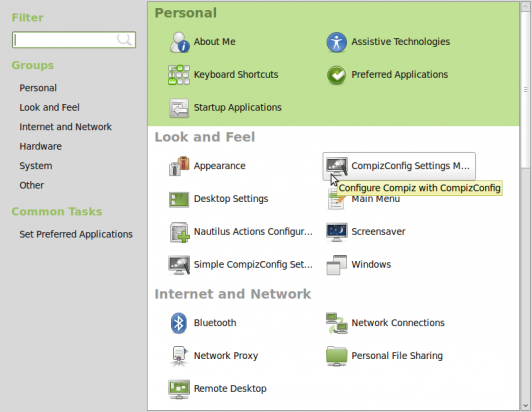
- Wobbly Windows – If your computer has the requisite hardware, Compiz Fusion, the 3D compositing window manager, should be working out of the box. One aspect of Compiz that I like more than others is the Wobbly Windows effect. To enable it, access the CompizConfig Settings Manager tool in the Look and Feel section of the Control Center. Once enabled, give it a spin. Try moving a window around the desktop. Cool, eh!
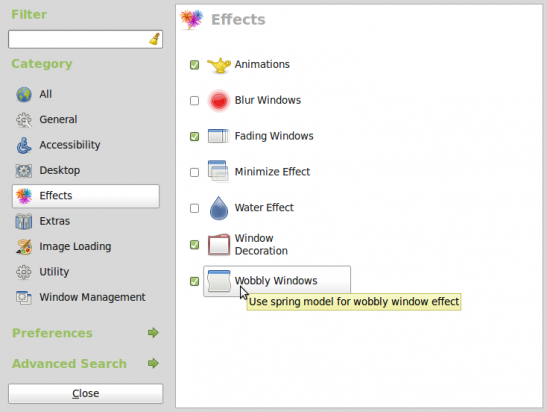
Enable the Wobbly Windows effect
-
Install and Enable NTP – When installed and running, the Network Time Protocol (NTP) enables your computer to keep very accurate time. It does this by syncing with NTP servers (your computer in this case is an NTP client) on the Internet. NTP is one of those applications I always like to have running on all my computers. To configure and enable it, access the graphical “Time and Date” utility from the System section of the Control Center. Using the Time and Date utility requires authentication. Click on the key icon to authenticate.

Time and Date management utility
After authenticating, you should get a window similar to the one below. Your time zone should be correctly displayed, but if it is not, click on the drop down menu next to “Time zone” and select the right one. Next, click on the “Configuration” menu and select Keep synchronized with Internet servers. Because the NTP package is not installed, you will be prompted to install it. After installation, click on the “Time servers” menu.
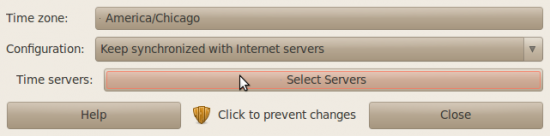
Configuration options of the Time and Date utility
Clicking on the “Time servers” drop down menu should yield the window show below. In this example, I’ve chosen to select three time servers. You do not have to select the same ones. Just pick those that are near you and click the “Close” button. Click “Close” again at the main Time and Date Settings window to exit the Time and Date utility.
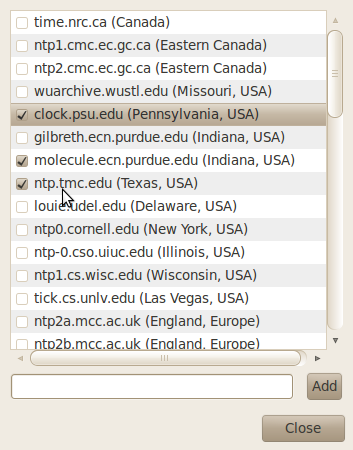
Selecting time servers in the Time and Date management utility
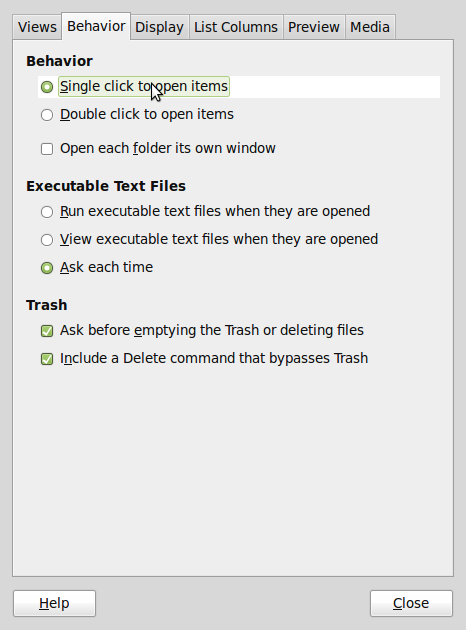
If you have several Internet-connected computers in your LAN, it is preferable to set up one as both an NTP client and server, so that it can sync with NTP servers on the Internet, while the other local computers (the NTP clients) can get their time from it. - Tweak the Screen Saver and Power Saving Options – By default, the Mint 9 desktop is configured to activate the screen saver and lock the screen after five minutes of inactivity, then put the display to sleep after thirty minutes. For home use, especially if you are the only person at home, this is not necessarily the best setting. To modify the default configuration, access the Screensaver utility from the Look and Feel section of the Control Center.
The only two changes I like to make here are: Change the screensaver theme from “Blank screen” to “Random,” then uncheck “Lock screen when screensaver is active.” Note that if you use your computer in a public place, or you live with people you do not trust, it’s best to leave these settings unchanged. As a matter of fact, if you are in a public place and you need to step away from your computer for even a few seconds, activate the screensaver manually. If you want to modify the display’s power saving setting, click on the “Power Management” button.
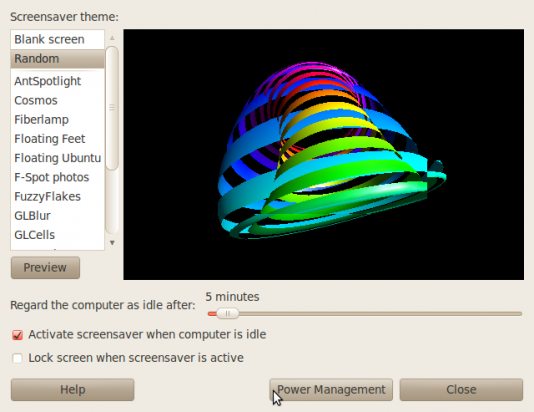
Modifying the Screensaver preferences
Clicking on the “Power Management” button brings up this window. By default, the display will “sleep” after thirty minutes of idleness. You can change to the other times options or to never. Your choice.
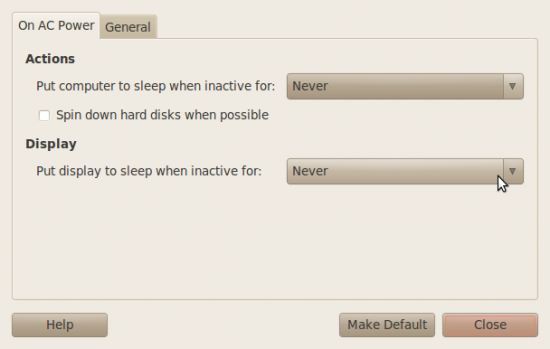
Power Management settings


