3. Install GRUB 2 to Fedora’s boot partition: Once inside Fedora, the next task is to install GRUB in the Partition Boot Record (PBR) of the boot partition, that is, the first sector of the boot partition. Once in Fedora, launch a shell terminal and su to root. To install GRUB 2 in the boot partition’s PBR, you need to know its partition number or device name. The output of df -h will reveal that information. On my installation, it is /dev/sda3. Next, type grub2-install /dev/sda3. The system will complain and refuse to do as instructed. Not to worry, you can force it.
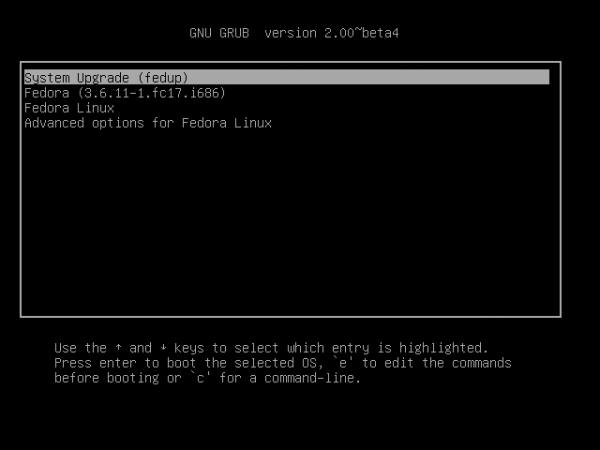
To compel it to install GRUB 2 where we want, type add “- -force” option to the command, so that it reads grub2-install – -force /dev/sda3. Once that’s done, reboot the computer. Note that completing this step does not remove GRUB from the MBR. It just installs another copy in the boot partition. At the next step, GRUB will be removed from the MBR.

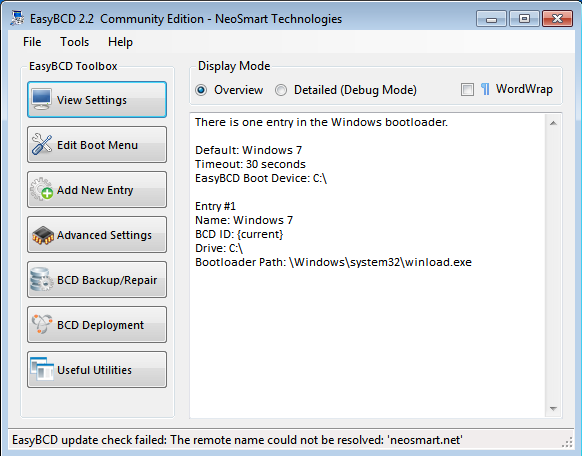
4. Restore Windows 7’s boot manager to the MBR: When the computer reboots, you will still see Fedora’s boot menu, but instead of booting into Fedora 18, boot into Windows 7. The next task is to restore its boot program to the MBR and add an entry for Fedora 18 in its boot manager’s menu. The program I know that makes it easy to do that, is EasyBCD. Download it from here. Note that EasyBCD is free for personal use. After installing it, start it, if it does not start automatically. Shown below is its main window. Click on Add New Entry to begin.
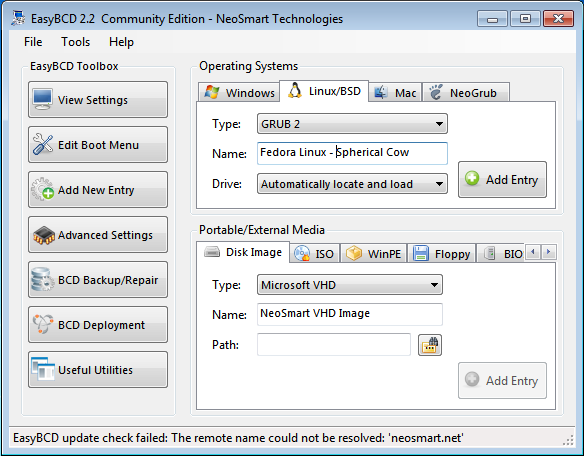
Then click on the Linux/BSD tab. Select GRUB 2 from the Type dropdown menu, and edit the Name field to match. Click on Add Entry.
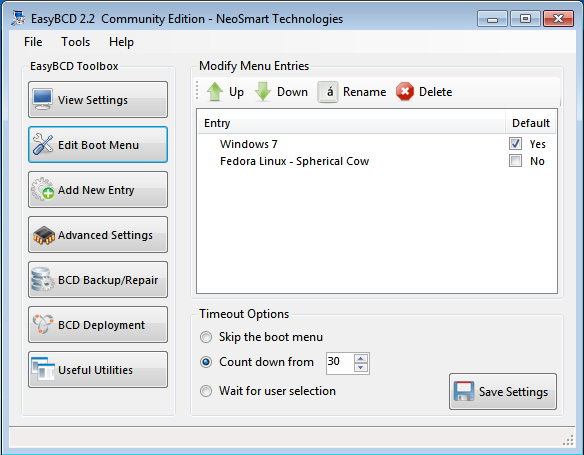
This is a preview of what the entries will be on the boot menu of Windows 7. The final task is to restore the Windows 7 boot program to the MBR. To do that, click on BCD Deployment.
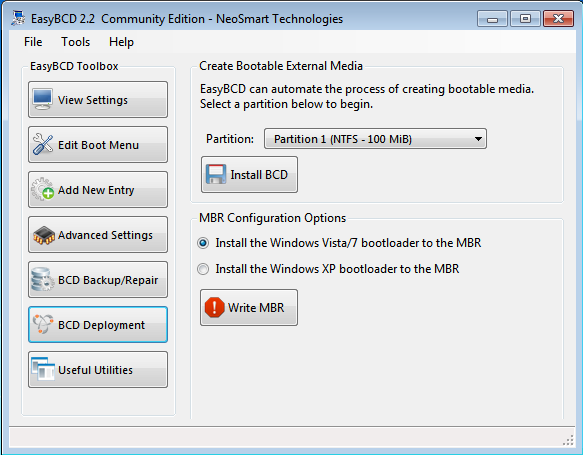
Under MBR Configuration Options, make sure that the first option is selected. Then click on Write MBR. Exit EasyBCD and reboot the computer.
If you reboot the computer after that last operation, you will be presented with Windows 7’s boot menu. Test to make sure that you can boot into either OS. When you are satisfied, reboot into Windows 7 to start the last series of steps in this operation.
5. Encrypt Windows 7 with Truecrypt: If you’ve not downloaded Truecrypt, you may do so now, and install it. Start it by clicking its icon on the desktop. Throughout this step, very little extra explanation is necessary because the on-screen explanations will suffice. So, at this step, the default is good. Next.
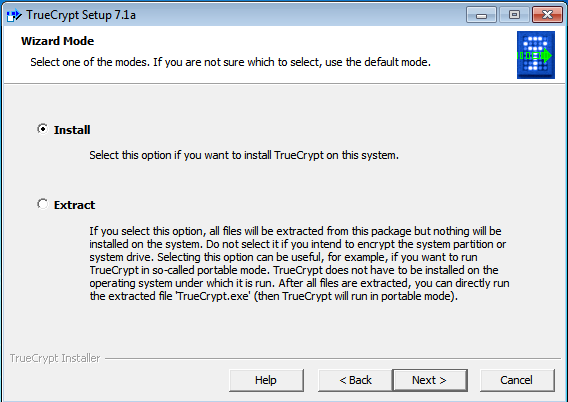
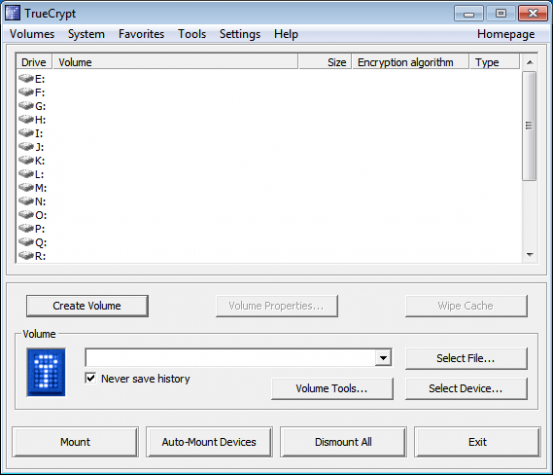
Click Create Volume.
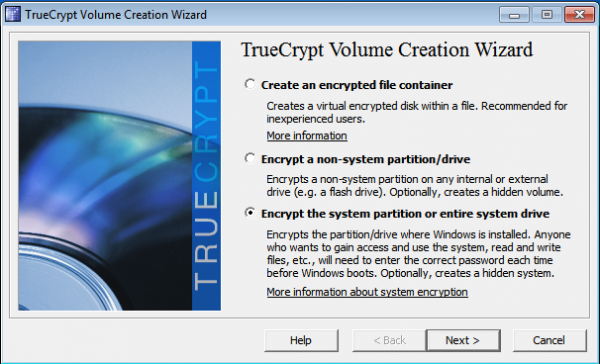
Select the last option as shown, then Next.
The first option is it. Next.
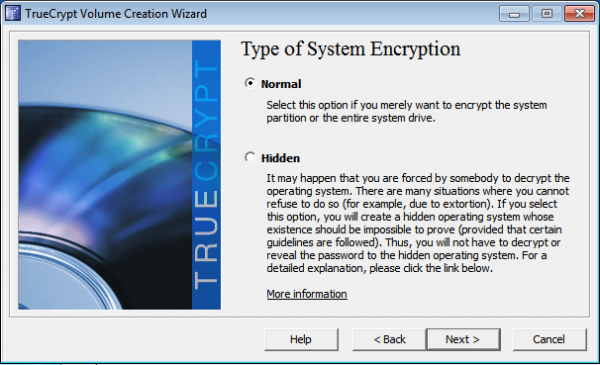
For obvious reasons, the last option offers a more (physically) secure system. Next.
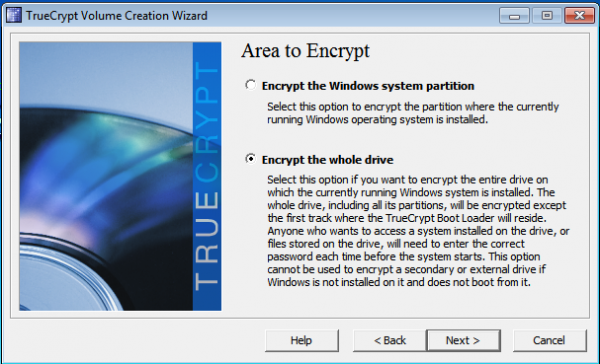
Though not indicated in this screen shot, I chose “No”. I think the on-screen explanation is sufficient.
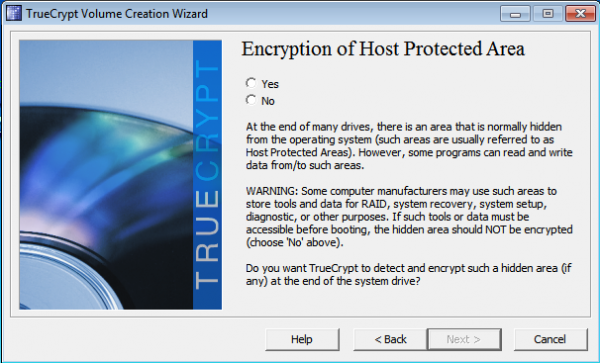
Last option, then Next.
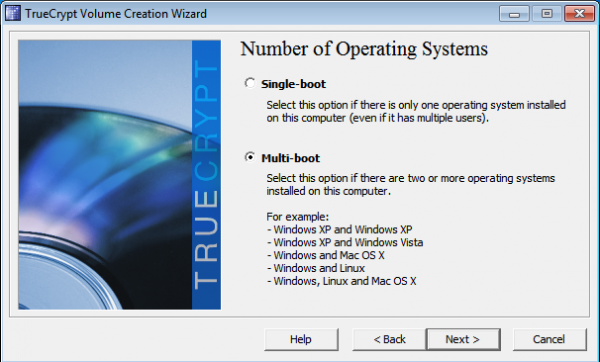

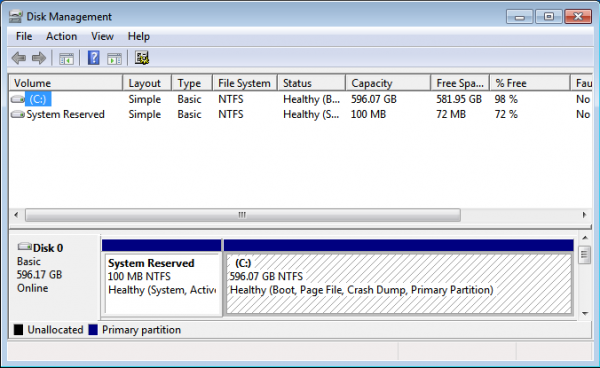


I am unable to proceed further after “Number of System Drives” menu. After I select the number of drives as ‘1’, TrueCrypt comes with an error mentioning that “True Crypt does not support encrypting a whole drive that contains multiple operating systems” and comes up with two possible solutions of “encrypt single system partition as opposed to encrypt entire system drive” and “move other system to other drive”. Not sure if I have missed anything. Any help is much appreciated.
This tutorial has a flaw.
1. We should select to encrypt System partition only, and not Whole drive.
2. Select “Number of System Drives” 2 or more
A correct tutrial is here:
http://www.7tutorials.com/how-encrypt-your-system-drive-truecrypt-multi-boot-configuration
If you are only encrypting the System Partition, what about the C drive?
And Number of System Drives? 2 or more implies that there are other OSs installed on a second drive, which is not the case in this tutorial.
If you have only one drive (doesn’t matter how many partitions and OS are installed on those partitions), then first try “1”. If it gives error, then select “2 or more”. Simple.
If we encrypt whole drive using Truecrypt then wudn’t it become a double encryption when we run fedora! as fedora is encrypted too
1. How do I make a bootable flash drive of the desktop version of fedora 18 (4.5GB)?
2. I have win7 installed on c drive. On D drive, I’ve my media files. And I can install Fedora on E Drive (100GB). After installing fedora 18 with a DVD, will I see a proper entry of windows7 on the list?
Answer to “2” is yes.
For “1”, use Unetbootin. You can install it on Fedora. And there are better options that run on Windows. See this article and the comments under it.
thanks. Somehow, Unetbootin fails to boot the installer of fedora 18. It shows some error – /dev/root does not exist – and is stuck on it forever. I’ve tried other software in that link you provided, all are for live installation, not the desktop installation. (sorry I don’t know what exactly that is called).
They are all designed to load the ISO image on the USB. Then after you boot from the USB, you can install the OS just like you would from a CD/DVD.
no. it never works with fedora this way.
Excellent article. The only drawback I can think of is losing access to windows partitions from Linux. Is there any workaround.
not true, you can mount the windows partition from linux using truecrypt.
that’s a great tutorial. does it limit the installation of new operating systems?
I currently dual boot windows 7 and Fedora 18. I want both encrypted.
I am also thinking of having a small 3rd OS installed which will have no personal data but will allow easy access to the internet so as to make recovery of a stolen laptop through something like Prey more likely.
Am I correct in thinking that your method wouldn’t allow that?
If you install the 3rd OS on the same HDD as another OS whose partition is encrypted, obviously, the 3rd OS is not affected by the other OS’ encryption scheme. So Prey will work on the 3rd OS.
The trick in your case, with Windows and Fedora on the same HDD, is recovering enough space to install the 3rd OS. It can be done, though. Just resize your home or root logical volume.
If I have Ubuntu 12.04 and Fedora 18 along with Windows 7, does creating auto configured Grub 2 menu for Windows Boot loader using EasyBCD will work ?
Yes. The devil, however, is in the details.