Full disk encryption is supported in the graphical installer of PC-BSD 10.1, which was released on November 16 and which I just reviewed just three days ago (see PC-BSD 10.1 review).
In this article, you’ll read how to install a default PC-BSD 10.1 system on a single hard drive with full disk encryption configured. The installation image I used is the same one I used for the review, which I transferred to a USB stick by using the dd command. You may download an installation image of PC-BSD 10.1 from here.
For this tutorial, the test computer is a recent build using a motherboard with UEFI firmware, and the target hard drive is a 500 GB unit. If you wish to follow along, boot into the installer, then click through the first few steps until you get to the step shown in Figure 1. Full disk encryption is not part of the configuration in a default installation of PC-BSD 10.1, so you’ll have to click on the Customize button.
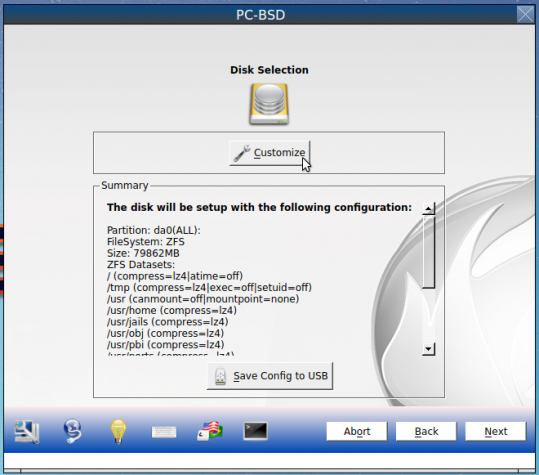
Figure 1: Default disk partition of PC-BSD 10.1. ZFS is the default file system.
That should open the window shown in Figure 2. Basic (New to BSD or disk partitioning) is the default. Because it does not support disk encryption, you’ll have to select the Advanced (Experienced with file-systems) option. Click Next.
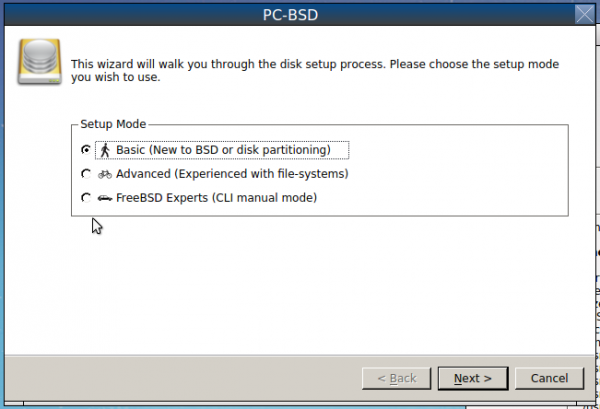
Figure 2: Basic, Advanced and Expert disk partition options of PC-BSD 10.1 installer.
That should open the window shown in Figure 3. To have the option to encrypt the hard drive, GPT disk partitioning must be use, so you’ll need to click the check box next to Partition disk with GPT. Next.
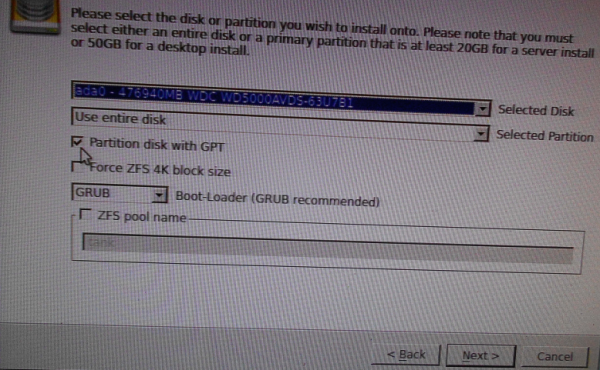
Figure 3: The installer requires that GPT disk scheme be selected for disk encryption.
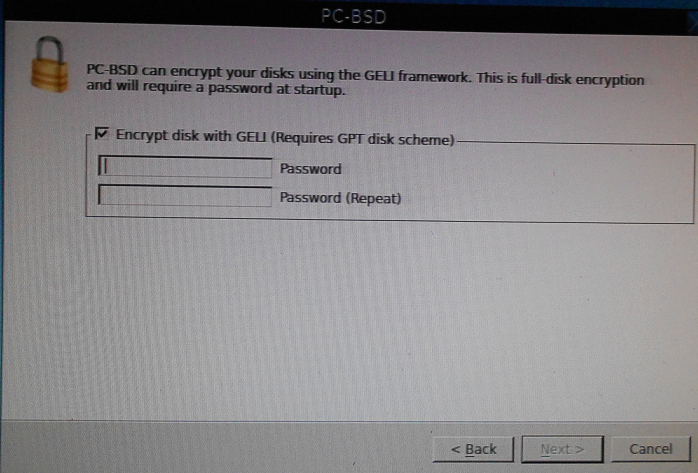
At the step shown in Figure 4, you enable disk encryption by clicking the check box next to Encrypt the disk with GELI, then specify the disk encryption password or passphrase. Next.
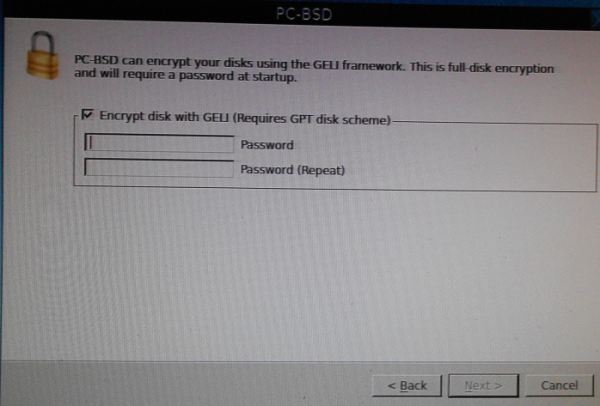
Figure 4: Setting the disk encryption passphrase.
The installer creates three partitions – boot, Swap and the root. Swap and root are encrypted.
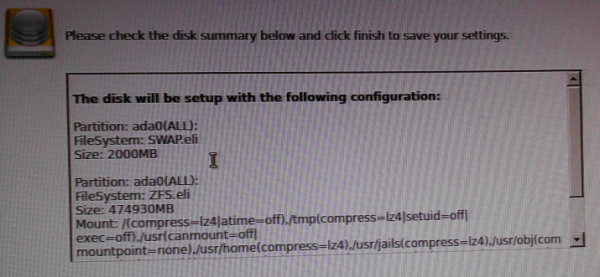
Figure 5: With disk encryption, the Swap and root partitions are encrypted.
After installation has completed successfully, reboot the computer. Before booting into the new system, you’ll be prompted to specify the disk encryption passphrase. Figure 6 shows how that screen looks like. For my test installation, I was able to log in after specifying the correct passphrase.
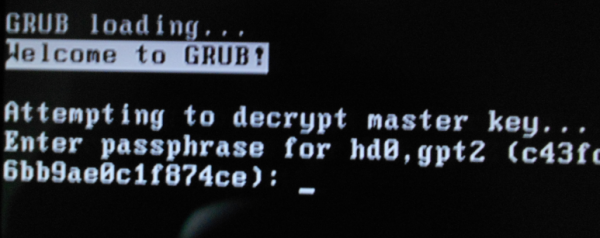
Figure 6: The system prompting for the disk encryption passphrase.
Using the Disk Manager, accessible from the PC-BSD Control Panel, I could view the partition layout.
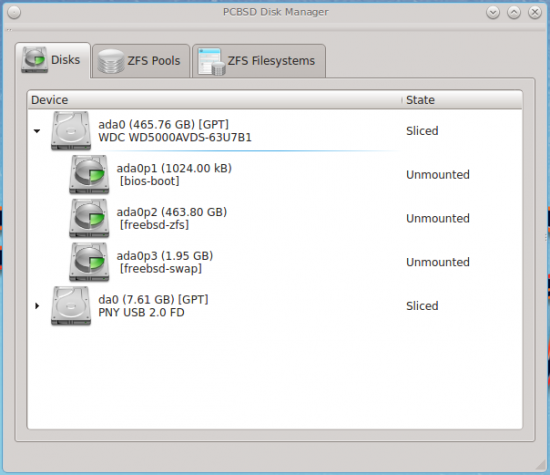
Figure 8: Configured partitions include boot, swap and root
The configured ZFS Pool is shown in Figure 10.

Figure 9: Configured partitions include boot, swap and root
And here’s the layout of the ZFS file system. Users home directories and jails are under tank/user.
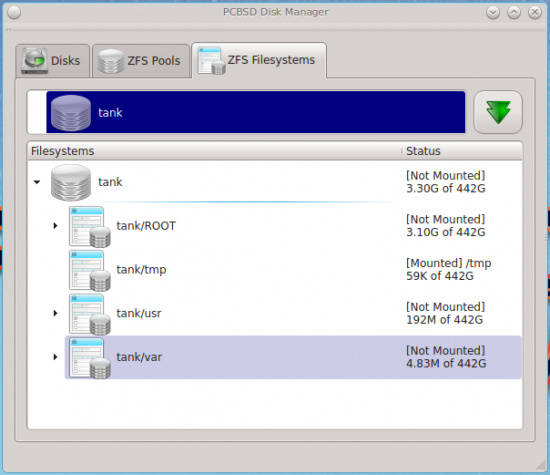
Figure 10: The ZFS file systems on PC-BSD 10 as seen from the Disk Manager.
After playing with the new installation for a while, I decided to find out what will happen if I specified the incorrect passphrase while attempting to log in. That meant rebooting the computer and going through the login process again. After specifying an incorrect passphrase just once, the system dropped to a GRUB Rescue screen. That’s something I was not expecting, because with Linux distributions, it takes several failed attempts before anything happens. I don’t know what informed this type of implementation in PC-BSD 10.1, but whatever it is, it needs a rethink.
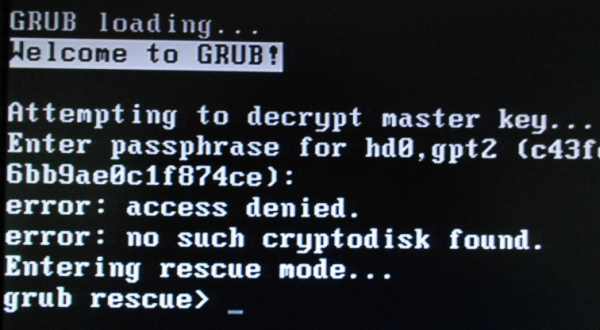
Figure 7: system drops to GRUB recsue shell after one failed attempt to decrypt the disk.
While still logged into the system, I decided to view the partition table from the command line. That required using the gdisk untility. Gdisk is not installed by default, so I had to first install it using pkg install gdisk. After that I typed gdisk /dev/ada0. The output is shown in the code block below.
[sun@homa] /usr/home/sun# gdisk /dev/ada0
GPT fdisk (gdisk) version 0.8.10

NOTE: Write test failed with error number 1. It will be impossible to save
changes to this disk's partition table!
You may be able to enable writes by exiting this program, typing
'sysctl kern.geom.debugflags=16' at a shell prompt, and re-running this
program.

Partition table scan:
  MBR: protective
  BSD: not present
  APM: not present
  GPT: present

Found valid GPT with protective MBR; using GPT.

Command (? for help): p
Disk /dev/ada0: 976773168 sectors, 465.8 GiB
Logical sector size: 512 bytes
Disk identifier (GUID): A6838E15-7593-11E4-9161-BC5FF447A8B8
Partition table holds up to 128 entries
First usable sector is 34, last usable sector is 976773134
Partitions will be aligned on 8-sector boundaries
Total free space is 18413 sectors (9.0 MiB)

Number  Start (sector)    End (sector)  Size       Code  Name
   1              34            2081   1024.0 KiB  EF02
   2            2088       972658727   463.8 GiB   A504
   3       972658728       976754727   2.0 GiB     A502
The warning about “Write test failed with error number 1” was new to me. I think it’s probably because the hard drive the system is installed on was previously used in a PC-BSD 10.1 basic RAID installation. Not entirely sure, but I can’t think of anything else and searching on the Internet didn’t help. There are a couple of threads in the FreeBSD forum, but none had anything specific to this. In any case, I ran the suggested command.
[sun@homa] /usr/home/sun# sysctl kern.geom.debugflags=16

kern.geom.debugflags: 0 -> 16
After that, running gdisk /dev/ada0 did not return the write error again.
That does it for how to install PC-BSD 10 on an encrypted hard drive. Hope the developers take another look at what happens after a wrong passphrase is specified.


Thank you for the writeup, which will be helpful to the next iteration of some PCBSD testing I’m in the middle of now.
Regarding a bad password entry immediately dropping you to the Grub rescue screen, the same problem crops up when using full-disk encryption (including /boot) on Linux distros with Grub2 as the bootloader. It is due not to the operating system but rather to Grub2’s cryptodisk feature, which was evidently coded with a zero tolerance policy regarding password entries when decrypting a GELI or LUKS root.
If you’ve found a way around this annoyance since the time you wrote this article, I’d love to know it, especially since I work on some machines for which a reboot cycle to get back to GRUB is quite lengthy, an irksome price to pay for a password typo.