
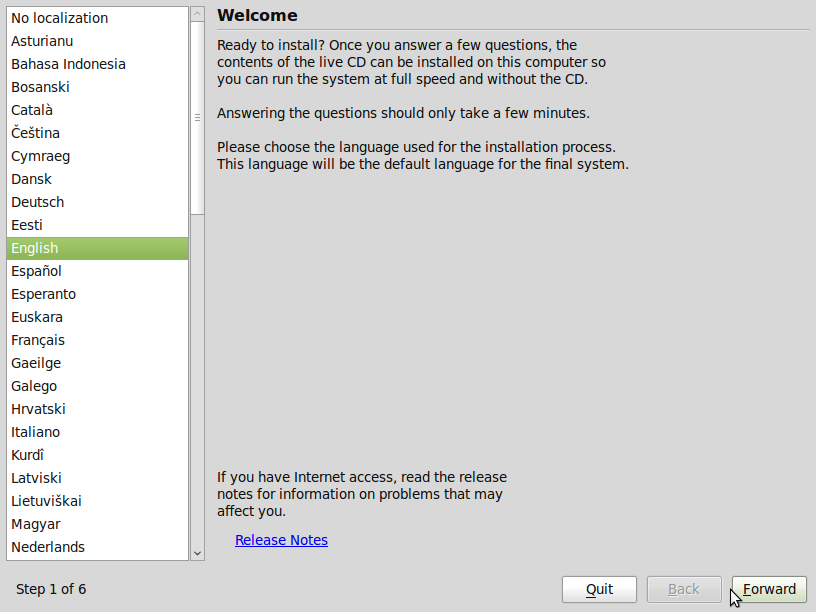
Because Linux Mint is a Live CD distro, the installation, which is a simple, six-step process, will only begin when you launch the installer from the desktop. The first window presented to you will be the one below. If the default language is not what you are expecting, scroll through the list of languages until you find your language, then click the ‘Forward’ button.
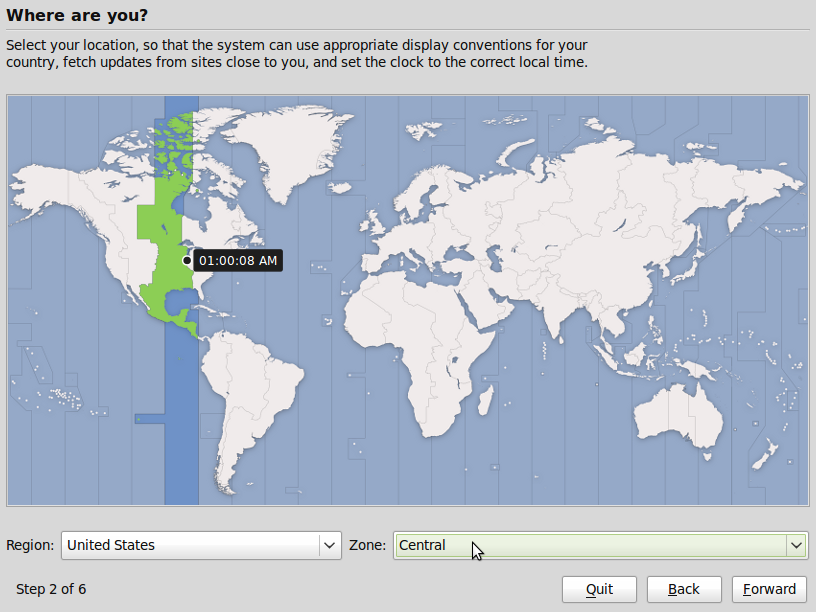
Step two is where you set your time zone. Again, if the default is different from your time zone, use the ‘Region’ and ‘Zone’ drop down boxes to make the appropriate selection. ‘Forward.’
If the default keyboard layout is not what you are expecting, make sure to select the correct one, or else you will be typing funny characters after installation.

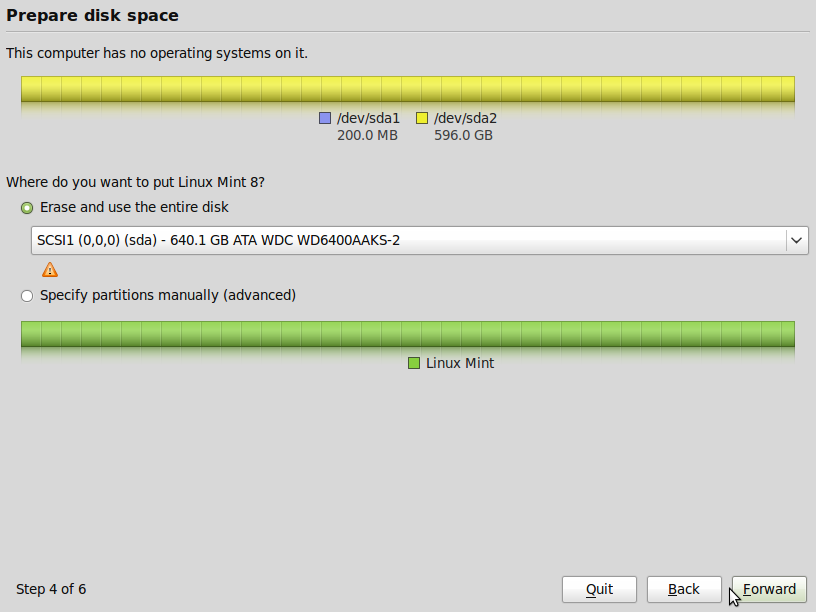
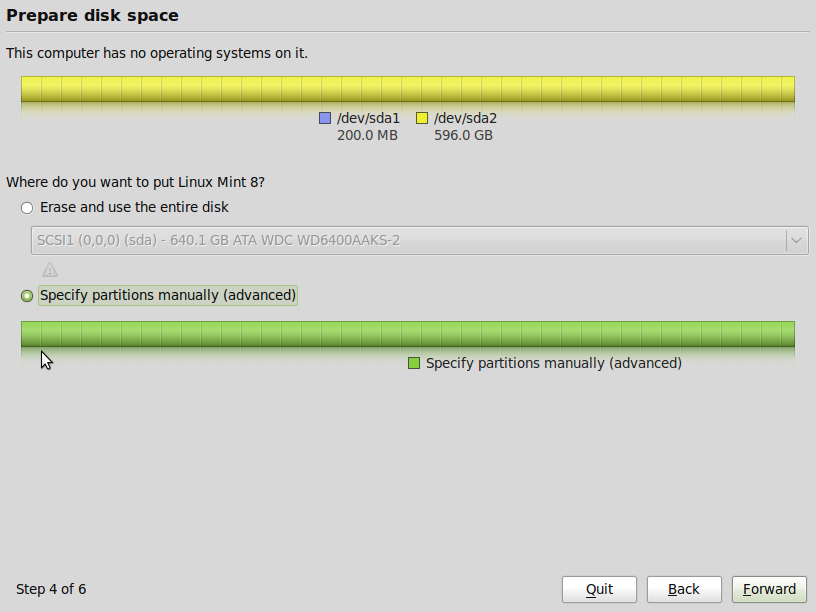
Here’s where it gets interesting, the disk partitioning part. Mint’s installer presents at least two disk partitioning options. If there is no other OS installed on the PC, or if the OS already installed on the hard drive is encrypted (Mint cannot see it), then the options shown in the screenshot below is what you’ll get. First option is to erase the entire disk and install. Second option is to manually partition the disk yourself. This option assumes that you are familiar with disk partitioning on a Linux system.
If there is another (unencrypted) OS installed on the disk, then a third option will be available. That option, ‘Install them side by side, choosing between them each startup,’ lets you dual boot Linux Mint with other operating systems.
As in this test installation, if you opt for the default, that is, to erase and use the entire disk, the installer will create two partitions. One for swap of about 8.6 GB and the other for / with ext4 filesystem type. ‘Forward.’
If you want to create more partitions than the system default, then select the ‘Specify partitions manually (advanced)’ options and click the ‘Forward’ button. There is a tutorial on how to manually partition a disk on Linux Mint, written for a prior version, but still useful for Mint 8. The only difference is that you’ll need to choose ext4 for filesystem type for your partitions instead of ext3, which was the default before Mint 8 was released.
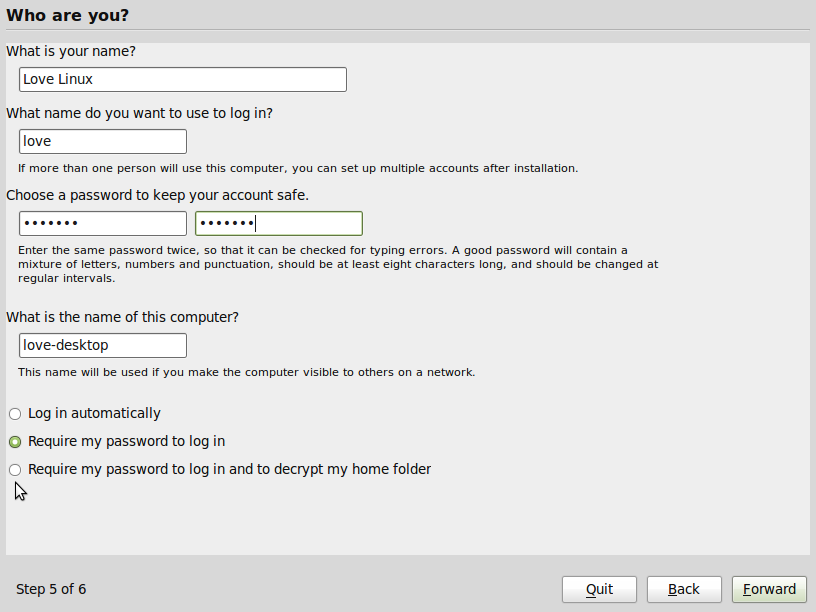
Whether you chose automatic or manual partitioning, the next window (after partitioning is completed) will be one where you’ll need to create the user account. What you need to do here is pretty much self explanatory. Click ‘Forward’ when you are done creating the user.
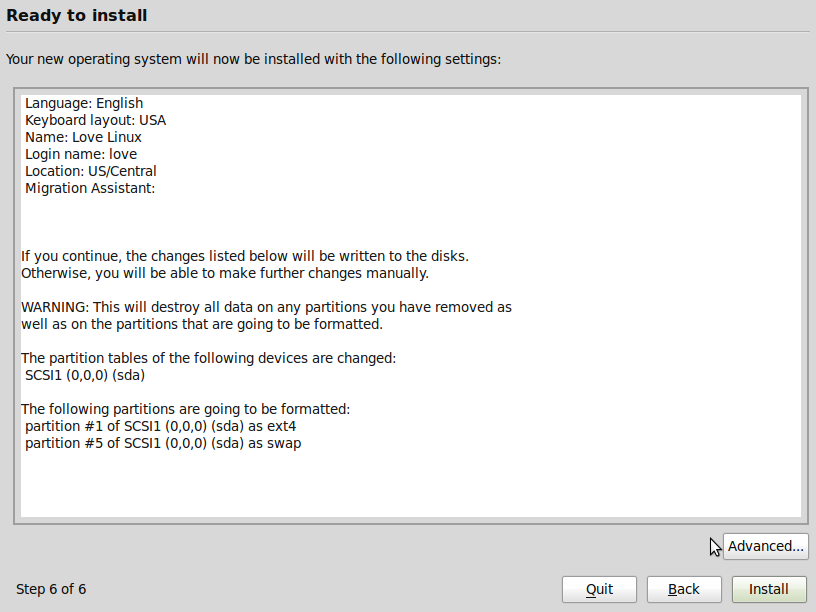
Here is where you review your choices. If you do not need to make any changes, click ‘Forward’ and let the formating of partitions and the installation of packages begin.
Once the installation is completed, you’ll be prompted to either continue using the Live environment or reboot into your newly installed Linux Mint 8 system.


In partitioning, what to and how to protect earlier data is not described.
It would be worth, how to install on PCs which are already running on some or other OS. In such cases, there is data stored on D, E drives. Does one needs to take back up of it before Mint installation?
I’m assuming that by “… some or other OS” you are referring to Windows. Also assume that the D and E drives are separate disks, and not partitions of the C drive. If that’s the case, you do not need to bother about the D and E drives since you are going to be installing to the C drive. That is, you will be installing Mint on the primary disk drive.
Note: Whether you are trying to dual boot or not, it is always a good practice to keep backup copies of your data.
After trying and using Linux mint 8 for a few days I seem to think the
the developers are on the right track but need a remainder that like myself
and Mr Joe Public only want to run certain programs, I don’t want to
see black screens with flashing white cursers or know what a kernel or any other
Code is for, what I would like to see is a more friendly operating system
One that I can use from the box but at the moment I would say your 90% there
using Linux mint I found I was unable to connect my scanner and webcam (no add/remove
hardware), using wine was hit and miss causing problems. So come on you developers
Think about Joe Public and Microsoft windows would have to take you seriously
A general installation guide can be very useful if that cover all the options and possibilities. Based on such a guide one can prepare for the installation by planning the possible route to follow. Unfortunately this installation guide is neither general, nor a typical one. One may say it is based on a typical misconception.
Experienced people should better know that building up a working system tailored to someone’s individual needs takes time. Also, during the time a lot of useful information accumulates on the hard drive without which normal daily operation is just impossible. Now, who is such an idiot that wants to wipe out everything just to try something that may not even work. For one thing, at this point, the user is not assured that can establish an Internet connection without which the whole exercise is futile. Suggesting such a thing is highly irresponsible, and making that option the default is one of the returning irritation of installing such Linux distributions.
Experienced people rather should suggest a nondestructive approach. To mitigate the probability of mishaps, it is wiser to prepare the partition for / for Mint by a utility program before the actual installation. One swap file can be used by number of Linux systems. What is not completely clear to me is whether using ext4 is obligatory, or just optional. For a simple setup ext3 could well serve me if its usage is allowed.
There are at least two more critical issues: the bootloader to be used, and establishing an Internet connection. Some systems do prematurely push the use of GRUB2 while others can handle ext4 with the stabile (legacy) GRUB. I am not the only one who is quite unhappy the new approach. What’s next? Maybe using an obscure small language with strange characters so that what one could fix in fifteen minutes with the classical GRUB will take more than ten years with GRUB3?!
Internet access is quintessential nowadays, yet number of distributions ( including Linux Mint 7, XFCE) do not have the facilities, or do not work properly for ordinary people whose service provider is a phone, or a cable TV company, i.e., who need DSL PPPoE configuration. I believe that the configuration of the network interface card should be replaced with the full configuration of Internet access, and local networking. In addition number of people use a router to share the incoming network connection, or used as a hardware firewall, yet no Linux distro configuration ever mentions it.
The devil is in the details. To make any Linux distro a viable alternative I believe those details have to be fully addressed.
Respectfully LLR
It’s the rush to GRUB 2 that’s been very disappointing. See a quote from one of the developers to this point.
http://linuxbsdos.com/2009/12/03/linux-m… Linux Mint 8 installation guide