 One of the best features introduced in Sabayon 5.3, the latest upgrade to the Gentoo-based, multi-purpose Linux distribution is the installer. The old installer was dumped in favor of Anaconda, the Fedora 13 installation program. Aside from bringing enterprise-class storage features to Sabayon, Anaconda boots a lot faster than Sabayon’s old installer, which had the unenviable reputation of being very slow and resource-intensive.
With the new installation program, the old installation guides are of no use to new adopters. Hence the need for this guide which presents a very detailed description of the important steps involved. You’ll find in this guide detailed explanations of the importance of disk encryption, bootloader password protection, and LVM disk space allocation.
In order to reduce the number of images used in this tutorial, three images have been omitted. These involve steps that only require the user to click on the Next button. At this point, it is assumed that you have already downloaded an iso image of Sabayon 5.3, burned it on a DVD, inserted the DVD into your computer’s optical drive and rebooted.
- System Language – This is the first step of the installation process. The correct language should be automatically selected. If not, just find your language in the list and click Next.
- Keyboard Layout – Like the system language, the correct keyboard layout should be automatically selected. Next.
-
Storage Devices – At this step, you select the type of storage device(s) you want to use for installation. For most users, the default, Basic Storage Devices, should be what’s required. Choosing the other option, Specialized Storage Devices, will enable you to install or upgrade to Storage Area Networks (SANs), or to devices attached to Mainframes. Make your selection and click Next.
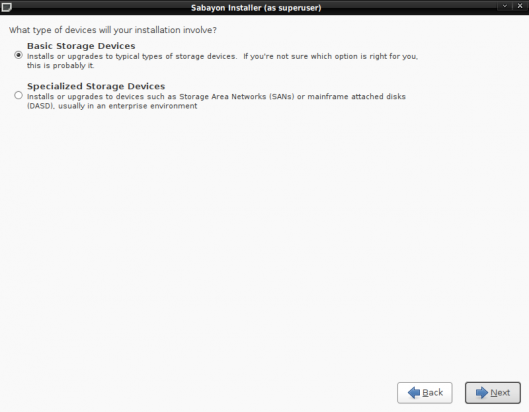
Choice of storage devices to install to.
-
Timezone – Unlike the installer in Ubuntu 10.04 and Linux Mint 9, which automatically detects the correct timezone, Anaconda does not. So you will have to choose the timezone that your area is in and click Next.
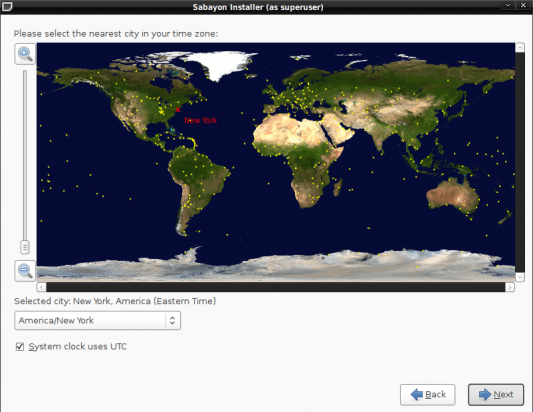
Choose the correct timezone
-
Root Password – Sabayon uses the root account for performing system administrative tasks. That password is specified at this step. Next.
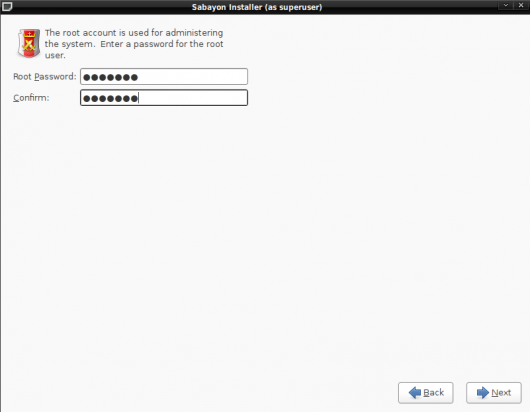
Specify a password for the root account
-
User Account – Here you create an account that you’ll use to login into the computer for everyday use. It is highly recommended that the password for this user account not be the same as the root password. Next.
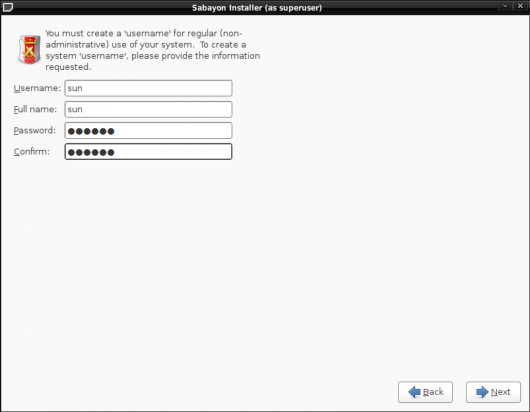
Create a regular user account
-
Partition Options – Anaconda presents several disk partitioning options. If all the space on the hard drive has been initialized for use by another OS, and you want to dual boot, choose the third option, “Shrink Current System.” If you want to create a custom set of partitions, select “Create Custom Layout.” Note that like Fedora (13), Sabayon (5.3), uses the Linux Logical Volume Manager as the default disk partitioning scheme. LVM has better disk management capabilities than the traditional disk management system on Linux.
A security-related option you should be aware of at this step is the disk encryption option. Encrypting a hard drive is one of the tools you may use to enhance the physical security posture of your computer. It’s optional, but it’s a highly recommended feature. For this guide, I’ve chosen to encrypt the disk, hence the “Encrypt system” option is selected.
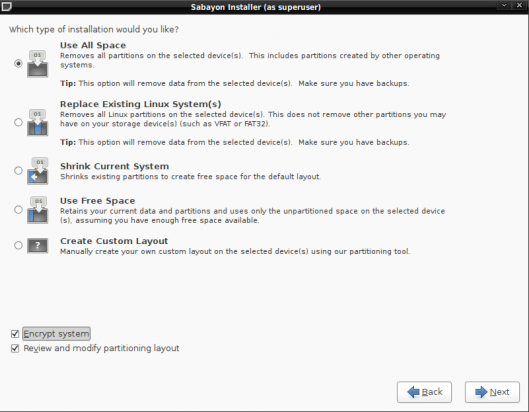
Disk partition options

