This tutorial is a guide on how to install Linux Mint 22.1 (Xia) on a MacBook Air and then configure the Broadcom wireless network card to work after installation. These steps should also work on Linux Mint 22 (Wilma) and future releases of Linux Mint 22 line of Linux Mint.
The MacBook Air used for this tutorial is a 2017/2018 model whose battery is effectively dead. After using it for a few years, I wiped macOS from it and now use it as a crash-and-burn computer for Linux installations.
If you want to follow along, here are the steps involved:
Step 1: Download Linux Mint 22.1
To download Linux Mint 22.1, visit the distribution’s download page. Note that while I used Linux Mint 22.1 (Xia) for this tutorial, this would also work for Linux Mint 22 (Wilma) or any edition of the Linux Mint 22 line. When download is completed, transfer or flash it to a USB stick. If you’re on Windows, use one of these two apps for flashing Linux ISO images to USB stick in Windows. On any Linux distro, use the dd command or any one of other apps for flashing Linux ISO images to USB sticks in Linux.
Once you’ve completed that successfully, proceed to step 2.
Step 2: Install Linux Mint 22 on a MacBook Air
The first task in this step is to turn the MacBook Air off, then insert the USB stick from step 1 into one of its USB ports. Restart it by pressing the power button, then hold down the option/alt key until it boots into the boot menu, which should be similar to what you see in Figure 1. The icon for the USB stick will be either of the colorful ones. Use the arrow keys to select it then press the enter/return key or double-click on it. The system should boot into the GRUB menu.
NOTE: Don’t bother with connecting to a wireless network, because it won’t work after you boot into the live desktop. You’ll learn how to configure it in step 3.
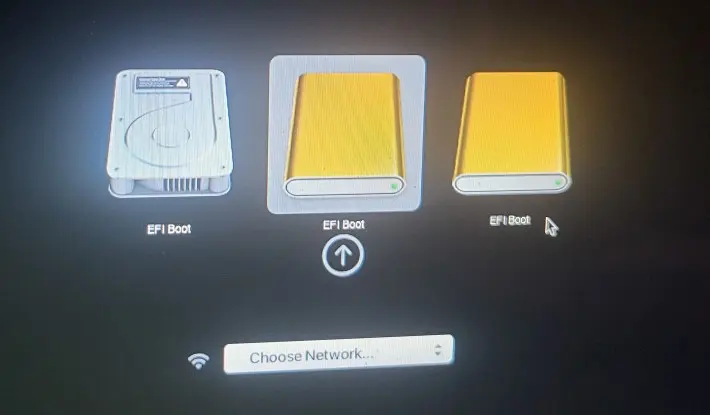
Figure 1: Linux Mint 22.1 installation media in a MacBook Air boot menu.
At the GRUB menu, shown in Figure 2, select the Start Linux Mint 22.1 Cinnamon 64-bit entry, then press the enter/return key to boot into the live desktop of Linux Mint 22.1.
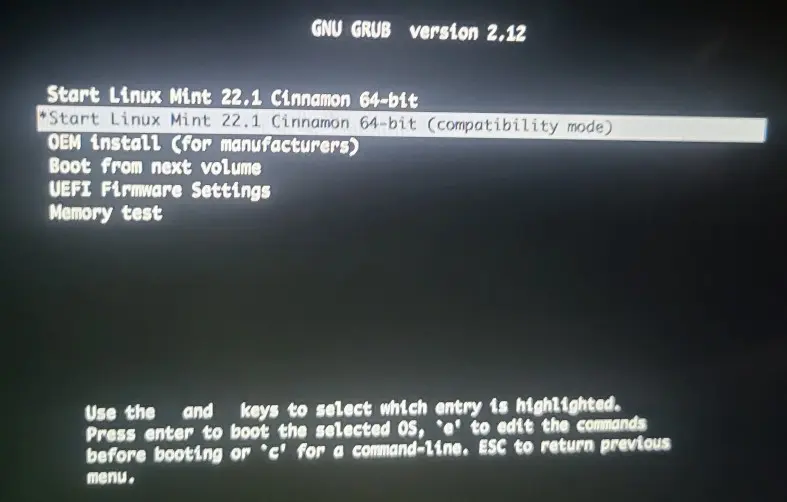
Figure 2: Linux Mint 22 GRUB menu
While in the live desktop, click on the Install Linux Mint icon on the top left corner of the desktop to launch the installer. Go through and complete the installation process. Afterwards, restart the unit when prompted, removing the installation USB stick before pressing the enter/return key.
If the unit does not respond after pressing the enter/return key, power it down. Then power it back up. It should boot up like normal into your new installaion of Linux Mint 22.1.

Figure 3: Prompt to remove the Linux Mint 22.1 installation media from MacBook Air.
You’ll learn how to configure the wireless network card in the MacBook Air in the next step.
Step 3: Configure the MacBook Air’s wireless network card
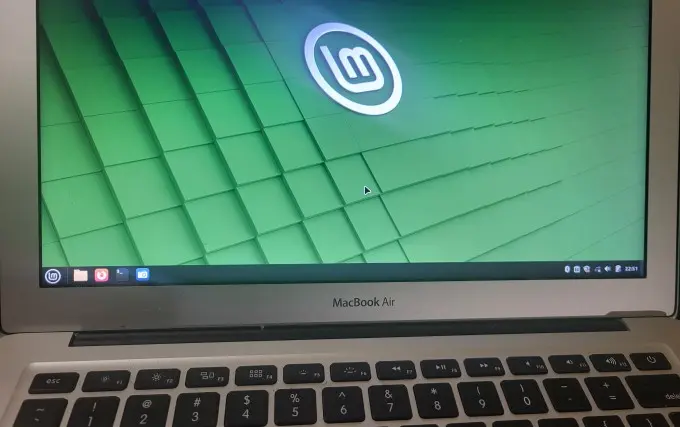
If all worked out in the previous step, the MacBook Air should reboot into a Linux Mint 22.1 desktop. Internet access will not be available, because the driver for the built-in Broadcom wireless network card still needs to be installed. You’ll learn how to install the driver for that Broadcom wireless network card in this step.
The simplest way to do that is to click on the Let’s go! button in the window of the Welcome up that should be open on your desktop.
NOTE: The USB stick you made in step 2 and used to install the system will be needed in this step, so keep it within reach.
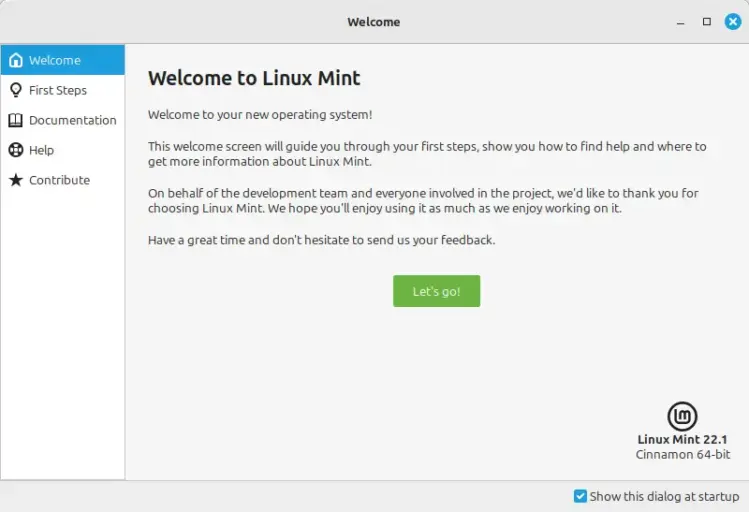
Figure 4: Welcome app of Linux Mint 22.1.
Then on the First Steps tab of the Welcome app, click on the Launch button under the Driver Manager section.
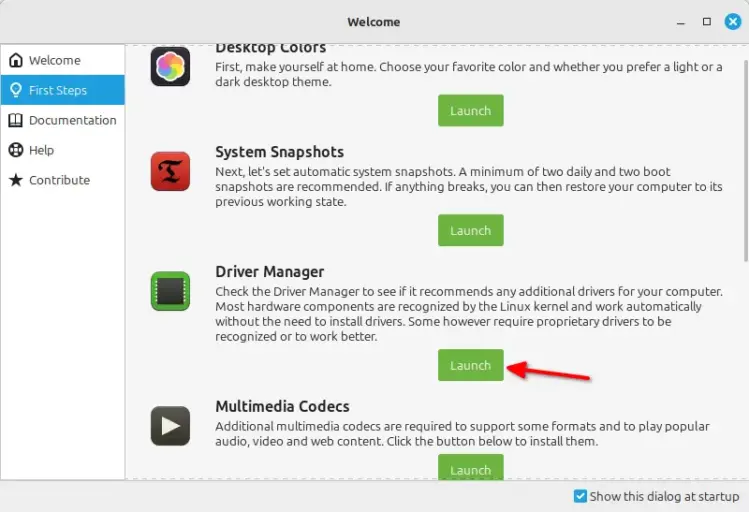
Figure 4: Launching Linux Mint 22.1 Driver Manager.
In the next window shown in Figure 5, you’re given the option of connecting to the Internet or inserting the USB stick you used to install the system. Since, for an obvious reason, you can’t connect to the Internet just yet, insert the installation USB stick you made in step 2, then click the OK button.
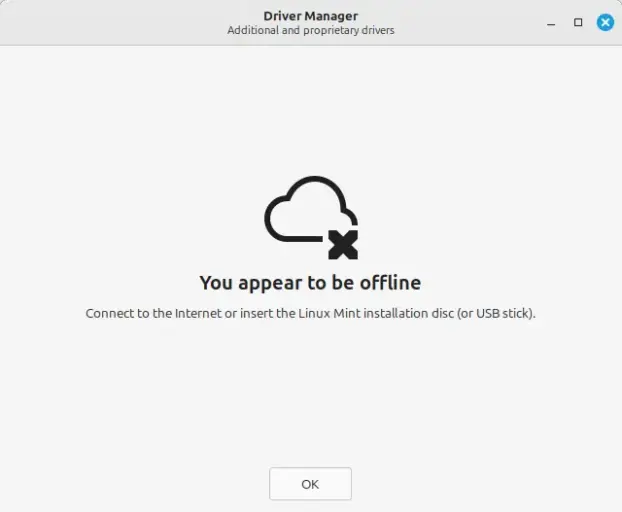
Figure 5: Option to connect to eh Internet or insert installation media of Linux Mint 22.1.
Now the installation media needs to be mounted. To do that, click on the Mount installation media button like the one shown in Figure 6. You’ll next be prompted to authenticate.
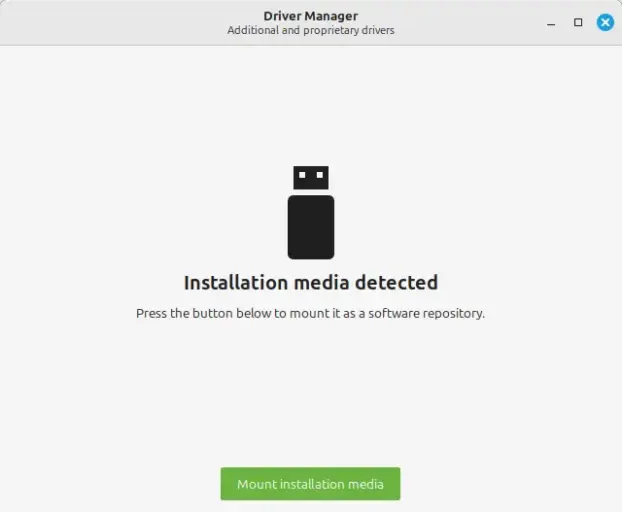
Figure 6: Mount Linux Mint 22.1 installation media.
After authenticating successfully, you’ll be presented with a window just like the one shown in Figure 7. Of the 2 options shown, select broadcom-sta-dkms, then click the Apply Changes button. You’ll be prompted to authenticate again.
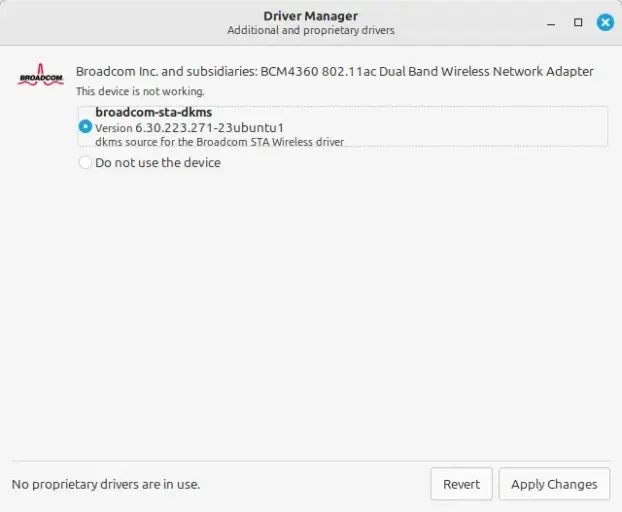
Figure 7: Install Broadcom wireless driver on MacBook Air
Finally, click the Restart. . . button to reboot the computer and complete the setup of the Broadcom wireless driver.
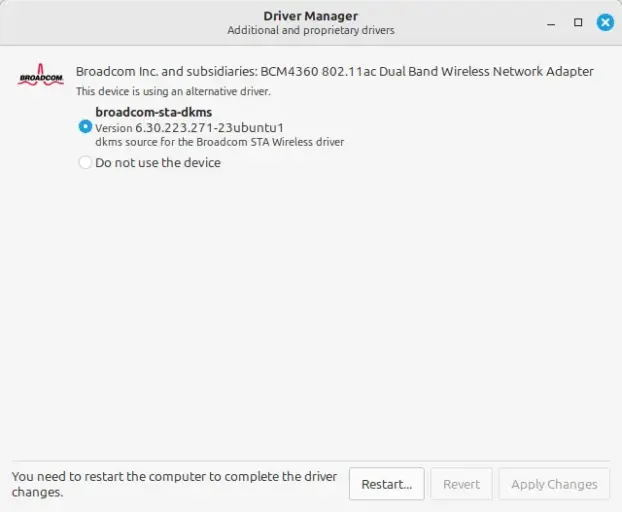
Figure 8: Complete the Broadcom wireless driver installation by restarting the computer.
When you log in after restarting, you should now be able to connect to a wireless network and surf the Web on your MacBook Air now running Linux Mint 22.1.
By the way . . .
If you would like to install Ubuntu on your MackBook Air instead of Linux Mint 22.1, read my other article on how to install Ubuntu 24.04 or Ubuntu 24.10 on a MacBook Air

