Introduction:
CloudBerry Backup, from CloudBerry Lab, is a cloud backup software for corporate and personal use that counts support for 256-bit AES encryption, image-based backup and data deduplication as features. It has a Freeware, Pro and an Ultimate version, with a 15-day trial for the latter two. The Freeware version is completely free to use, though with limited features. The Pro and Ultimate versions come with the support for encryption and compression, besides those features that are part of the Freeware version. And the only difference between the Pro and the Ultimate editions is that the former has a 5 TB storage limit. There’s no storage limit for the Ultimate edition.
A previous article about CloudBerry Backup showed how to use it to backup Linux files to a Minio storage server. In this article, you’ll learn how to use CloudBerry software for Linux cloud backup to back up your files on a Linux desktop to a bucket on the Wasabi cloud storage platform. This article was written using the 15-day trial of the Ultimate edition on both Linux Mint 18.2 and Ubuntu 17.10.
Wasabi is a cloud storage solutions provider that offers an S3-compatible storage that is touted as being faster than Amazon’s storage offerings. The company offers a 30-day trial account that comes with 1 TB of storage, with no credit card requirements. So if you wish to follow along with this tutorial, sign up for your trial account by visiting the company’s website, and use the Wasabi official guide to configure your account. Make a note of your access and secret keys because you’ll need them later.
Besides a Wasabi account, you’ll also need CloudBerry Backup installed on your Linux desktop to complete this tutorial. You’ll learn how to accomplish that next.
Installing CloudBerry Backup:
In this section, you’ll be installing CloudBerry Backup on a Linux distribution that makes use of the Advanced Packaging Tool (APT). That means you can use the following instructions to install it on any Debian– or Ubuntu-based distribution. To begin the installation process, you’ll need to download its .deb file from here. And as you’ll see in the next step, downloading that installation file gives you access to the Freeware version and access to take the Pro and Ultimate editions for a 15-day trial.
To install the downloaded file, which should be saved under a name like CloudBerryBackup_v2.2.deb, navigate to the directory that you saved the file into, then type the following command: sudo dpkg -i CloudBerryBackup_v2.2.deb.
After installation has completed successfully, you should find an entry named CloudBerry Backup in the Internet applications menu category. And there should also be a command line interface named cbbCommandLine installed into the /opt/local/CloudBerry Backup directory. You’ll learn how to use the graphical interface in the next step.
Using CloudBerry Backup:
To use CloudBerry Backup’s graphical user interface, launch it from the Internet menu category. The following images show a step-by-step process of how to use it for the very first time on your Linux system.
When the application starts, select from the given options and click Next.
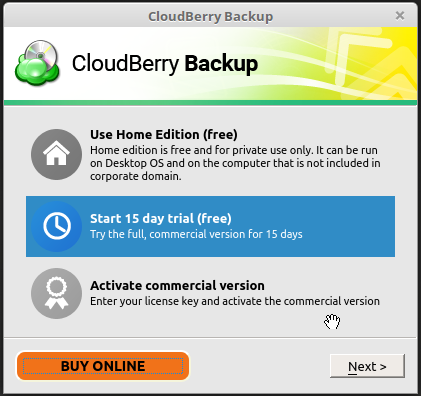
Figure 1: Starting up CloudBerry Backup graphical interface
On the next window, type your email, select either the Pro or Ultimate edition, then click Start Trial.
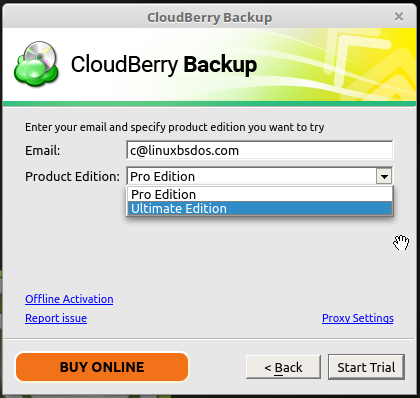
Figure 2: CloudBerry Backup Pro or Ultimate versions
If your request to start a 15-day trial is successful, you should see a window just like the one in the following image. And on clicking on that OK button…
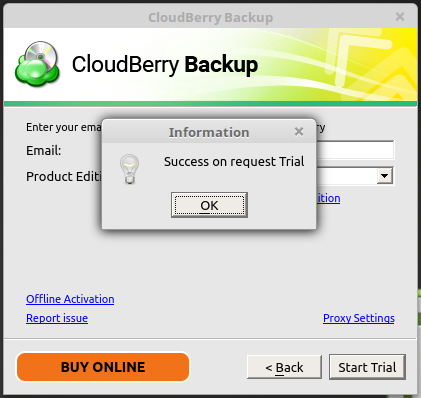
Figure 3: Trialing CloudBerry Backup Pro or Ultimate editions
You should be presented with the image below. Now CloudBerry Backup Pro or Ultimate is ready for use. To configure it to use your Wasabi account, click on the Back up Files button.

Figure 4: Main interface of CloudBerry Backup graphical interface
Clicking the + button in the next window should show the supported cloud storage platforms. Since we’ll be backing up our files to a bucket on the Wasabi platform, select it from the list.
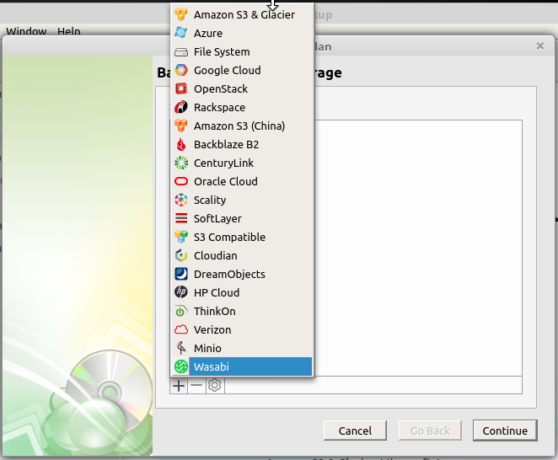
Figure 5: List of cloud platforms supported by CloudBerry Backup
In the window that opens after that, input your Wasabi account’s access and secret keys. The Display Name is any arbitrary name, but the Access Key and Secret Key must be exactly the same as those of your Wasabi account. If the connection to Wasabi account is successful, the buckets configured under the account should show up in the Bucket menu, so you can select which one to use for backups. And if the connection to your Wasabi account is not over SSL, clicking on the Advanced settings button…
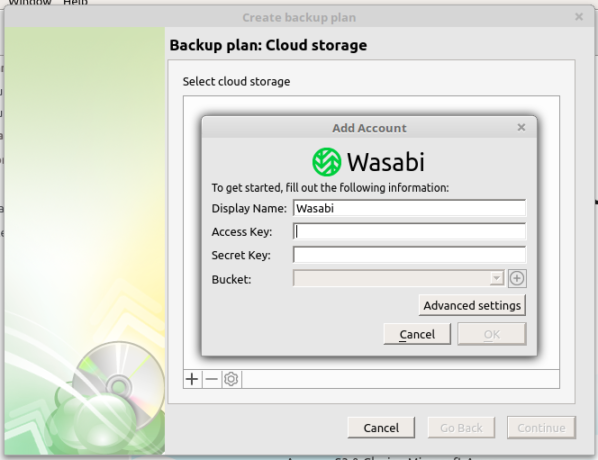
Figure 6: Configuring Wasabi for use with CloudBerry Backup
Will open a window that gives you the option to enable or disable it. SSL is enabled out of the box.
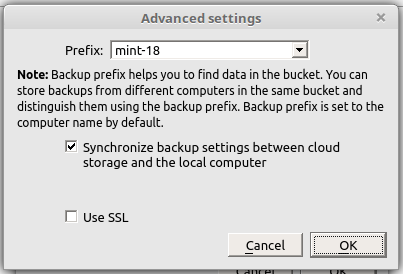
Figure 7: SSL option on CloudBerry Backup
After the Wasabi account has been added, you should be back at the window shown in this next image. The next series of tasks involve configuring the backup settings and policies, so click on the Continue button.
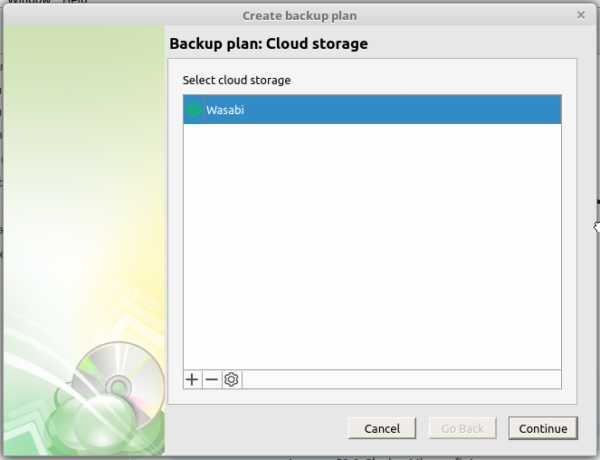
Figure 8: Wasabi plan for use with CloudBerry Backup
In the next window, give your backup plan a name. Continue.
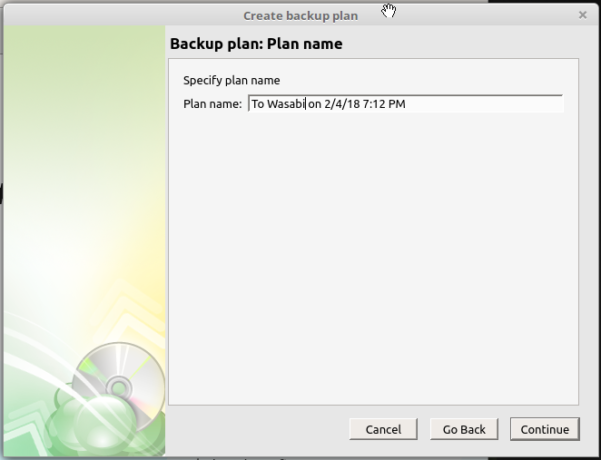
Figure 9: Configure Wasabi plan for use with CloudBerry Backup
Next, select the files and/or folders you wish to backup from the window shown in this next image. Note that only a few windows have been selected from this set of tasks to show what you need to configure. Continue.
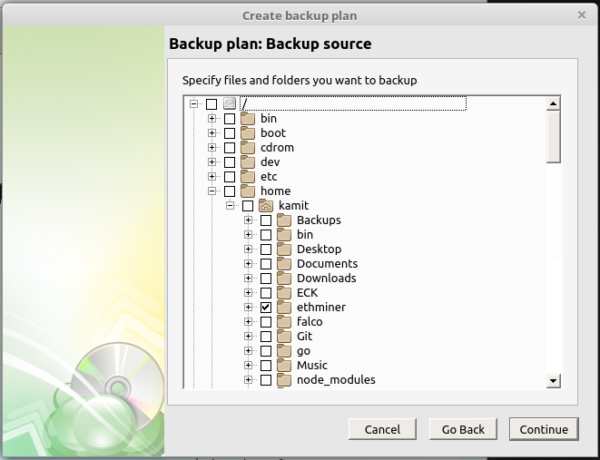
Figure 10: Selecting files to backup using CloudBerry Backup
The feature on this window is configurable only in the Pro and Ultimate edition, so if you’re using the Freeware edition, you probably will not see the options.
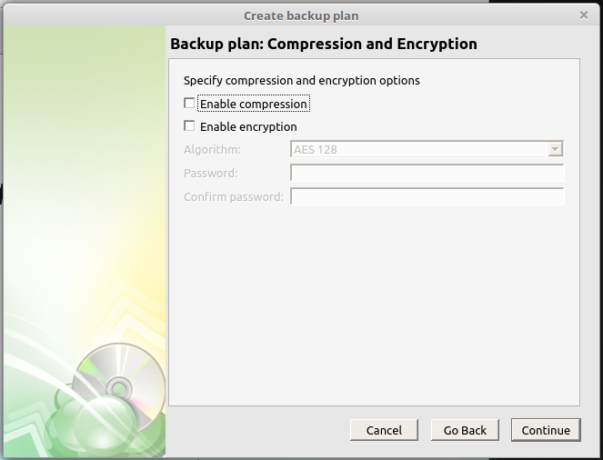
Figure 11: Compression and encryption options on CloudBerry Backup
You can configure the backup retention policy. Continue.
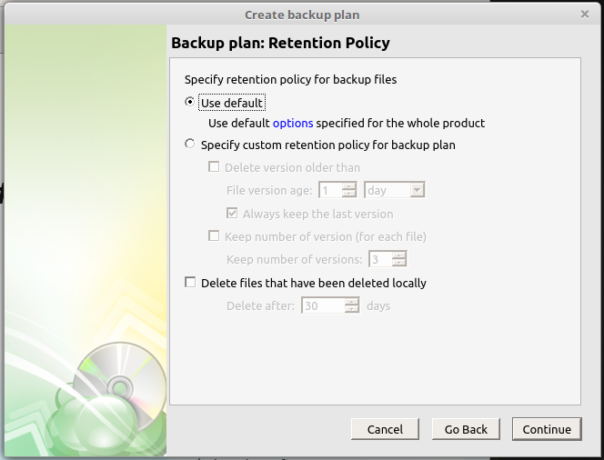
Figure 12: Configuring backup retention policy options on CloudBerry Backup
And also a backup schedule and when it should be triggered. Continue.

Figure 13: Backup plan schedule on CloudBerry Backup
When all the settings and policies of the backup are all in pace, and a backup has been triggered, you should see the status of the operation in the following window. However, if the number/size of the files to be backed up is small, the operation would have been completed before you get to this window.
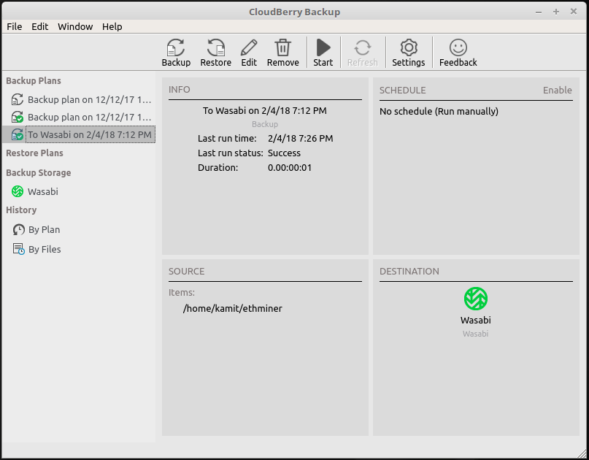
Figure 14: CloudBerry Backup in action
After the backup has been completed, and you take a peek at the dashboard of your Wasabi account, you should see the newly backed up files and folders in the target bucket.
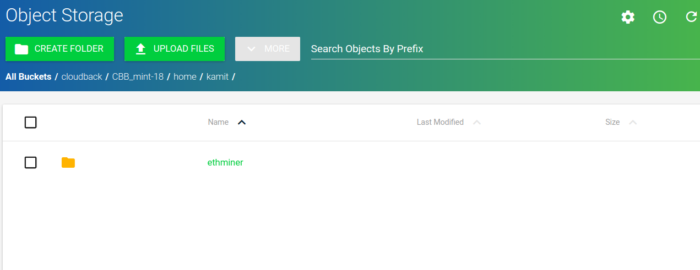
Figure 15: Wasabi account dashboard
So that’s how you use the graphical user interface of CloudBerry Backup to archive your files to an account on the Wasabi storage platform. In the next section, you learn how to restore the files using the same application.
Restoring Files from a backup using CloudBerry Backup:
Consider this a bonus section, because a backup plan is really not complete until you’re sure that you can reliably restore your files from a backup. It should be an integral part of your backup plan. And with CloudBerry Backup, it’s point-and-click easy to accomplish.
To begin, click on the Restore Backup button on the main window, then select the cloud storage platform you backed up your files into in the following window. Click Continue.
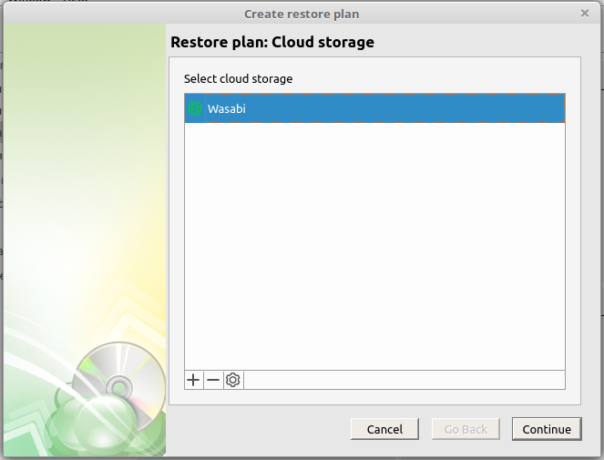
Figure 16: CloudBerry Backup restore interface
Then select the plan’s name or how you intend to implement the restore operation. Continue.
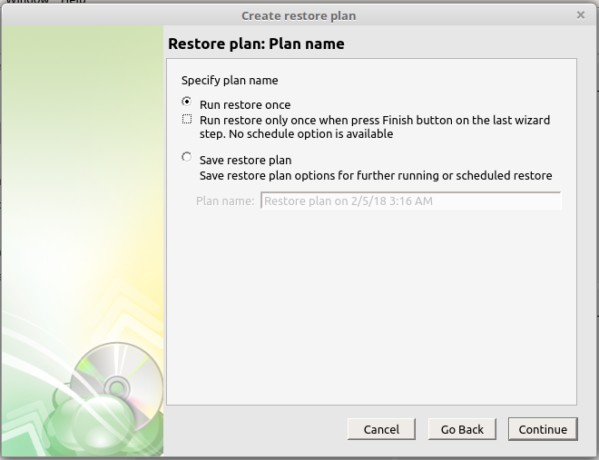
Figure 17: CloudBerry Backup restore plan
What version of the backup do you wish to restore? Select it here. Continue.
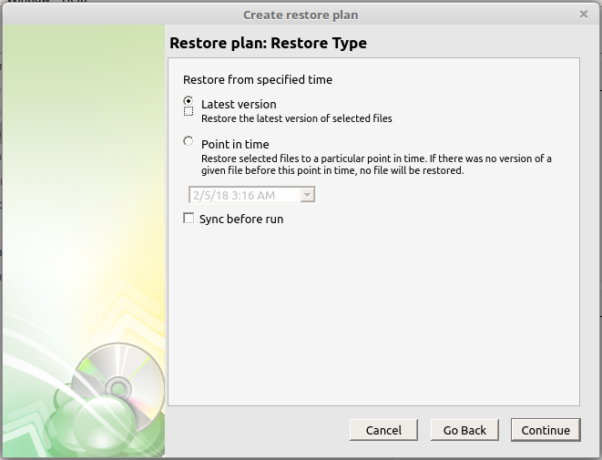
Figure 18: CloudBerry Backup restore type
You may restore all the files or just some of them. Make the selection in the next window.
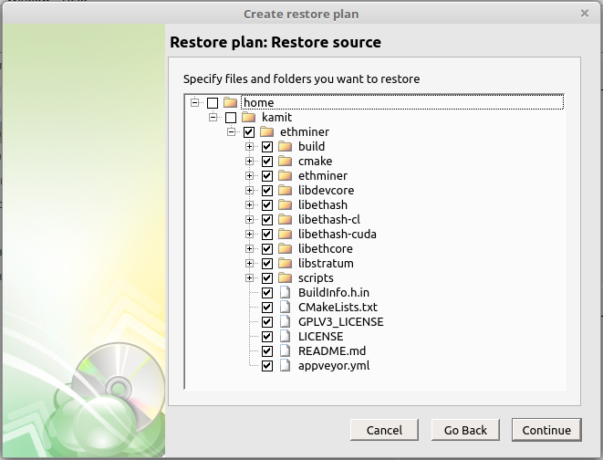
Figure 19: Selecting files to restore using CloudBerry Backup
Then indicate where you wish to restore the files into. Same location as the original or some other location.
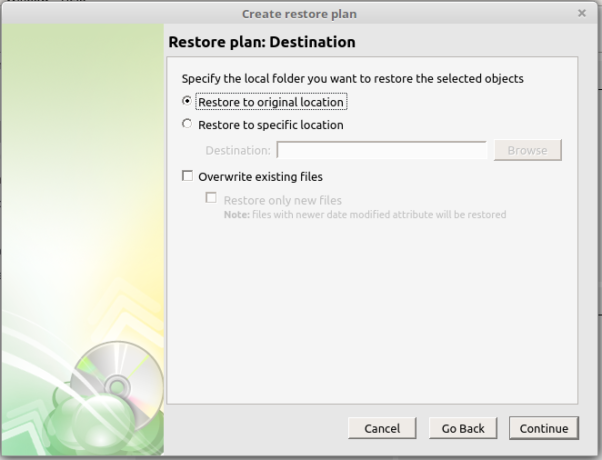
Figure 20: Selecting restore destination on CloudBerry Backup
If you encrypted the backup, specify the encryption passphrase so that CloudBerry Backup can decrypt it.
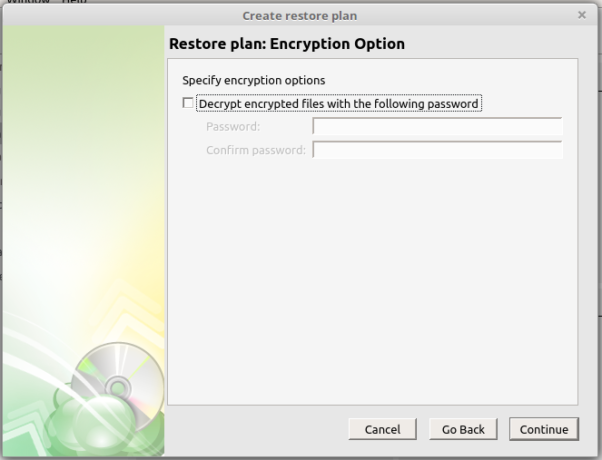
Figure 21: Specifying decryption passphrase for restore operation with CloudBerry Backup
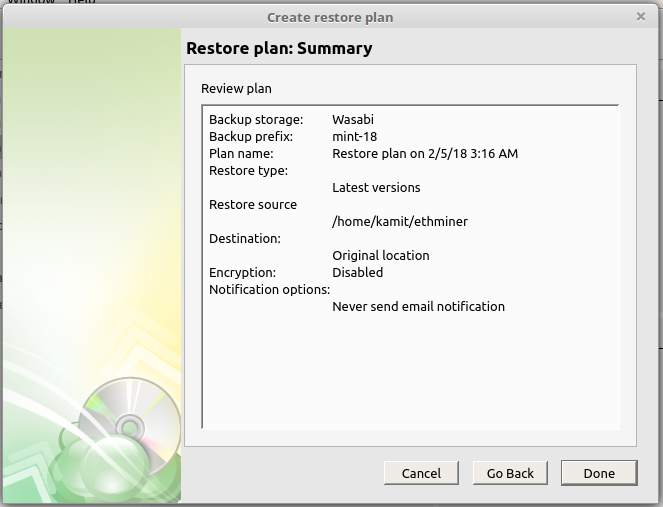
This gives you a summary of your restore preferences. Click Done to start the restore operation. After the operation has been completed, check the restored files to make sure all went well.
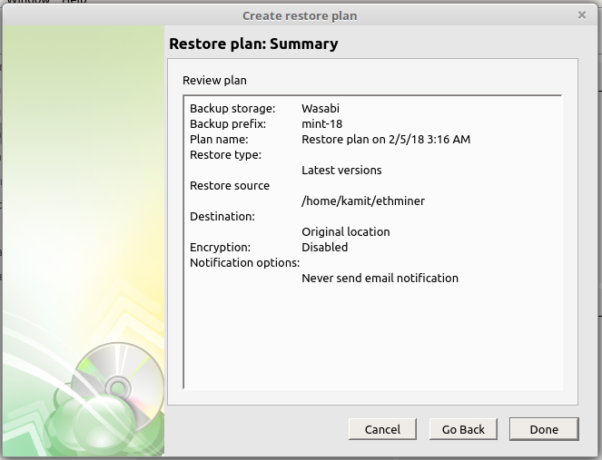
Figure 22: Summary of restore options on CloudBerry Backup
Conclusion:
You’ve read, in this article, how to install and use CloudBerry Backup for Linux to backup your files to your account on the Wasabi storage platform. And you’ve also seen how to use it to restore files from a backup.
As stated previously, I used a 15-day trail version of CloudBerry Backup Ultimate, but a freeware version is available if you don’t want to pay for a backup software.
Editor: This post has been sponsored by CloudBerry, a storage solutions provider.

