In this article, you’ll learn how to use Docker Machine to provision Dockerized hosts on the Vultr Cloud platform from your Linux Mint 18.1 or Ubuntu 16.04 desktops.
To complete the tasks in this article succesfully, you’ll need to have read:
- How to install Docker Machine on Linux Mint 18 and 18.1
- How to Install Vultr Docker Machine driver on Ubuntu 16.04 and Linux Mint 18
- How to Display a list of available operating systems on Vultr in pretty JSON. This last article is only needed when you have to provision a machine using a non-default operating system.
And most importantly, you’ll need to have a Vultr account. If you don’t have one, you may sign up using this link. It’s an affiliate link, so using it to sign up benefits me and helps to keep this website going. The main benefit you’ll get from using Vultr is that their base server comes with 50% more RAM than other Cloud hosting providers’.
Generate Your Vultr Cloud API Token
After signing up for a Vultr account, assuming you did not have one already, the next task it to generate a Vultr API token, which will be used for authentication. To generate the token, log into your account and click on the Account tab on the left. Follow that by clicking on API. Then click on the Enable API button.
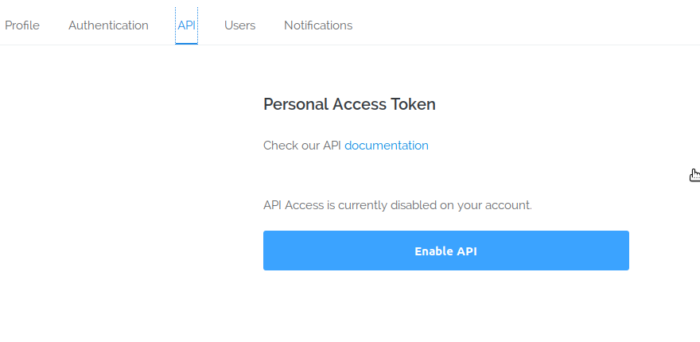
Figure 1: Generating your Vultr Cloud platform API token
Your Vultr API token has been generated. You may copy it to a file on your computer. Actually, it will make things easier if you copied it to a file on your computer.
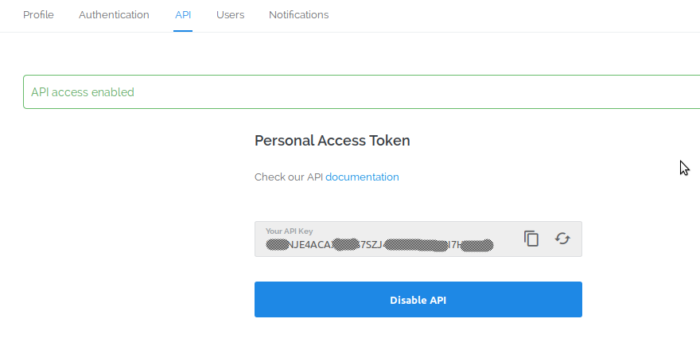
Figure 2: Vultr Cloud platform API token
Create a Bash Variable for Your Vultr API Token
The Vultr API token is a long string that can be difficult to work with on the command line. To make things easier, it’s better to assign it to a Bash variable. And the best method of doing that is to add it to the .bashrc file under your home directory. Use the following commands to accomplish that.
# Use these commands to assign your Vultr API token to a Bash variable # Open the .bashrc file # >> indicates output nano ~/.bashrc # Append the next line to the file # Replacewith the one you generated export VTOKEN= # Assuming the token is db5b297b2th0f5897b09, the actual command would be export VTOKEN=db5b297b2th0f5897b09 # Save and close the file # To activate the changes, type source ~/.bashrc # To check that the variable is recognized by the system, type echo $VTOKEN >> db5b297b2th0f5897b09 #
Provision One Dockerized Host on Vultr Cloud
At this point, you may start provisioning machines on Vultr using the docker-machine create command. The complete command you need to provision your first machine is given below.
# Docker Machine command to create a machine on Vultr Cloud
# This command creates a machine called rancher-node. You may replace that with your own name

docker-machine create -d vultr --vultr-api-key $VTOKEN rancher-node

#
It will take about three minutes, but after that, you’ll have a server on Vultr with the Docker Engine installed. However, that server will not be running some standard Linux distribution like Ubuntu, Debian, or Fedora, but instead, will be running RancherOS, an operating system designed just for running containers. Called a container-native operating system, it’s one of many of its kind in active development. See this article for a partial list of container-native operating systems in active development.
In the next section, you’ll learn how to provision a machine on Vultr using an operating system other than RancherOS.
Provision a Dockerized Host on Vultr using an OS other than RancherOS
By adding the –vultr-os-id option to the docker-machine create command, you can create a machine running an operating system other than RancherOS. The value to that option is a 3-digit number that corresponds to the operating system. The list of operating systems available on Vultr are on a link that displays in a difficult-to-read JSON format. How to display the list in a more readable JSON format is given in Display a list of available operating systems on Vultr in pretty JSON.
Using the following command, you instruct Docker Machine to create a Dockerized host with Debian 8 Jessie, whose id is 193.
# Provision a machine running Debian 8 Jessie on Vultr

docker-machine create -d vultr --vultr-os-id 193 --vultr-api-key $VTOKEN debian-vtr

#
Provision Multiple Dockerized Host on Vultr
Provisioning one Dockerized host is nice, but the command can be extended with a little Bash magic to provision as many as you can afford to pay for. For example, the commands you may use to provision two or more machines are given next.
# This command will provision just two machines
# And they will be named node-1 and node-2 respectively

for i in 1 2 ; do docker-machine create -d vultr --vultr-api-key $VTOKEN node-$i ; done

# To provision, say, 10 machines automatically, use this variation of the command

for i in {1..10} ; do docker-machine create -d vultr --vultr-api-key $VTOKEN node-$i ; done

#
With those commands, you’ve now seen how you can provision hundreds, even thousands of Dockerized hosts with a single command.
Managing Dockerized Hosts On vultr from Linux Mint 18.1, Ubuntu 16.04
With Docker Machine, managing Dockerized hosts is not complicated. In this section, you’ll become familiar with basic commands you’ll need to work with it on Linux Mint 18.1 or Ubuntu 16.04. The simplest command you’ll be using regularly is docker-machine ls, which is used to list provisioned machines. The output is given in the following code block.
# The following is the output of docker-machine ls command

NAME     ACTIVE   DRIVER   STATE     URL                         SWARM   DOCKER    ERRORS
node-1   -        vultr    Running   tcp://45.76.4.111:2376              v1.11.2
node-2   -        vultr    Running   tcp://107.191.39.216:2376           v1.11.2

# And this is the same output when one of the machines has been activated
# Notice that the active machine has an asterisk in its ACTIVE column

NAME     ACTIVE   DRIVER   STATE     URL                         SWARM   DOCKER    ERRORS
node-1   -        vultr    Running   tcp://45.76.4.111:2376              v1.11.2
node-2   *        vultr    Running   tcp://107.191.39.216:2376           v1.11.2

#
So how do you activate a machine? By using the following command. Note that when a machine is activated, your Docker client is connected to it, so that all Docker commands (not Docker Machine commands) you type are executed on it.
# How to activate a machine # The command takes this form docker-machine use# For example, to activate a machine named node-1, type docker-machine use node-1 # Your command prompt will change to something like [username@hostname ~]$ # So for a default Dockerized host on Vultr whose name is node-1, the prompt will change to [rancher@node-1 ~]$ #
If you installed Docker Machine using this article, activating a machine will include its name in your command prompt. That makes it easy to keep track of which machine you’re working on when you have multiple machines.
A Dockerized host is just like any other server, so you can log into it using SSH and perform all the administrative tasks you need to. You can also log into it using the docker-machine ssh command. And with a variation of the same command, it’s possible to execute any command on the machine and perform the same administrative tasks without actually logging into it. Below are a few example commands you can execute on a remote machine using the docker-machine ssh command.
# The syntax of the 'docker-machine ssh' command takes this form docker-machine ssh# For example, to log into a machine named node-1, type docker-machine ssh node-1 # To execute a command on the same host, append the command to the above, like this # This assumes that the node's operating system is RancherOS docker-machine ssh node-1 sudo ros os list # Docker commands are fair game too docker-machine ssh node-1 docker info # Or docker-machine ssh node-1 docker images # Are there any containers running on the remote machine? docker-machine ssh node-1 docker ps #
Running Containers on Dockerized Hosts on Vultr
The whole point of provisioning a server with Docker Engine installed on it is to be able to run containers on it. As you saw in the previous section, with Docker Machine, you can do that without actually logging into the machine in the traditional way. The following commands show how to run containers on a remote machine using the docker-machine ssh command.
# To run the hello-world container on the remote machine, type # >> indicates output docker-machine ssh node-1 docker run hello-world # Now if you query the system, it will show one inactive container docker-machine ssh node-1 docker ps -a >> CONTAINER ID IMAGE COMMAND CREATED STATUS PORTS NAMES >> 195d5dc7a649 hello-world "/hello" 5 seconds ago Exited (0) 5 seconds ago pedantic_nobel # Since the container has outlived its usefulness, trash it docker-machine ssh node-1 docker rm# And while we're at it, trash the image also? docker-machine ssh node-1 docker rm hello-world #
Cleaning Up
After provisioning and test-driving one or more Dockerized hosts, there will come a time when you’ll need to stop and/or destroy them. This last set of commands show how to go about it.
# Use this command to stop a machine docker-machine stop# Want to destroy it? Use the next command docker-machine rm # This will stop more than one machine for i in {1..10}; do docker-machine stop node-$i; done # And this will forcefully destroy them for i in {1..10}; do docker-machine rm -f node-$i; done #
Resources
The foregoing has shown how to provision Dockerized hosts, or machines, on the Vultr platform from your Linux Mint 18.1 or Ubuntu 16.04 desktop. The Vultr Docker Machine driver is just one of many available for Docker Machine. You may view the complete list here. For the list of core drivers supported by Docker Machine, click here. And if you have not yet signed up for a Vultr account, you may do so now using this link.

