Prey is a cross-platform (Android, Linux, iOS, Mac OS X, and Windows desktop) anti-theft tracking software that, when installed and activated on a supported device, makes it possible for the owner to remotely locate, lock, wipe and recover it, if it’s stolen or missing.
If Prey is news to you, read the introduction at How to integrate Prey into the security posture of your Linux PC, then create a free account at preyproject.com.
This rest of this tutorial will show how to install and manage it on Linux Mint 17.1.
There’s no binary package for Prey in the repository, so you’ll have to download a .deb package from the project’s download page here. Since you’ll be installing it on a Ubuntu-based distribution, download the one for Ubuntu. Save it to the Downloads folder.
Now, launch a shell terminal and change to the Downloads folder by typing cd Downloads. Before installing it, you’ll have to install some dependencies. How to install those and then install Prey is shown in this code block. Be sure to install the exact Prey package you downloaded:
# Install the dependencies

sudo apt-get install -y streamer scrot mpg123

# Install Prey

sudo apt-get install -y prey_1.3.6_amd64.deb
If installation completed successfully, a window similar to the one shown in Figure 1 should open. If you’ve not created an account yet, do so by clicking on the appropriate option. Otherwise select the option shown, then click Forward.
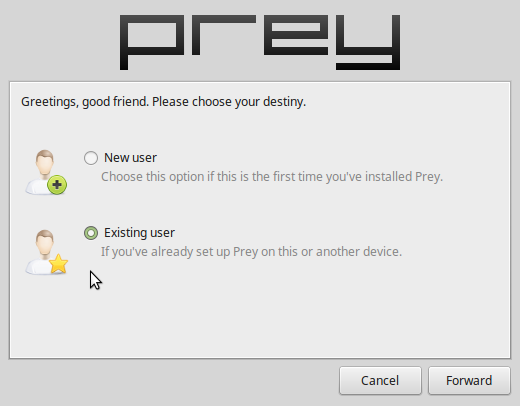
Figure 1: Prey setup window.
You will be prompted to log in. After a successful login, you should get the message shown in Figure 2.
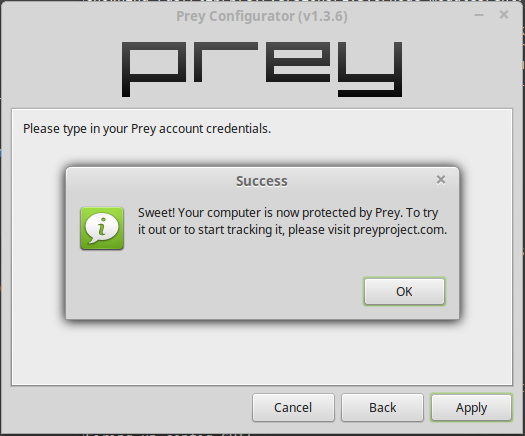
Figure 2: Prey successfully installed on Linux Mint 17.1
This screenshot shows the Prey Web UI of my account before any device was registered.

Figure 3: Prey Web UI before a device is registered
And this one shows the same interface after a device was registered and is being tracked.
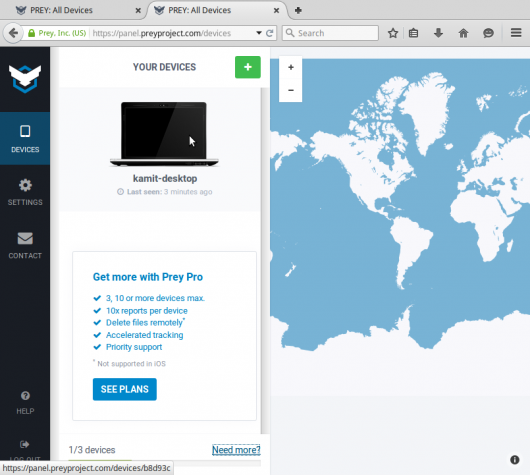
Figure 4: Prey Web UI after a device is registered
The registered device just happens to be a desktop installation of Linux Mint 17.1 Cinnamon. Yes, desktop, not notebook. Desktop’s can be stolen too.
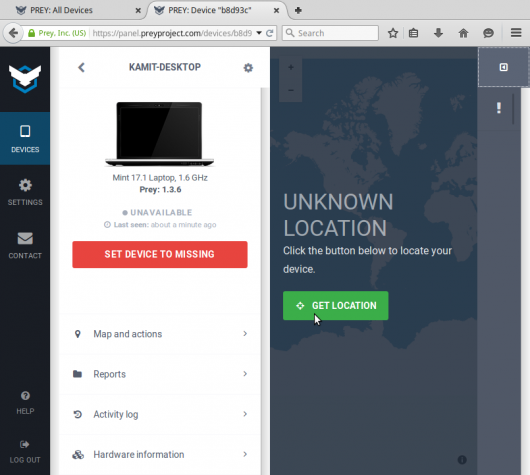
Figure 5: A tracked Linux Mint 17.1 computer on Prey Web UI.
Geolocation works with WiFi access, but the desktop did not have one, so I did not test that feature.
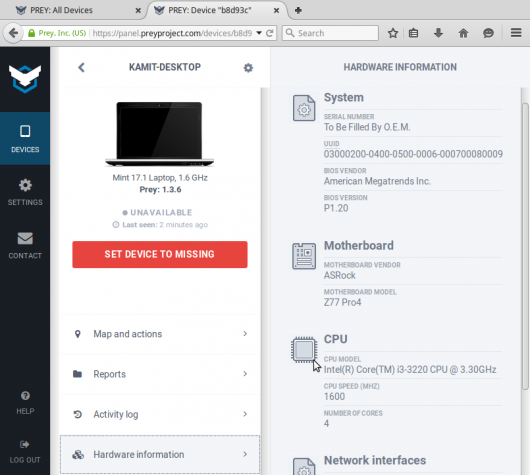
Figure 6: A tracked Linux Mint 17.1 computer on Prey Web UI.
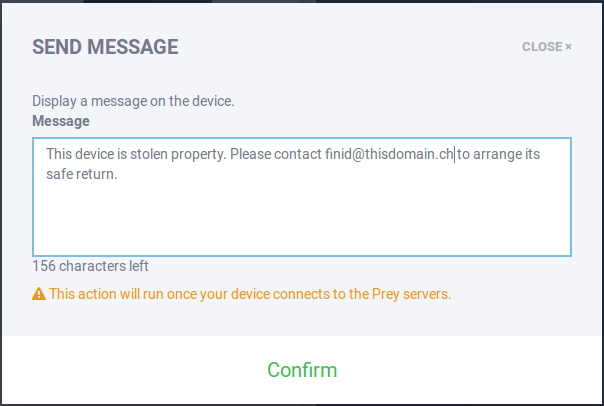
In the event of a loss or theft, you log into your account and take any number of actions, including sending a message that will be seen by the person using the computer.
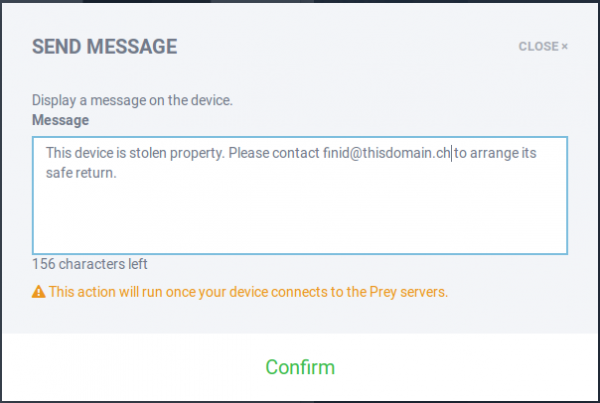
Figure 6: A tracked Linux Mint 17.1 compuer on Prey Web UI.
And that’s the benefit of installing an anti-theft application like Prey. But consider this: If your computer is stolen and you can send a message through Prey that can be seen by the thief, then you failed to do something very important – encrypt the disk. That’s far more important than an anti-theft application.
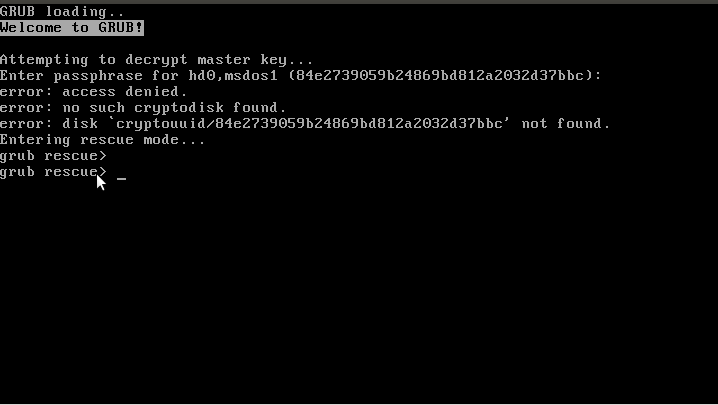
But nothing stops you from encrypting your disk, then installing Prey, because, like I wrote in How to integrate Prey into the security posture of your Linux PC:
…in the unlikely event the disk is decrypted without the configured passphrase, Prey will be able to call home and hopefully, help you recover the unit. If you go this route, remember to also have a backup system in place. You can’t lose your data by backing it up.


As of november 2015, this tutorial doesn’t work with Linux Mint 17.2.
Here are the steps I followed to install Prey on my PC :
1. Download the Ubuntu package from the Prey project website
2. Install the dependencies as shown in the LinuxBSDos tutorial :
sudo apt-get install -y streamer scrot mpg123
If you try to install Prey with apt-get, it will fail with the following error : “unable to locate the package prey_xxx.deb”.
3. Open the file manager, then the folder containing the package that you downloaded at step 1
4. Right-click on the package and left-click on “Open with GDebi+ package installer”.
5. When the GDebi+ package installer opens, install the prey_xxx.deb package.
6. Contrary to the LinuxBSDos tutorial, the Prey program will not open a configuration window automatically
7. To correct this issue, open a terminal and execute the following command :
sudo /usr/lib/prey/current/bin/prey config account setup
8. Answer questions about your Prey account (email, password, …).
9. If you typed your information correctly, your PC will be added to your Prey account.
10. Login to your account on the Prey Project website : your PC will be listed.
One big annoyance :
My linux PC isn’t accurately located by Prey. On a regional map, it appears in the neighbouring town, dozens of miles from where I live. However, the Windows version of Prey doesn’t have this problem.
Sources :
1. This tutorial
2. The Ubuntu forums
http://ubuntuforums.org/showthread.php?t=2276081
Thanks for the contribution. I’ll see if I can install it on Mint 17.3.
As of december 30, 2015, the Prey package has been updated to version 1.5.0. Unfortunately, there is only a 32-bit Ubuntu version.
If you try to use it on a 64-bit system, the package installer will fail with lots of errors. To solve this problem, google “prey-1.4.2_amd64.deb”. Once you’ve found it, download it and follow the tutorial.
I confirm “k” affirmation
Doesn’t work anyway. Download from web site, install with package manager fails. All dependencies satisfied. Prey never installs easily, it’s always a PITA. This time with Mint 17.2.
Hmm… Installed first time on my machine. What error message did you get?
Totally bogus. apt-get doesn’t install locally downloaded package