The last PC-BSD release I reviewed was the 9.1 edition, and that was back in December 2012 (see PC-BSD 9.1 preview). That’s almost two years ago, But that’s because I’ve been very disappointed with subsequent releases after that, so I never bothered to write another review, though I was each testing each release privately.
When the first 10.0 edition was released, I played with it a bit, but was not impressed, so I never wrote about it. With the release of version 10.1, which was made available for download on November 16 (2014), I decided it was time for another comprehensive review of PC-BSD.
For me, part of the draw for a FreeBSD based distribution is ZFS, the default file system that was inherited from Solaris. ZFS has some very cool features that you won’t find in any Linux file system, including btrfs. That’s a reason I keep track of PC-BSD, hoping that a default installation will be usable.
And so four days ago I decided to do a complete review of PC-BSD 10.1. What follows is a 4-day experience of installing and playing with PC-BSD 10.1 on real hardware and in a virtual environment using VMware Player.
In this review, you’ll read why I came to these conclusions:
- PC-BSD 10.1 comes with some very cool features and very good graphical management applications. And many have been much improved since the version 9.1 edition.
- A PC-BSD 10.1 KDE is the only one worth using. But even then, the default settings could be better, much better.
- A default installation that uses the Cinnamon desktop is worse than anything that Microsoft has ever produced. And we know that Microsoft has produced some very bad stuff.
So come on with me as I take you through a 4-day adventure with PC-BSD 10.1.
Let’s start, as is customary with reviews on this website, with the graphical installer.
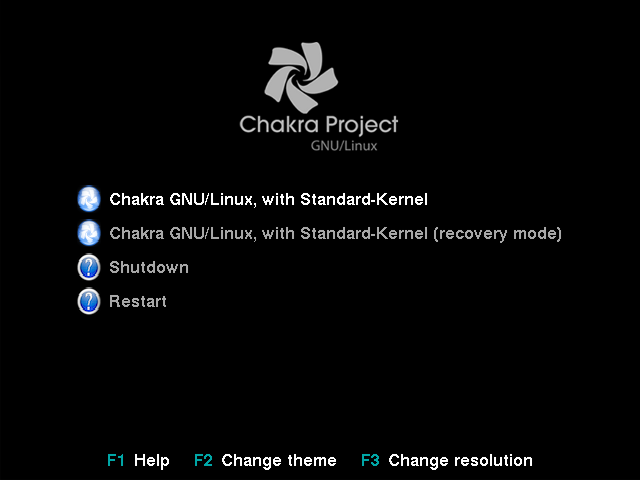
The Graphical Installer of PC-BSD 10.1: The ISO image I downloaded is the DVD/USB image that weighs in at 3.7 GB. For installations on real hardware, I transferred it to a USB stick using the dd command and worked from there. Figure 1 shows the distribution’s boot menu.
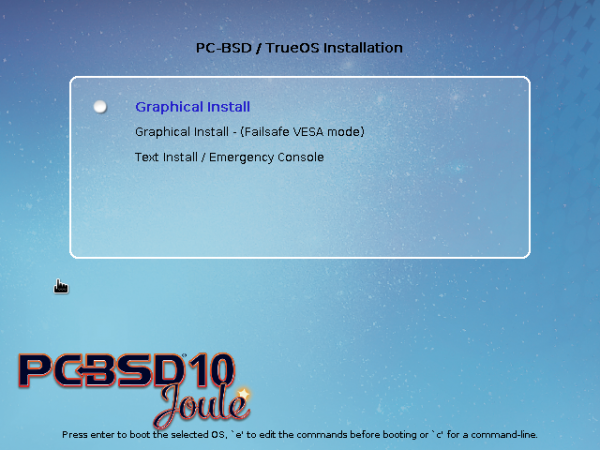
Figure 1: The boot menu of PC-BSD 10.1.
The image I used does not offer the option of booting into a live desktop, so it boots straight into the graphical installer. Figure 2 shows the default options for a desktop installation. The installer also offers the option to install a server edition of PC-BSD called TrueOS. I never tried that option and so I won’t write about TrueOS again in this review.
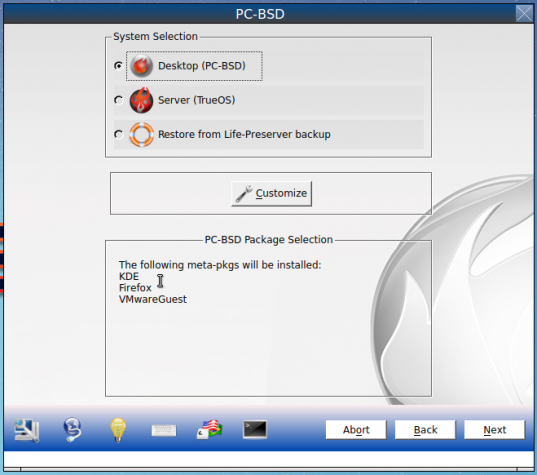
Figure 2: Graphical installer of PC-BSD 10.1.
Aside from KDE, other supported desktop environments are shown in Figure 3. There’s GNOME, Cinnamon, MATE and Lumina, a new desktop environment from the developers of PC-BSD. For this review, I only test-installed the Cinnamon, GNOME, KDE and Lumina desktops.

Figure 3: Desktop options available on PC-BSD 10.1.
You also have the option to customize the applications that will be installed. There’s really not a lot to choose from, but for the few there are, you do get to choose what to install and what to skip.
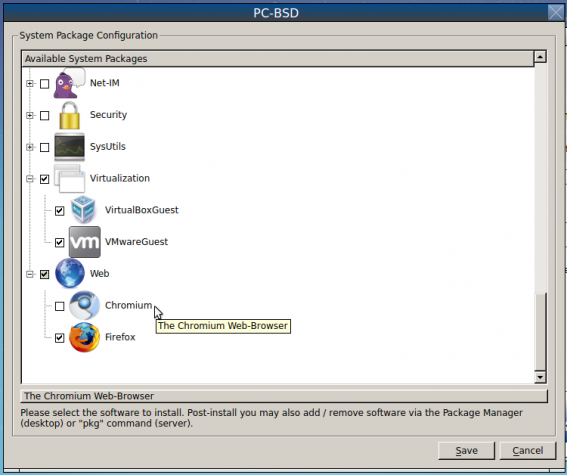
Figure 4: You can customize software for the installer of PC-BSD 10.1.
For disk partitioning, the installer offers basic, Advanced, and Expert modes. Basic and Advanced are via a graphical interface, while Expert is via a command line interface.
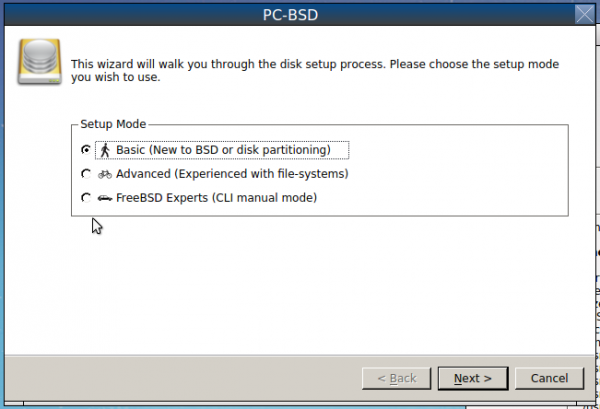
Figure 5: Basic, Advanced and Expert disk partition options of PC-BSD 10.1 installer.
The default mode of disk partitioning is Basic, with ZFS as the file system. With an existing operating on the target disk, the installer is unable to perform an automated dual-boot setup, so any attempt to dual-boot PC-BSD 10.1 with another OS on the same disk has to be done manually. The last time I attempted to dual-boot a PC-BSD release with another OS on the same disk was back in February 2011, and that was between PC-BSD 8.2 and Windows 7, long before this era of computers with UEFI firmware, Windows 8 and Restricted Boot. I’m yet to attempt the same using PC-BSD 10.1, but I’ll give it a try before the end of this month. However it goes, you can be sure that I’ll blog about it.
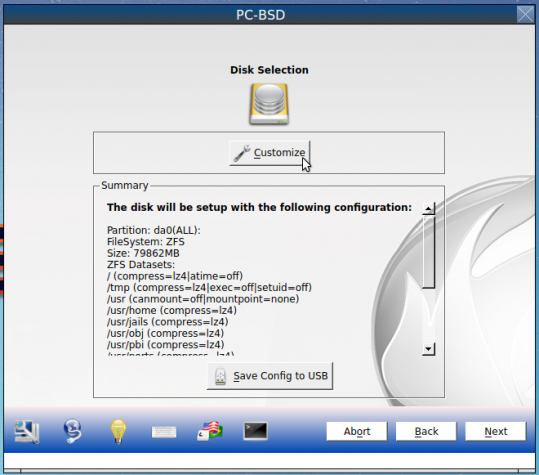
Figure 6: Default disk partition of PC-BSD 10.1. ZFS is the default file system.
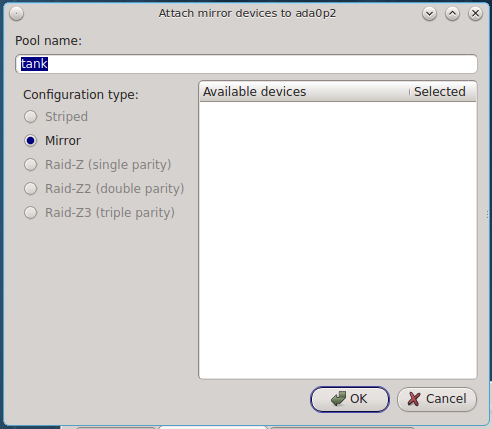
Figure 7 shows some of the Advanced disk partitioning options. In this mode, you can customize the pool name. The default is tank, and the default boot loader is GRUB.

Figure 7: Advanced disk partition options of PC-BSD 10.1 installer.
If you have the required hardware, you can have a system installed on basic RAID or any one of the supported RAIDz options. For the record, I am writing this review on a PC-BSD 10.1 KDE system installed on basic RAID, and the system is running nice and smooth. You’ll see a couple of screenshots showing the file system setup in the RAID system further down. On desktop installations, I’m not a fan of RAID and don’t recommend it, because it’s just a waste of disk space.
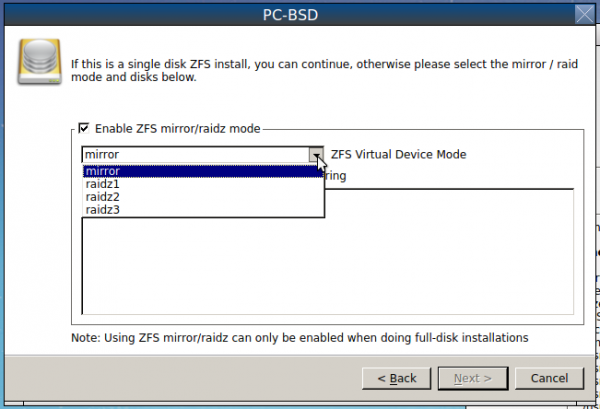
Figure 8: Disk mirror and RAIDz options supported by PC-BSD 10.1 installer.
On all the test systems that I set up, whether on real hardware or on VMware Player, I never encountered a single problem with the installer. And that brings me to booting into a newly installed PC-BSD 10.1.
PC-BSD 10.1 Boot Loader: Figure 9 shows what the boot loader’s menu looks like. And the boot loader is, of course, GRUB, the same GRUB that’s the default on virtually all Linux distributions. The default boot delay is just two seconds and you’ll have to hold down the left Shift key for about 5 seconds to see the GRUB menu.

Figure 9: The GRUB boot menu of PC-BSD 10.1.
Accessing the GRUB menu and pressing the Enter brings up the options shown in Figure 10. Booting into Single User Mode, like the default on Linux distributions, is unprotected. That, by the way, is a physical security risk.
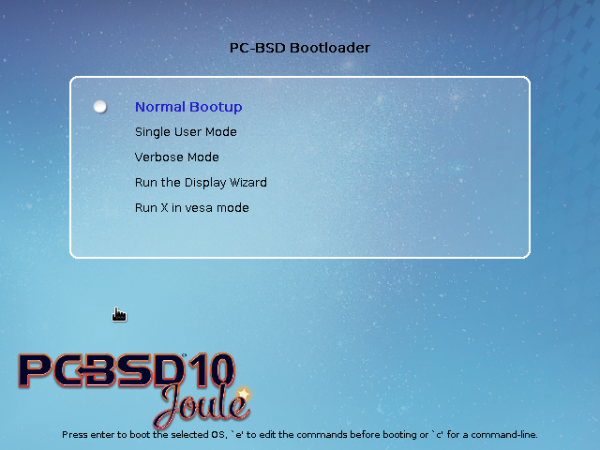
Figure 10: Extra GRUB menu options of PC-BSD 10.1.


Overall disappointed.
I have installed PC-BSD as VirtualBox guest, and guess what – PCBSD does not support file share by design with the host??
Impractical… And in addition to the very hostile attitude of BSD to NTFS and EXT4 file systems I simply reverted back to Linux/Windows.
A pure shame on BSD!
More than anything else, the project needs a QA team.
PC-BSD has all the features that can make it better than anything in Linuxland. It just needs to present a polished default installation, which shouldn’t be that difficult a task.
I just tried PC-BSD 10.1 using my favorite, Xfce (I don’t like KDE). Unfortunately, just as your experience with Cinnamon, it was dreadfully buggy. I did really like the Graphical Package Manager, though.
Yes, the package manager is really good.
Thank you for this interesting review. I had been considering installing PC-BSD to take a look at it, but even though I love KDE, it sounds like PC-BSD still has quite a number of minor issues to fix. I’ll pass on it for now, but still keep an eye on it. I’m disappointed that they include Cinnamon without making sure that it would work properly when chosen and installed.
Yes, the Cinnamon desktop was especially disappointing.
If BSD wants to be taken seriously, there is one thing that will push it into the Linux territory :
installation and working from an extended partition.
With computers coming with Windows occupying 3 partitions, most geeks-wannabe will boot linux/bsd in the extended partition. Simple as that.
But with UEFI and GPT being the default on newer computers, the issue of extended/logical partitions is history.
Locking forward to the FDE install review.
FDE, full disk encryption?
Yes.
If it works, I’ll post it late tomorrow. Dual-boot with Windows 7 on UEFI PC too.