This post shows how to dual-boot Ubuntu 14.04 and Windows 7 on a computer with two hard disk drives (HDD) and UEFI firmware. The test computer used for this tutorial has a 500 GB and a 320 GB hard drives connected, with Windows 7 Pro installed on the 500 GB HDD. The screenshots and descriptions in this tutorial show how to install Ubuntu 14.04 LTS on the 320 GB and setting up the Ubuntu 14.04 boot manager as the default boot device.
The steps involved are:
- Download an installation image of Ubuntu 14.04 from here and burn it to a DVD or transfer it to a USB stick
- Install Ubuntu 14.04 on the target HDD
- Set Ubuntu’s boot manager as the default boot device
Ready? Let’s get started.
Step 2. Install Ubuntu 14.04: Assuming Step 1 has been completed, reboot the computer with the installation media in the optical drive or in a USB port. Launch the installer and click through the first steps until you get to the step shown in this image. It is very likely that the installer will inform you that “This computer currently has no detected operating systems. What would you like to do?” Select the Something else option, then click Continue.

That should open the installer’s Advanced Partitioning Tool’s window. The two HDDs should be labeled as /dev/sda and /dev/sdb and their partitions should be listed directly under them. For the computer used in this tutorial, the target HDD is /dev/sda. Whatever you do here, don’t touch the Windows 7 HDD. As shown in this screenshot, the target HDD has no partitions on it, so I only needed to select the free space and clicked on the + button to start creating partitions. If yours has existing partitions on it, you may first have to delete them before creating new partitions.

That should open the installer’s partition editor. If you are new to the concept of disk partitions in Linux, it is highly recommended that you read Guide to disks and disk partitions in Linux. For an installation on a computer with UEFI firmware, you need at least three partitions, one of which must be an EFI partition. For this tutorial, four partitions were created – the EFI partition, and three other partitions. One is mounted at / (root), another at /home and the last is for Swap. For each partition that you’ll create at this step, all you need to modify are the values for “Size,” “Use as” and “Mount point.”

The first partition will be the EFI partition. The default size allocated by the Ubuntu installer for this partition is about 536 MB. From the “Use as” menu, select EFI boot partition. OK.

For the root partition, a disk space of 20 GB (20,000 MB) should be more than enough. The minimum required is actually 6.4 GB, so the extra should take care of future growth in disk usage. For file system (Use as), you may select the default (Ext4) or even btrfs. Be sure to select / from the “Mount point” menu. OK.

For the /home partition, assign the disk space you think you need and select /home for the mount point. OK.

For the Swap partition, a size of 4 GB (4000 MB) should be enough. From the “Use as” menu, select swap area. OK.

Back to the main partitioning window, you should see all the newly created partitions. Did you notice that we did not create a boot partition? That’s because on these systems, the EFI partition serves as the boot partition. Boot files for GRUB will be installed there. GRUB (the GRand Unified Bootloader) is the boot program used by Ubuntu and virtually all Linux distributions. Before clicking Install Now, change the entry in the “Device for boot loader installation” from /dev/sda to /dev/sda1. /dev/sda1 is the EFI partition.

It should look like the one shown in this screenshot. Install Now

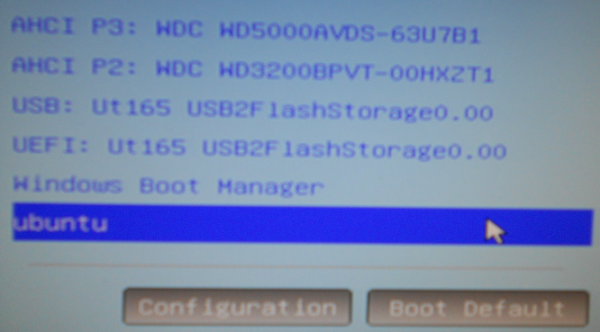
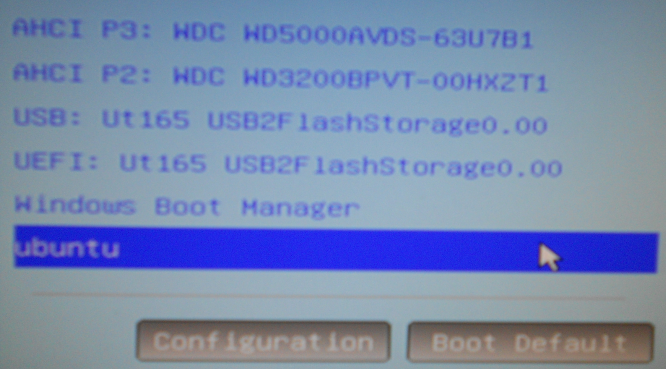
Step 3. Set the Default Boot Device: After Step 2 has completed successfully, reboot the computer. Before it reboots into the default boot device, press the F key that will take you to the boot menu. For my computer, it is the F11 key. This screenshot shows the entries in the boot menu of the computer used for this tutorial. The AHCI P3: WDC WD5000… entry is /dev/sdb, the Windows 7 installation HDD, while the AHCI P2: WDC WD3200… entry is /dev/sda, the Ubuntu installation HDD. Selectnig either entry will cause a boot failure. To boot into the Windows 7 or Ubuntu 14.04 HDD, select the matching OS entry. In this screenshot, it is either Ubuntu or Windows Boot Manager.
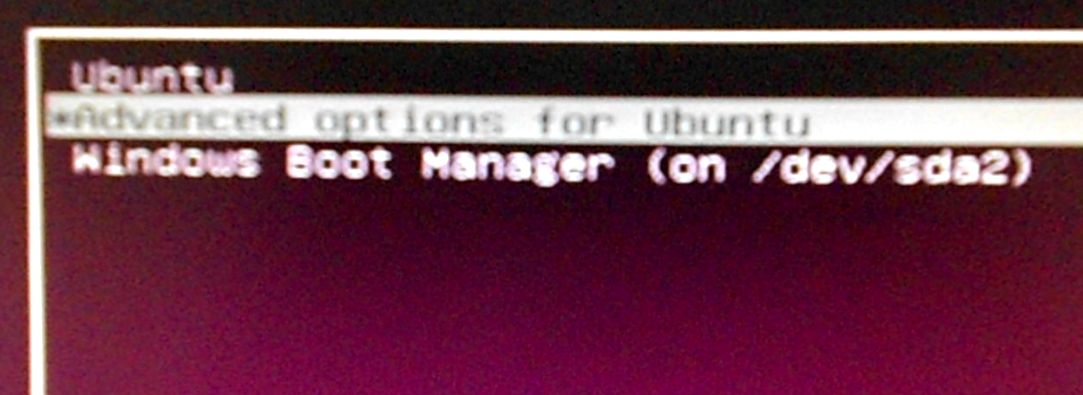
After verifying that you can boot into Windows 7 and Ubuntu 14.04, you should get into your system’s UEFI setup utility and set the default boot device to Ubuntu, which should have entries for Ubuntu 14.04 and windows 7 in the GRUB menu. You might want to read Boot managers and boot devices on a PC with UEFI firmware for a brief discussion of the subject in this step.
Ubuntu 14.04 and Windows 7 boot managers on UEFI hardware



Hp probook 4530s here with ssd main drive win 8.1 and just installed an hdd in the upgrade drive bay instead of dvd writer. Any suggestions or help when installing a linux os on the 2nd drive ?
None, really. Just be sure to specify that the Linux installer installs GRUB in the EFI Boot Partition of the 2nd HDD.
But even at that, some installer’s, especially Ubuntu’s and those based on it, will ignore that directive and install GRUB in the EFI Boot Partition of the 1st drive. That won’t break anything. It just means that the 2nd drive will not boot when not connected to the original PC.
IF that happens, you can install GRUB on it afterwards.
Hi
I got a message at the installer that says that the other operating system is not in UEFI and that I should not force to install ubuntu in UEFI, how do I do? How do I partition the second hard drive then?
If the other OS was not installed using UEFI, which means the computer firmware settings is set Legacy BIOS, then I don’t think it would even make sense to attempt a UEFI installation.
So perform a traditional MBR installation.
For such a setup, you can create the following partitions on the 2nd HDD: root partition (about 15 GB); home partition; and swap partition (1-2 GB). Then select sdb as the device for boot loader installation. That should do it, though it is likely that the installer will install GRUB on sda. If that happens, reinstall GRUB after installation onto sdb.
Thanks for the instructions it helped a lot. I did have issues with the install. After setting up Ubuntu on the second drive which didn’t have the EFI partition so I created a primary /boot partition. I went to reboot and it was no longer detecting my windows drive. Found that the boot MBR was corrupt and had to fix that by disconnecting the ubuntu drive and loading the windows CD to repair it. I then did not get a grub menu when booting so I ran sudo update-grub which found my windows partition and after reboot everything is working great. If I had to redo this process I would just disconnect the windows drive and install ubuntu on a second drive then reconnect the windows drive and run sudo update-grub.
Yep, that should be pointed out in the article, because the Ubuntu install installs GRUB in the first hard drive detected on the system, not the one you configure it to.
I have a 32GB SSD and a 500GB HDD, I’ve installed windows 10 on the SSD and I want to install a Linux distro on the HDD. I first tried installing Kali linux 2.0 and the installer couldn’t see the hdd, and then I tried installing Ubuntu and the same error. If I try going live any of the above distros I can see and access the HDD, but the installer doesn’t see it. Please help.
I’m using a 16GB usb to do the Linux installation.
With Ubuntu, can you see the HDD when you select the Something else option and go to the manual disk partitioning tool?
Btw, what brand of computer are you trying to install this on, and which version of Ubuntu?
No I can’t see the HDD when I select something else. I’m using a Lenovo U410. I’ve uninstalled the Windows 10 and installed windows 8, but still the same thing, I can’t see the HDD even under “something else”
Can you see the HDD from the computer’s boot menu?
I had a similar situation yesterday where I could not see one of the HDDs while trying to dual-boot on a system with two HDDs. It turned out that the HDD was not detected by the firmware, so the Linux installer could not see it too. I had to disconnect/reconnect the SATA cables several times before the HDD was detected.
So check if you can see he HDD in the computer’s boot menu. F11 or F12 should get you there.
Yes I can see the other HDD on the boot menu. I can even see it when I boot live from the USB installer.
What I’m thinking is this; it seems Linux wants to only install on the disk drive that has the Windows Boot Manager on it, dunno if thats whats happening and if so, what can I do as my SSD is quite small 32GB
Disconnect the drive with Windows on it and try again. That was the trick I used for writing How to dual-boot Windows 10 and Ubuntu 15.10 on two hard drives.
First thank you for this post!
The thing is, I am using an laptop also with two disk, just before I click “install now”, I cannot choose the decide for boot loader installation to the efi partition, it just let me choose between /sdb or /sdb3 the last one is my root partition, is it OK if I choose just /sdb?
That should work also, though I find it interesting that it doesn’t allow you to choose the EFI partition.
Yeah, so do I. Thankfully it actually works anyway, thank you very much
Hello! Very nice guide!! I would like to realize this configuration. Right now I have Windows 7 installed on a SSD and I want to install Ubuntu on a second hard drive.
I have asrock Z68 extrem 4 as motherboard. Unfortunately I can’t visualize “Windows Boot Manager” in the Boot device list. Which might be the reason? Thanks in advance!
Not sure, but that should not stop you from installing Ubuntu on the other HDD.
Do you see Windows Boot Manager in the UEFI setup utility?
Uhm, no! I can’t see Windows Boot Manager in the UEFI setup utility. Even there, I can visualize only the hard drive.
But can you boot into Windows? If you can do so now. Then reboot and access the boot menu again. The Windows Boot Manager should show up. It happens on my UEFI computer too, so it’s not just specific to yours.
And it’s not a Linux problem, but a UEFI implementation problem.
When creating the partitions there is no EFi boot partition option available for me in the drop down list. I am on an alienware m17xr4 with windows 7 installed on a 120g SSD Drive. Trying to install Ubuntu on my 3rd hard drive in UEFI Mode.
That happens only if you did not boot the UEFI-aware version of the installer. If you access the boot menu of the PC, do you see two entries for the installation media?
Hi,
Great guide! Will it work with win 8.1 and Mint 17 as well?
Yes, and I’ve actually written oone for Mint and Windows 8. See Dual-boot Windows 8 and Linux Mint 17 on a PC with 2 disks and UEFI firmware.
I can boot in each OS but not have grub. Anyway, it is good for me, thanks
Hi. The Kubuntu dont have the option use as EFI boot partition. What i do?
Is that the latest version of Kubuntu?
See this forum post.
I’m using the 14.04 and my mb is a AsRock a55m. I dont understand why dont show this option.
The A55 series comes with UEFI firmware, so it should see that option. Did you check to see if EFI compatible ROM is enabled in the UEFI setup utility?
Hi. It was in Legacy and I change to UEFI. I saw the option EFI boot partition and I did the instalation but the grub not recognized the windows.
But what exactly do you mean by “grub not recognized the windows.” Can you boot into either OS?