This is the LVM Physical Volume setup window. The File System Type should already be pre-selected with the right option. If not, select it. For the size, type in what you would like to allocate. The system used for this tutorial had about 300 GB of disk space, and I allocated 200 GB of that to the Physical Volume. On a hard drive, where the Physical Volume is the second partition being created, Anaconda will create it as a primary partition, so you do not have to check Force to be a primary partition. OK.

Back to the main partitioning window, you can see the two partitions you just created, plus the free space still unallocated. The next task involves creating a Volume Group and the logical volumes. To do that, select sda2, and click Create.

Select LVM Volume Group.

This is where the Volume Group and the logical volumes will be created. By default, Anaconda assigns a Volume Group name based on the system’s hostname. So, in this example, the hostname is hum, therefore, the default Volume Group name is vg_hum. Anaconda does about the same with the names of the logical volumes. But you do not have to stick with the system-assigned names. Choose simpler ones.

See, the Volume Group name has been changed to just hum. Now to creating the logical volumes. Click the Add button. Note that as with the default installation, we are going to create logical volumes for the root partition, home partition and Swap.

This is the logical volume setup window. The only options to modify here, are the Mount Point, Logical Volume Name, and Size (in megabytes).

Here is the same window with the values for the root logical volume specified. When specifying the size of a logical volume, you only need to allocate just enough to install the system. You can always grow or expand it with free space from the Volume Group. OK.

For the home logical volume. OK.

And, finally, for Swap. OK. For guidance on how much disk space to allocate to Swap, see this answer to a question at the Forum.

So, the Volume Group and logical volumes have been created. Click OK to exit this window.

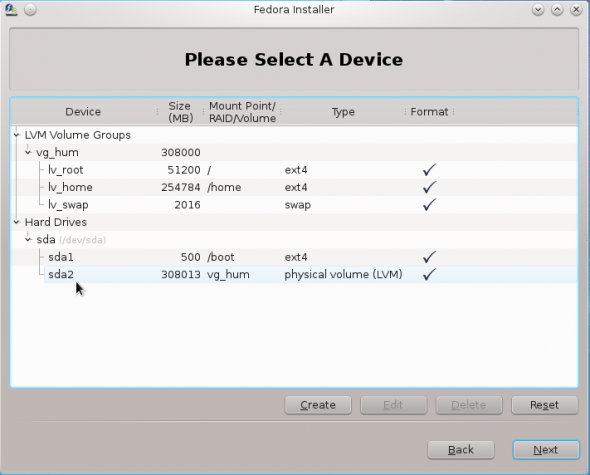
Back to the main partitioning window, you can see all the partitions and logical volumes, plus the free, unallocated space. That free, unallocated space could be used at some point in the future to expand the Physical Volume or to install another distribution or operating system in dual-boot fashion. Notice that I also left some space unallocated in the Volume Group. That can be used to grow any logical volume that runs out of space. And that expansion can be done online. That, is the beauty of LVM. Click Next to continue with the rest of the installation.

At the boot loader configuration step, you have the option to choose where GRUB, the boot loader, will be installed. By default, the installer will want to install it in the Master Boot Record. On a standalone system, that is, with Fedora as the only OS on the hard drive, that is where it should be. At this step, you may also opt to configure a boot loader password, for added security.

That should do it. For basic questions or feedback, use the comments box, or for more engaging discussions, post at the Forum.


