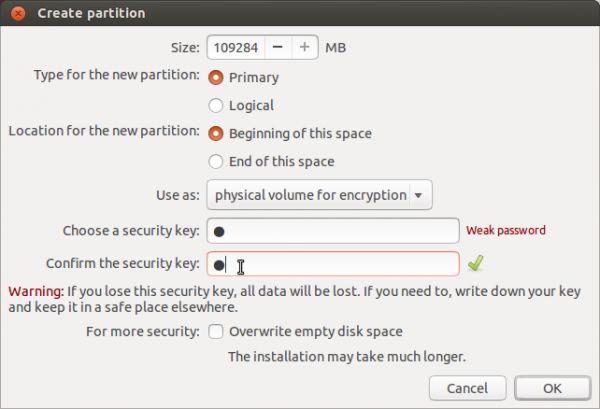
Partition number three will be for Swap. This is disk space that the system may use as virtual memory. The default is about 2 GB, but you can go higher than that. It all depends on how much memory is installed. See recommended disk space for Swap for help in deciding how much (disk space) to allocate. Be sure to select “swap area” from the “Use as” dropdown menu before clicking OK.

The last partition will be mounted at /home. This is where your home directory and that of every user account you create on the system will be located. How much disk space you allocate to it will, of course, depend on what is available. The file system is ext4. OK.

With all the partitions in place, the last task in this step, before moving on to the next one, is to select where the boot loader will be installed. By default, the installer installs it in the Master Boot Record (MBR) of disk number 1. But the best location is in the MBR of disk number 2, where Ubuntu 11.10 will be installed. So change the Device for boot loader installation from sda to sdb.

Make sure that sdb is selected from the boot device menu before clicking Install Now. If you neglect to do this, GRUB will be installed in the MBR of sda, overwriting Windows boot loader. After you have made the change, click Install Now.

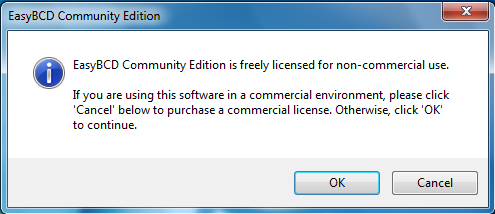
After installation, the computer will boot into Windows 7, unless you change the boot device from the BIOS boot menu. The final step is to add an entry in Windows’ boot menu for Ubuntu 11.10. You achieve that by messing with the Windows Boot Configuration Data (BCD). There are several programs for doing it, but the best I have found is EasyBCD. The latest edition is free for personal use, but cost about US$25 for commercial use. You may download it from here. Scroll all the way down and look for the link that says “Download free for limited, non-commercial use.” Install it as you would any other Windows application. When you launch EasyBCD, you should see this friendly message from the developers. Make the right choice.
Disclaimer: I have no financial ties to NeoSmart Technologies, the company behind EasyBCD. I recommend it because it is the best I have come across. If you know of any that is better, and free, please post the link in the comments box.

This is the main view of EasyBCD. We cannot do anything here, so click on the Add New Entry tab.

While on the Add New Entry tab, click on the Linux/BSD tab, then select “GRUB2” from the Type dropdown menu. Edit the Name field to reflect the edition of Ubuntu, then click on Add Entry. Click on Edit Boot Menu to see the result.

From Edit Boot Menu tab, you can see the entries as they will appear on the boot menu and as you will see them every time you (re)boot the computer. When you are satisfied that you have done everything right or done all the right stuff, exit EasyBCD, reboot Windows and see if you can boot into Ubuntu 11.10 from the Windows 7 boot menu. If you followed this guide to the letter, there should be no problems booting into either operating system.Bon Appetit.






I am using windows 8 OS and i also installed Ubuntu 12.10 in other drive, but at booting process only windows 8 are shown. How i boot Ubuntu.
Dude, you rock!!! This worked perfectly!
Hi, I put my 2nd hard drive on my laptop where CD Reader was located before, and I dont think it is possible to boot the second drive first. any ideas?
Why not? Did you try changing the default boot device in the BIOS setup utility?
An extremely well written and illustrated guide to dual booting. The linked articles regarding partitioning and dual booting advice were good too (but the swap partition advice link was dead).
I’d stick with the EasyBCD step as it’s beginner and Windows friendly. The aptly named grub is ugly and not easy to tinker with or repair.
Thanks for your help.
That’s how to do a walk through, lots of relevant screen-shots. Worked a treat for me, many thanks.
I have just installed Ubuntu 11.10 in the 2nd HDD (first has Win 7)
according to your instructions and everything worked fine, thank you for the excellent article
Hello,
I did all the steps but after booting into Ubuntu i get a screen with ubuntu wallpaper in it and it is totally blank and there is nothing .Finally i have to shut down the computer from the cpu button.
Also i can login using my password..but after login i get this blank screen with nothing on it but the default ubuntu wallpaper
Something obviously went wrong with the Ubuntu side. Try reinstalling it.
hi,
i followed all your steps, and everything went well.
but when i get the options screen on whether to load windows 7 or ubuntu 11.10 and when i select ubuntu 11.10, nothing happens but just a blank screen with some GRUB syntax appears, thats it!!!
please help me out on this issue
This tutorial will soon be modified to show that the EasyBCD step is not required. Here’s what you could do.
After installing Ubuntu, reboot the PC, get into the BIOS and make the second drive the default boot disk. so, when you reboot, you will see GRUB’s menu, with an entry for Windows and Ubuntu. That should be all you need. Ignore the EasyBCD part. It just adds an unnecessary complexity to the process.
There is a better way for even Triple Boot possible with Win XP, Win7 and Ubuntu 11.10 on the same hard disk. It is as simple as follows.
First install WinXP on one primary partition.
Second install Win7 on another primamry partition.
Now we have WinXP and Win7 dual boot on same hard disk on two separate partitions.
Running on WinXP, download and run “wubi.exe” to install Ubuntu 11.10 as a “big” file on hard disk. The file may locate on any Windows partition.
Reboot computer you will see Ubuntu as one of the boot options. To start it correctly, choose “Previous System” first, then choose Ubuntu.
Now we have Triple Boot WinXP/Win7/Ubuntu ; )
Try yourselves and have fun !
I have 2 internal 1TB hard drives, and I dual-boot Windows 7 (strictly for games) and a Ubuntu spinoff. My second drive is mounted as /home whenever I make a new installation, and my boot drive has a 650GB Windows partition (for lots of games) and the rest for the Linux system drive, which is an embarrassingly large amount for Linux with 5 GUIs installed.
That’s what *I* do…
The easybcd step is completely useless, it is not needed to change your win hd at all. grub2 is all you need and you have it already. Just set 2nd hd as default in your bios. If you are slow you can set the grub timeout in /etc/default/grub and in the case you want win first you rename /etc/grub.d/30_os-prober to /etc/grub.d/09_os-prober. after that change run update-grub (also needed for timeout changes).
In the case that your linux and win install is using efi bootloader (which you do not describe, but it is also possible) you can add a boot entry for win to boot from another hd (basically another efi boot setting not hd) by default. To do so create a new /boot/grub/custom.cfg – the file is sourced on boot, no need for update-grub. Btw. it does not matter which distro you install, it just needs a recent grub2 bootloader. maybe os-prober/grub2 will find those files automatically at one point so that this step is not needed anymore.
if search -nf /EFI/Microsoft/Boot/BOOTMGR.EFI ; then
menuentry ‘Microsoft Bootmgr’ {
search -sf /EFI/Microsoft/Boot/BOOTMGR.EFI
chainloader /EFI/Boot/BOOTX64.EFI
}
fi
The method you described is one method. The EasyBCD step is another. Choices. Use the one that you feel most comfy with.
And a new user will feel a lot more comfy using the method from this article than messing with GRUB files.
They are already correct if you don’t use efi. os-prober finds other os incl. windows systems and those are automatically added to the grub menu. Just W7/8 in efi mode is not automatically found, but those installs are rare. It even finds recovery win partitions which you might not like to have in your menu, then you would need to hack it a little bit. By default the bios changes the bootflag to the recovery when you press a special function key at boot, otherwise it is hidden, but os-prober lists em for direct boot too. What you should not forget, if you only want to boot Linux from time to time you could use als quick boot selection and select the other hd, otherwise Linux would be completely hidden.
I think a possible advantage to have Windows manage the booting is that if you remove the second disk, Windows can/will still boot.
If you boot to disk 2, and later want/need to remove it, then you can tell bios to boot from disk 1. But if you are booting from disk 2 then you can NOT just remove disk 1 and keep going as with only a single disk in the system it will become disk1 and GRUB may get “confused”.