The tasks covered in this tutorial are:
- Enable Network Time Protocol
- Enable the firewall
- Install a printer (this page)
- Add a user account
- Install Java JRE plugin
3. Install a printer: Adding a printer to a distro like Pardus is very easy. You really do not have to do anything but connect the printer to the PC. On ALT Linux, however, you have to do more than connect the printer to the PC. You have to manually add it yourself. But that does not mean that it’s a difficult process, It’s actually very easy. Here are the steps involved:
Note: CUPS, the program used to manage printing and printers is already running.
Launch a Web browser from the menu, Applications > Internet > (Mozilla Firefox or Epiphany), and type localhost:631 (the http:// part is not necessary) into the address bar. You should get the page shown in the screenshot below. Then click on the ‘Administration’ tab.

On the ‘Administration’ page, click on the ‘Add Printer’ button.

Clicking on the ‘Add Printer’ button should bring up the ‘Printers’ page. Select your printer from the list of printers detected by the system and click ‘Continue.’
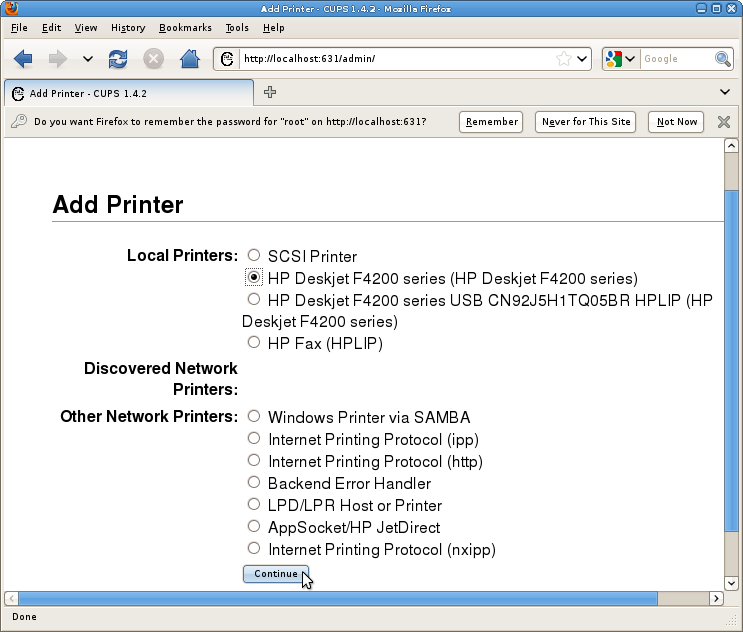
You may now personalize the printer, i.e., give it a name that appeals to you. You may leave everything else unchanged. ‘Continue.’
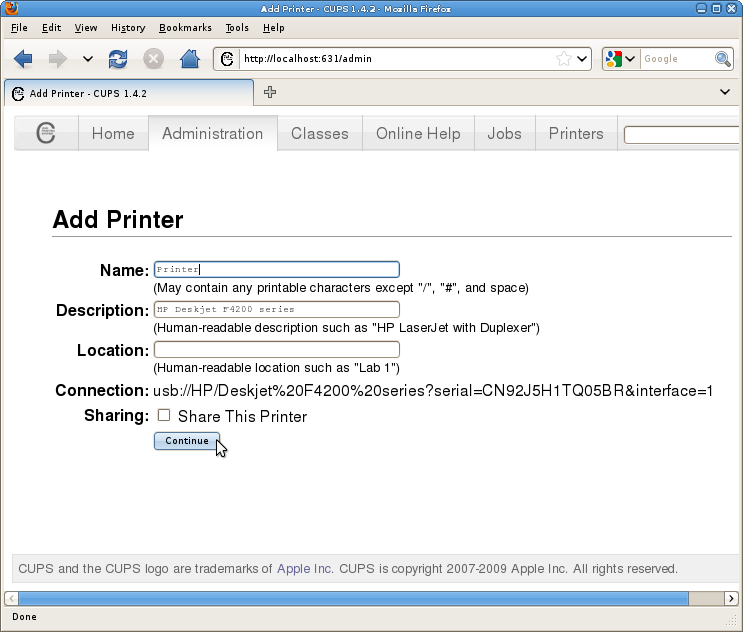
On this page, the printer’s model should already be highlighted. Click the ‘Add Printer’ button.
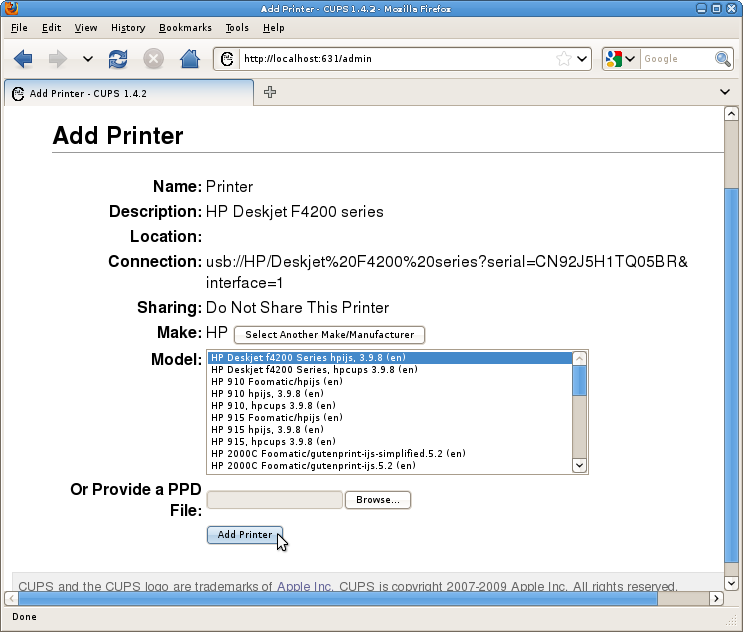
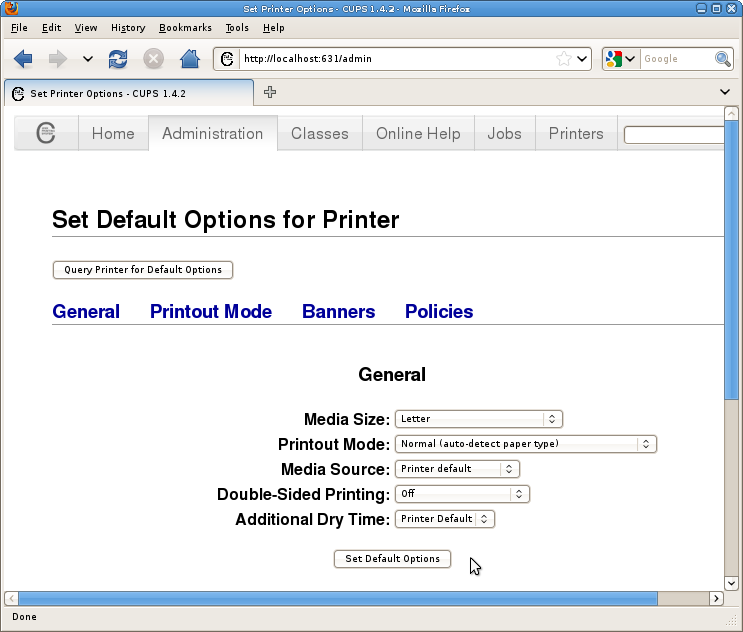
This is the printer’s default settings page. You shouldn’t have to make any changes here. Click on the ‘Printers’ tab.
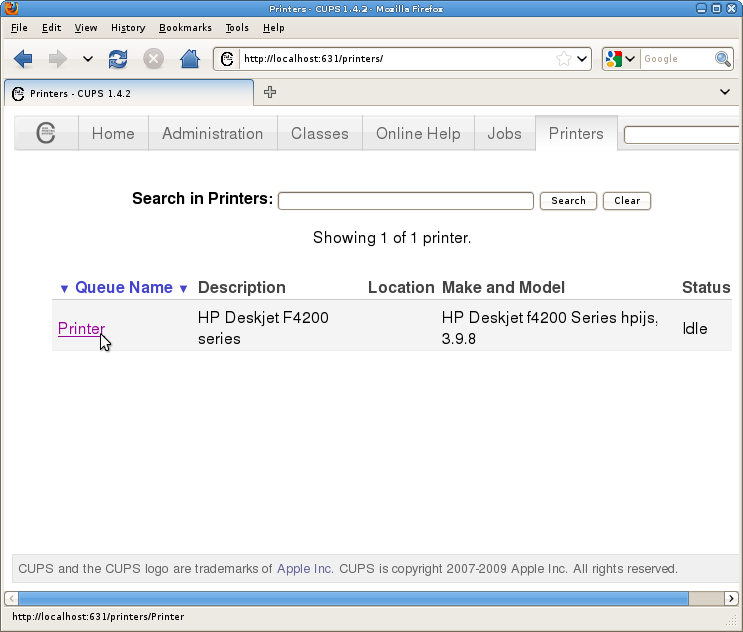
Clicking on the ‘Printers’ tab should bring you this page where all the printers configured on the system are listed, together with the status of each printer. If you click the Printer that you just added, you’ll be taken to the administrative page of the printer. You may then print a test page and perform other admin tasks on the printer.
