Disk encryption is one method you may use to enhance the physical security rating of your computer. From my experience, it is rarely used, which is a shame because it is one of the most effective safeguards against unauthorized physical access to data stored on a computer.
Disk encryption, which can be full disk, or per partition, may be configured during or after installation, but the most effective is full disk during installation. The following Linux distributions listed on this website, have support for configuring full disk encryption during installation:
When disk encryption is enabled on any of these distributions, the installer will prompt you for a passphrase which will be used to lock or encrypt the disk. The image below was taken during an installation of Fedora 13.
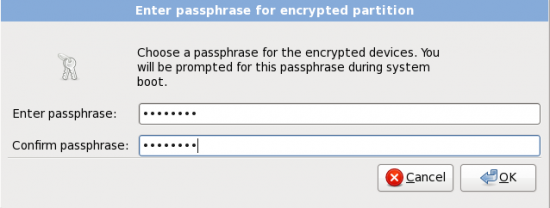
Here the installer requires you to type in the passphrase that will be used to encrypt and decrypt the disk
NOTE: The objective of this tutorial is to show you how to manage disk encryption keys or passphrases on a running system, and that involves creating a backup passphrase or encryption key, and deleting an encryption key (enabling and disabling key slots).
After installation, and during system bootup, you will be prompted for the passphrase before the computer completes bootup. Without the correct passphrase, you will not be able to boot into the system. The image below was taken during bootup of a Sabayon 5.3 installation.
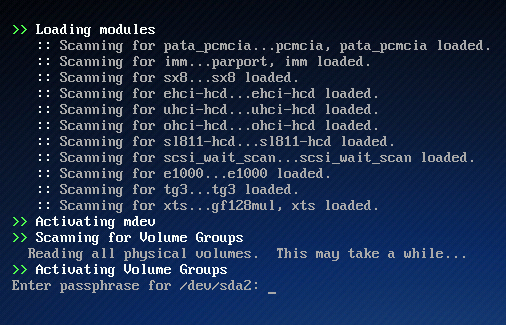
The disk encryption passphrase is being requested.
The rest of this article assumes that you have configured disk encryption and have booted up successfully. Now, let us get to the point of this tutorial – managing passphrases and key slots.
Though just one passphrase was set during installation, the system actually makes allowance for up to eight (8) passphrases. Each passphrase is designed to fit into a Key Slot. The best way to describe this, in layman’s terms, is to imagine a door with eight different keys (and eight key locks). Each key (passphrase) fits into a particular lock (key slot). When the door was first made, only one key (and its corresponding key lock) was activated. If you later activate any of the other keys, that is, more than one key is active at a time, you will still need just one key to open the door. The other active key(s) serve as backup(s), in case you lose or forget the main key.
And that is how the disk encryption system works. You are allowed to set up to eight (8) passphrases, but you need just one to unlock the disk during bootup. When more than one passphrase is set, any one may be used to unlock the disk during bootup, not just the one that was specified during installation.
With more than one passphrase active, you can delete a key when you feel there is a need to – for example, when you think that a key has been compromised, or when you have forgotten it. To view the status of the key slots on your system, launch a shell terminal and type cryptsetup luksDump /dev/sdaX where “X” is the encrypted disk (partition). In the default Sabayon 5.4 installation used for this tutorial, the encrypted device is /dev/sda2. So the correct command used is cryptsetup luksDump /dev/sda2
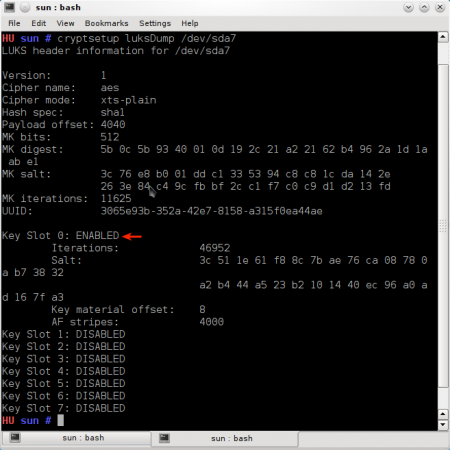
Output of cryptsetup luksDump
NOTE: The first key slot is Key Slot 0, the second key slot is Key Slot 1, …, and the last key slot, key slot eight is Key Slot 7).
In the image above, you can see that there are eight key slots, but only the first key slot, key slot 0, is in ENABLED status. This will always be the case when you first configure disk encryption. As noted earlier, you can delete a key (that is, disable the key slot). However, if you try to do that without creating a backup key, the system will try to discourage you (see shot below).

In the act of deleting a key
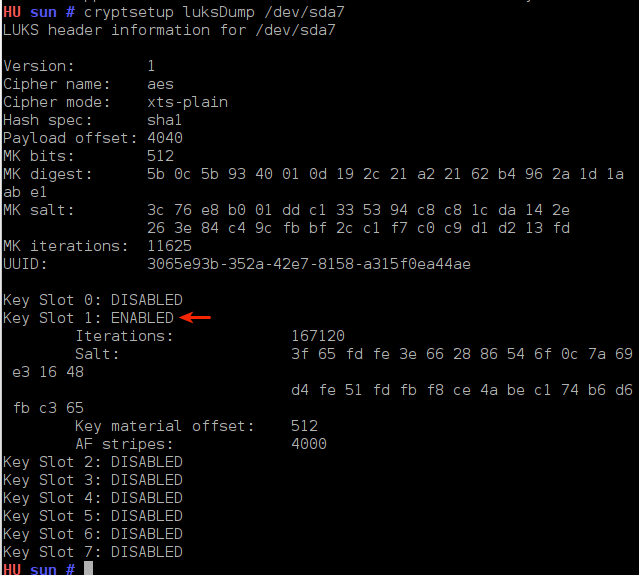
So if you think there is a need to delete the passphrase set during installation, the first thing to do is to create a backup key. And you accomplish that by typing the following command: cryptsetup luksAddKey /dev/sdaX –key-slot=1. Here, you are adding a key to key slot 1, that is, to the second key slot. (recall that we start from key slot 0, key slot 1, … key slot 7). You can add a key to any slot. It does not have to be next to the one you are going to delete.

Creating a backup passphrase




Opensuse also supports disk encryption (and LVM) natively in its GUI install program.