This short tutorial shows how to delete boot managers from a UEFI boot menu. It might not apply to all computers, but if your computer is anything like mine and you install and reinstall Linux distributions and other operating systems as often as I do, I think you’ll like to know how to remove those boot manager entries that you no longer need.
NFTs were hot in 2021. They will be even more so this year and beyond. NFT South is a conference where NFT enthusiasts will meet to explore and celebrate the different use cases of NFTs. It’s going to be a fun event. Get your ticket today!
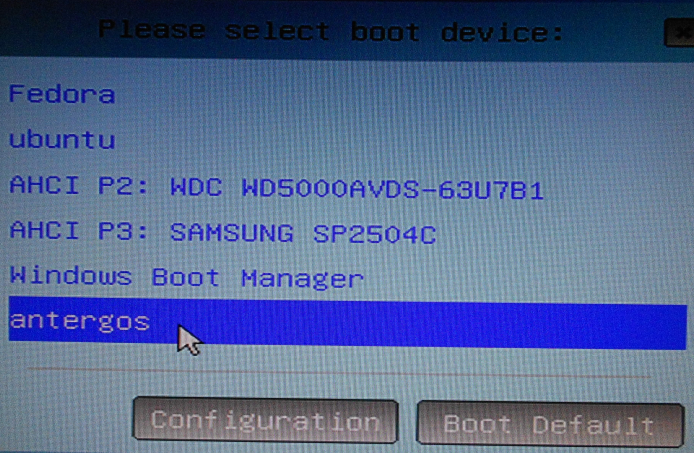
That’s because for every operating system you install, an entry is added to the EFI System Partition (ESP), which, then, shows up in the computers boot menu. This screenshot shows what the boot menu of my main test computer looks like. At the time this screenshot was taken, only Windows 7 and Ubuntu 14.04 were installed on the hard drive connected to the computer. That hard drive is the AHCI P2: WDC WD5000… entry.

To remove unwanted entries from the boot menu, the <em>efibootmgr</em> command is the userspace application to use. When logged into the installed Linux distribution, type the following command, as root, to delete a specific entry: <strong>efibootmgr -b 0003 -B</strong>. The number (0003) is the hexadecimal number representing the entry you want to delete. Those hex numbers and other details are shown in the output of the <strong>efibootmgr</strong> command. After issuing the command a couple of times on my test computer, I was able to get the boot menu down to what it looks in this screenshot. Details on this operation and also how to change the EFI boot timeout are available in this forum post.


