If you have an existing installation of a Linux distribution, like Fedora KDE or Kubuntu, that uses the KDE Plasma desktop environment, and you want to add an extra hard disk for storage, the graphical application to use is called KDE Partition Manager. This tutorial gives you a step-by-step guide on how it to add and automount that extra hard disk to your Linux installation.
When completed, you’ll have an extra hard disk that you can use to store your data. The best part is that the extra hard disk will be mounted automatically any time you reboot the computer.
If you want to do the same thing on a distro that uses the GNOME desktop environment or a desktop environment that uses the same framework, the application to use is called Disks or GNOME Disks. Then, how to add and automount a disk using GNOME Disks is the article you want to read.
To start with KDE Partition Manager, click on your desktop’s menu icon and type partition into the search field. KDE Partition Manager should be the first result listed. Press the Enter/Return key on your keyboard or click on it to launch it.
The main interface of KDE Partition Manager is shown in Figure. 1. The left panel will show a list of the hard disks connected to the system. The test installation of Fedora 41 KDE used for this article had 2 hard disks. The first, in focus here, is where Fedora 41 KDE is installed. Unless you have other plans, don’t mess with it.
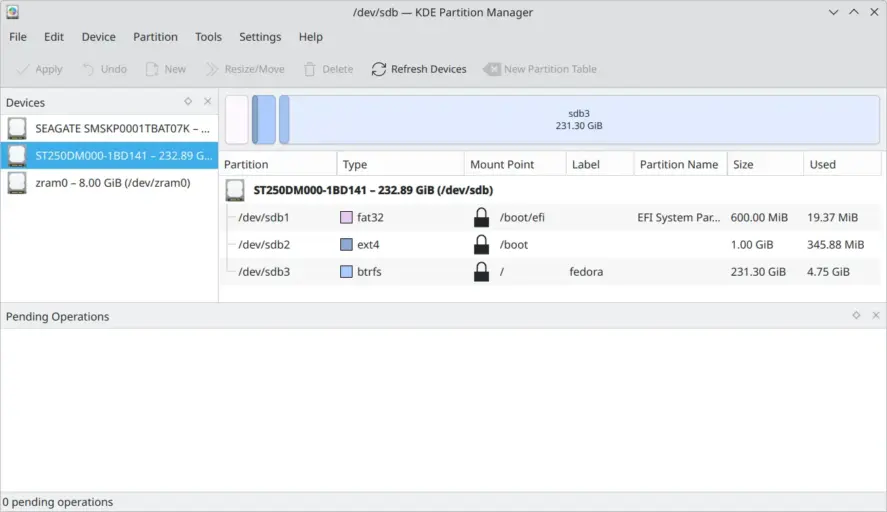
Figure 1: KDE Partition Manager showing installed hard disks.
Figure 2 shows the second hard disk listed. That is the one I want to use for extra storage. It already had a GPT partition table, so I didn’t have to create a new partition table on it. If yours is brand new or has an MBR partition table that you want to convert to GPT, then you’ll have to click on the New Partition Table button to create a GPT partition table on it.
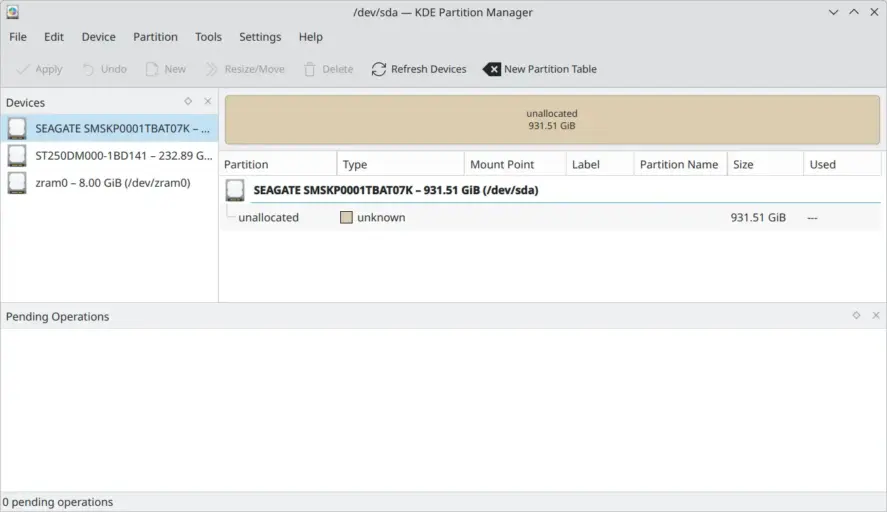
Figure 2: KDE Partition Manager showing the extra hard disk that will be added to the system.
Otherwise, right-click on the main body of the disk and select New to begin the process of creating partitions on it.
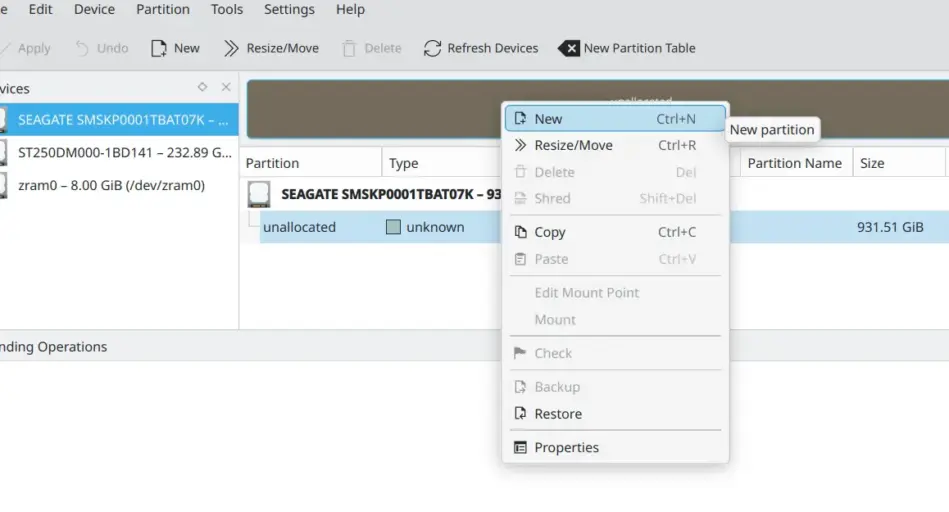
Figure 3: Starting the process of creating partitions on the hard disk.
The partition creation settings are shown in Figure 4. For my test installation, I chose to create just one partition on the 1 TB hard disk. Feel free to create as many partitions as you need. The settings to change are File system, size, and Permissions. I chose btrfs file system, but you may opt for Ext4 or any other in the list. If you are dual-booting a Linux distro with Windows 11 and you want a shared storage that can be accessed from your distro and Windows, choose NTFS.
If you want to encrypt the partition, you’ll have to check the Encrypt with LUKS checkbox. Then assign a size suitable for the partition you want to create. You don’t have to specify any value in the Free space before and Free space after fields.
Finally, change the Permissions to Everyone, then click OK.
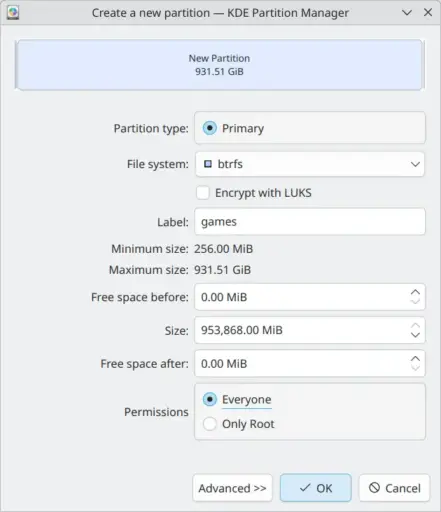
Figure 4: New partition settings of KDE Partition Manager.
Now apply the changes you made by clicking on the Apply button.
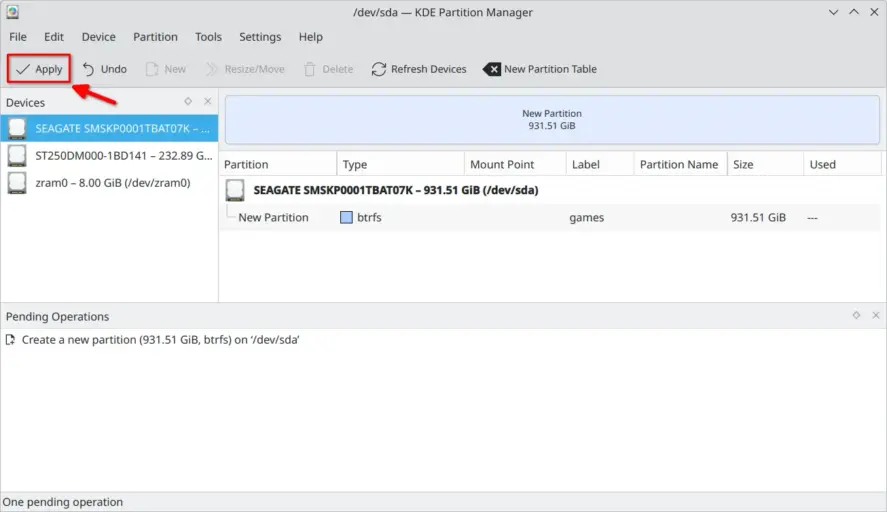
Figure 5: Button to apply changes made in KDE Partition Manager.
You’ll be prompted to confirm, Go right ahead and click on the Apply Pending Operations button.
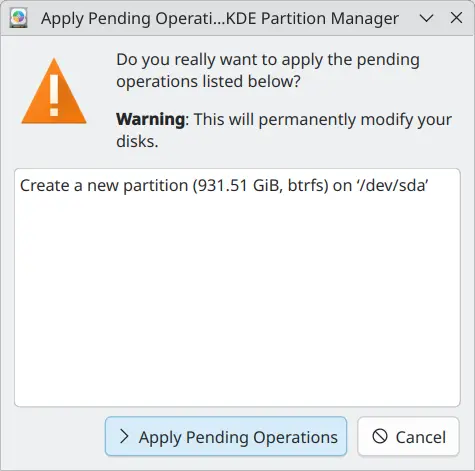
Figure 6: Apply pending operations made in KDE Partition Manager.
If the changes are applied successfully, click OK in the window similar to the one shown in Figure 7.
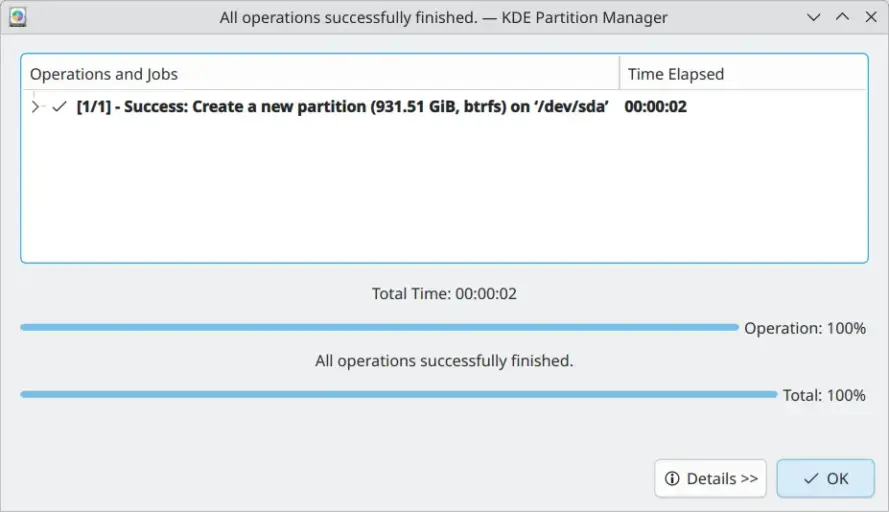
Figure 7: Changes successfully aplied to KDE Partition Manager.
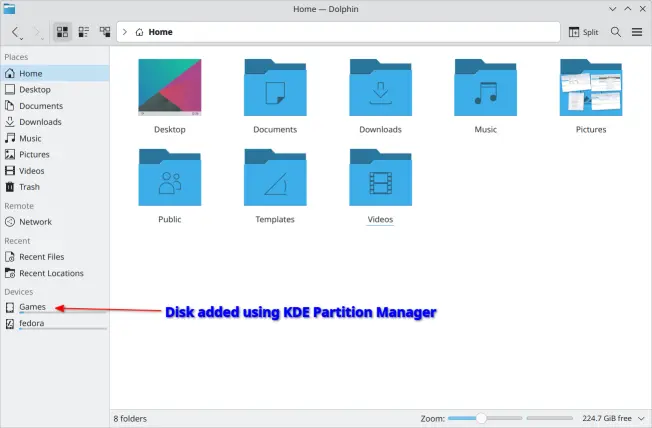
Now the disk is formatted and ready to receive content. The only task left is to configure it so that the system will mount it automatically whenever you reboot the computer. Doing that usually requires editing the /etc/fstab file manually from the command line, but you can accomplish the same thing from KDE Partition Manager.
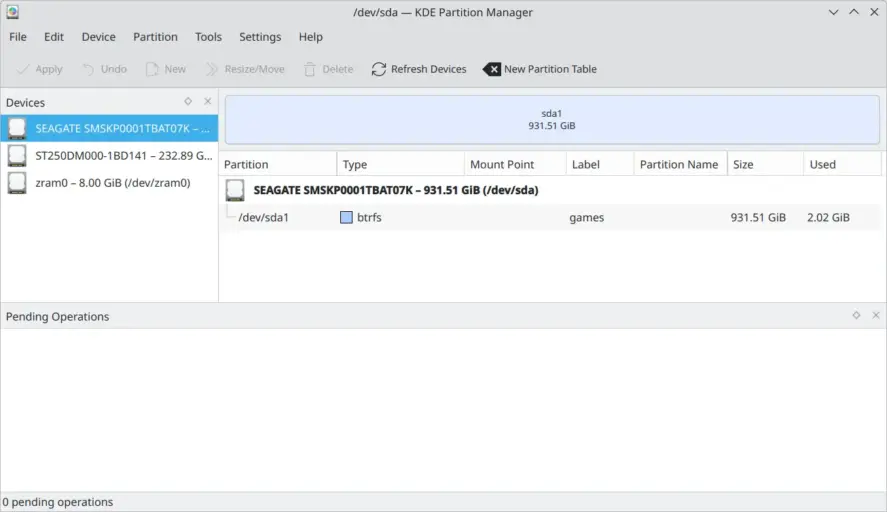
Figure 8: The disk newly added to the system using KDE Partition Manager.
To do that, right-click on the main body of the disk and select Edit Mount Point.
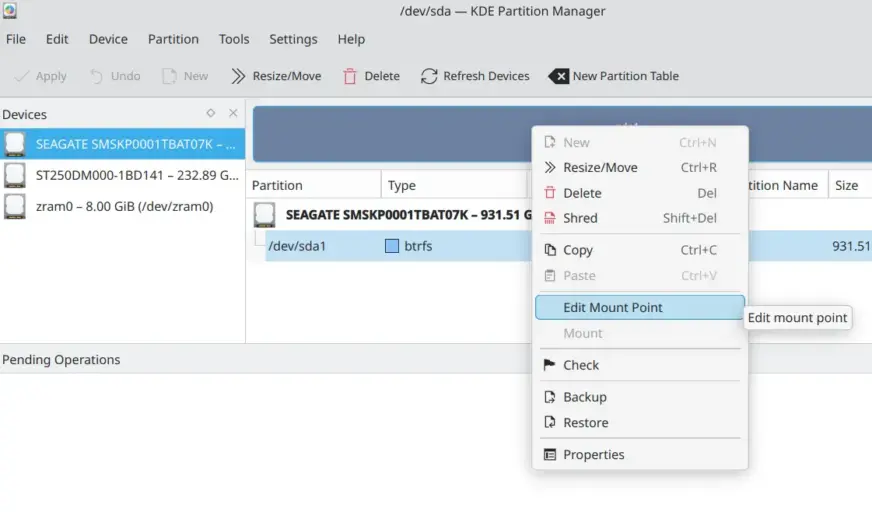
Figure 9: Edit Mount Point option in KDE Partition Manager.
In the window that opens, which should be just like the one shown in Figure 10, select UUID for Identify by, then specify a Path. The path will be the mount point of the partition and does not have to already exist. To make sure your system will boot regardless of what happens to the new disk, keep the Don’t prevent the system from booting if not mountable checked. Then check Users can mount and unmount, so that all users can perform those tasks on the partition.
That’s the bare minimum you need. For more info on the other options in this windows, consult the man pages of the mount and fstab commands – man mount and mount fstab. OK.

Figure 10: KDE Partition Manager’s mount point settings.
Clicking OK in the window shown in Figure 10 should open the one shown in Figure 11. The text in the window is just informational. And don’t be alarmed, because the existing file (/etc/fstab) will not be overwritten. Rather, a line for the new disk will be appended to the /etc/fstab file. So go ahead and click the Save changes button.
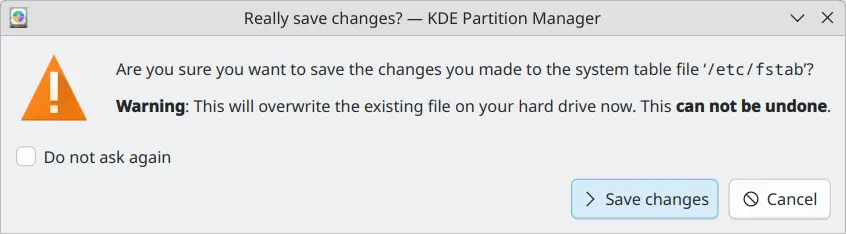
Figure 11: An informational window of KDE Partition Manager.
With that, you just completed the point-and-click part of adding a hard disk to Linux using the KDE Partition Manager. The last task will have to completed at the command-line – if your distro uses systemd. So launch a terminal application and type the command shown below. The point of running the command is to make the system manager aware of the changes you just made to the filesystem table. You’ll cause yourself unnecessary pain and grief if you don’t complete this command before rebooting the PC or attempting to use the disk on a systemd-based distro.
# run this systemd command after editing the filesystem table
sudo systemctl daemon-reload
And that’s all! When next you reboot the computer, you’ll see that the disk under Devices in Dolphin, the file manager and from the command-line if you view the output of the following command:
# show file system info filtered for lines containing the string "sd"
df -h | grep sd

#  command output - /dev/sdb is the disk added
/dev/sda3       232G  5.2G  225G   3% /
/dev/sda2       974M  346M  561M  39% /boot
/dev/sda1       599M   20M  580M   4% /boot/efi
/dev/sda3       232G  5.2G  225G   3% /home
/dev/sdb1       916G   28K  870G   1% /run/media/users/Games
Reminder . . .
If you want to do the same thing on a distro that uses the GNOME desktop environment or a desktop environment that uses the same framework, the equivalent to KDE Partition Manager is called GNOME Disks or just Disks. In that case, how to add and automount a hard disk using GNOME Disks is the article you want to read.

