
If you have an existing Linux installation, like Linux Mint, that uses the Disks, or GNOME Disks, graphical application for disk management, this tutorial gives you a step-by-step guide on how to use it to add and automount an extra hard disk for storage to that installation.
When completed, you’ll have another hard disk that you can use to store your data. The best part is you won’t need to manually mount the disk any time you reboot the computer.
If you want to do the same thing on a Linux installation that uses the KDE Plasma desktop environment, the application to use is called the KDE Partition Manager. In that case, how to add and automount a disk using KDE Partition Manager is the article you want to read.
To start with Disks, click on your desktop’s menu icon and type disks into the search field. An application called Disks should top the result. To launch it, click on it or press the Enter/Return key on your keyboard.
The main interface of Disks is shown in Figure. 1. The left panel shows a list of hard disks connected to the system, while the main panel shows details of a selected disk. On the test installation used for this article, Linux Mint 22 is installed on the main disk, a 256 GB NVMe disk.
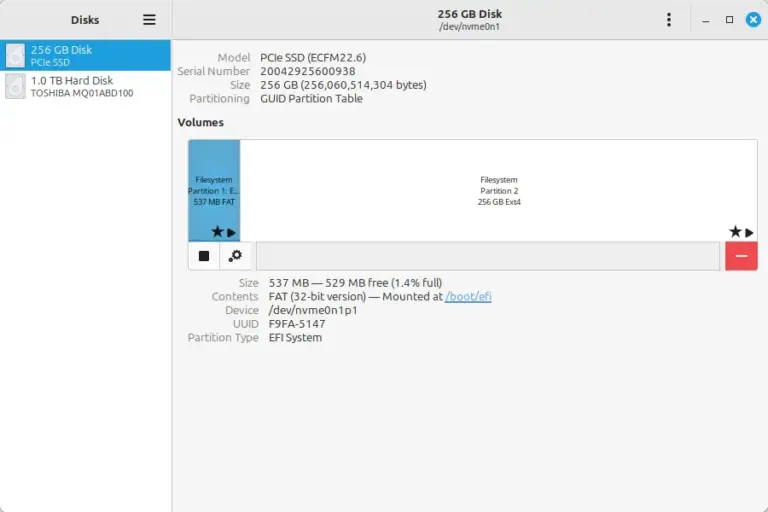
Figure 1: GNOME Disks
The second hard disk used to add extra storage for my test installation is a 1 TB SSD. The goal is to delete its existing partitions and create a single partition from it. If yours has any existing partitions, it’s best to delete them too. To do that, click on the red button on the lower left of an existing partition.
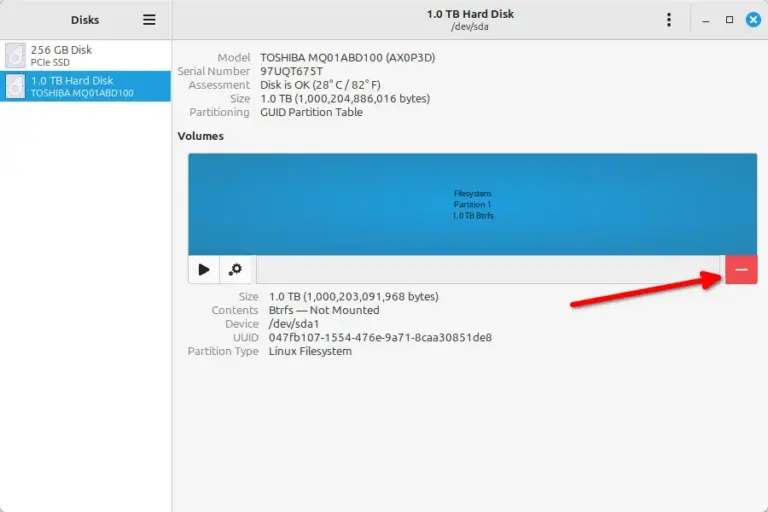
Figure 2: Deleting an existing partition in GNOME Disks.
You’ll then be presented with the window similar to the one shown in Figure 3. Click on the Delete button. Repeat this delete procedure for all existing partitions you want to delete.
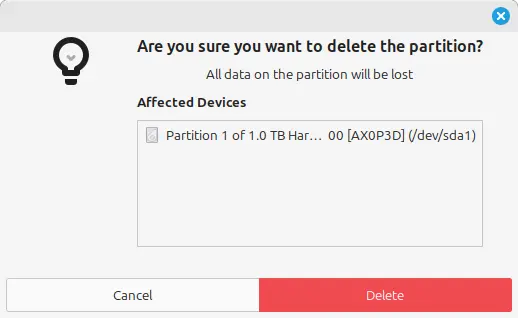
Figure 3: GNOME Disks partition delete prompt.
With all existing partitions out of the way, now you can start creating the partition(s) you need. For this tutorial, I opted to create one huge partition, but you can create as many partitions as you need. To create a new partition, click the + button on the lower left of the main area.
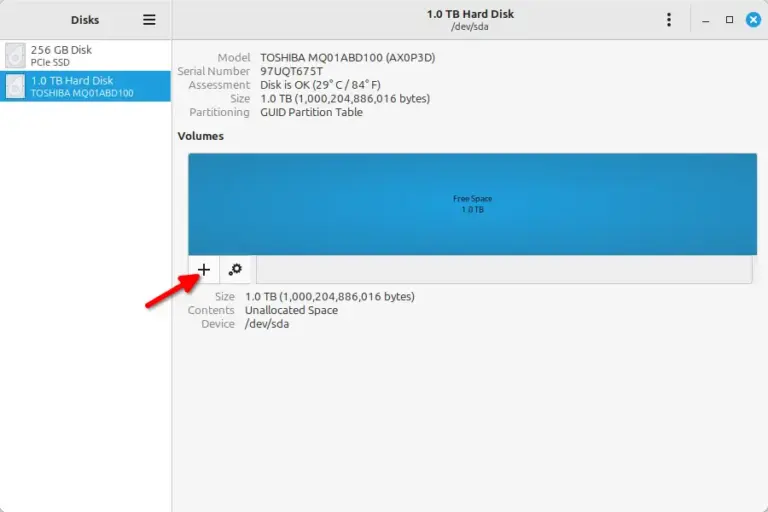
Figure 4: Creating a new partition in GNOME Disks.
In the window that opens, specify the desired size for the new partition by using the slider, typing into the Partition Size field or using the buttons on the right side of that field. You don’t have to specify any value in the Free Space Following field. Click Next.
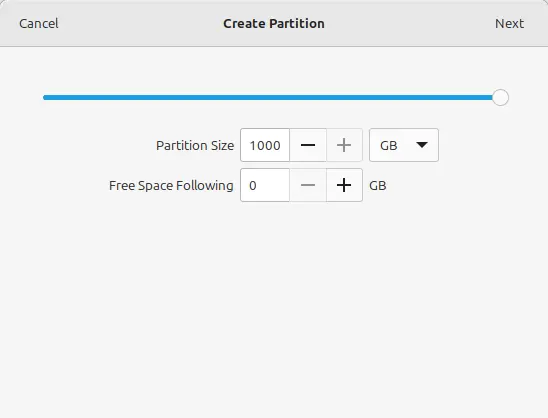
Figure 5: Specifying new partition size in GNOME Disks.
In the following window, specify a Volume Name. The name you use here will be used to reference the partition throughout the system. Then select the Type of filesystem you want to use for the partition. The default is Ext4, but if your installation is part of a dual-boot system between Linux and Windows 11 and you want a shared storage that can be accessed from your distro and Windows, For use with Windows (NTFS) is the option to select.
To see btrfs and other filesystems, select the Other option and click Next. And if you want to encrypt the partition, check the Password protect volume (LUKS) checkbox. When done with options in this window, click Create
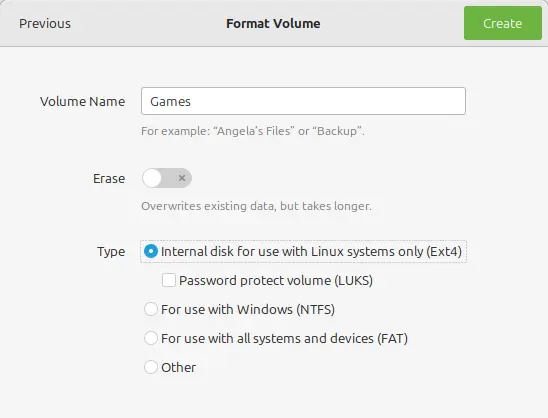
Figure 6: Creating partition options in GNOME Disks.
This shows the main window after the partition has been created. Note that by clicking the Create button in the previous window, the system also automatically appends an entry for the partition into the /etc/fstab file, so you don’t have to edit that file manually for this specific operation.
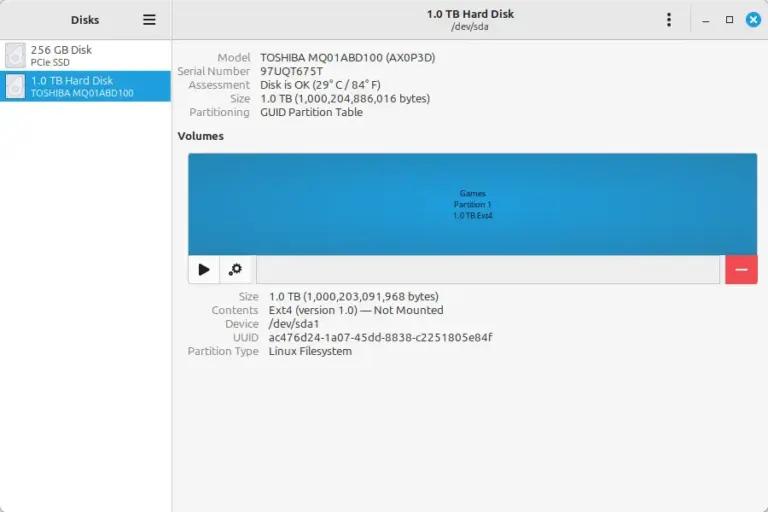
Figure 7: New partition created using GNOME Disks.
To see the default mount options the system used for the partition you just created, click the button with the cogwheel and select Edit Mount Options…
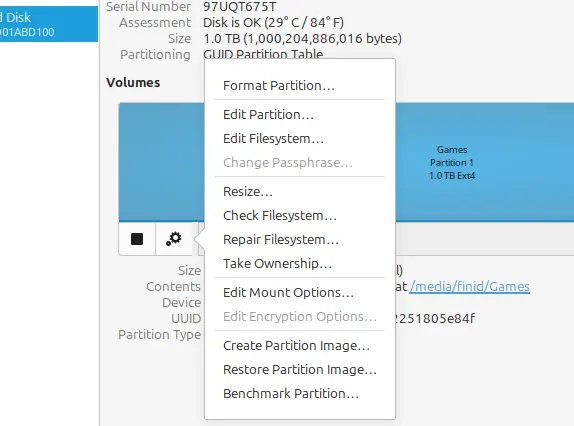
Figure 8: Edit Mount Options in GNOME Disks.
That should open the window shown in Figure 9. Some of the values shown in this window were automatically written to the /etc/fstab file. If you want to change the default values, disable User Session Defaults, but only if you know what you’re doing. Otherwise, click Cancel.
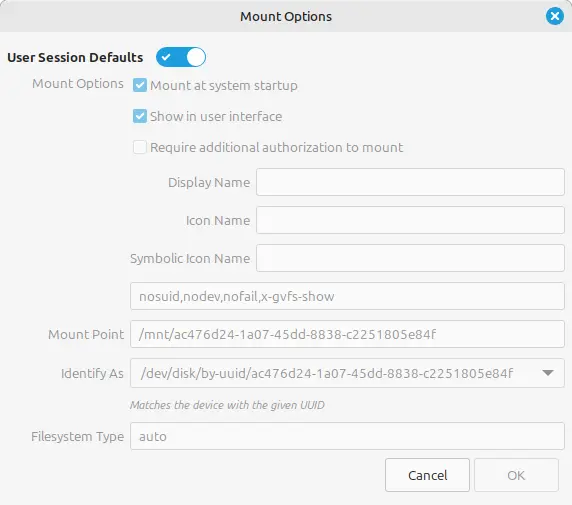
Figure 9: Default options used for creating partitions in GNOME Disks.
Before using the new partition or rebooting the PC on a systemd-based distro., open a terminal and type in the following command to make the system manager aware of the changes just written to the /etc/fstab file. If you fail to run this command before rebooting the PC, the system might fail to boot and drop into emergency mode (not that difficult to recover from). Attempting to open the disk without first running this command can also throw an error.
# run this systemd command to make the system manager aware of recent changes
sudo systemctl daemon-reload
And that’s all! You should see the disk listed under Devices in the file manager (see the featured image in this post) and from the command-line if you view the output of the following command:
# show file system info filtered for lines containing the string "dev"
df -h | grep dev

# command output - /dev/sda is the disk added
/dev/nvme0n1p2  234G  9.9G  212G   5% /
tmpfs           6.8G     0  6.8G   0% /dev/shm
/dev/nvme0n1p1  511M  6.2M  505M   2% /boot/efi
/dev/sda1       916G   28K  870G   1% /media/users/Games
Reminder . . .
If you want add a hard disk to a Linux installation that uses the KDE Plasma desktop environment, the graphical application to use is called KDE Partition Manager. In that case, how to add and automount a disk using KDE Partition Manager is the article you want to read.

