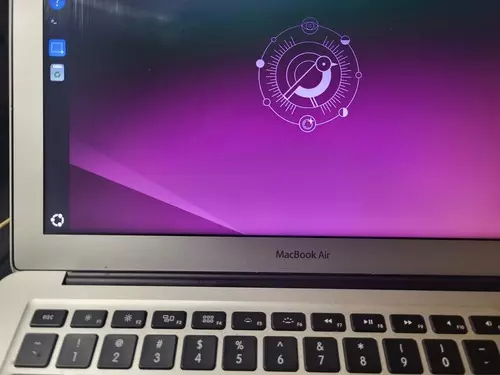
This tutorial gives you a step-by-step guide on how to install Ubuntu 24.04 LTS or Ubuntu 24.10 on a MacBook Air (13-inch) and get the Broadcom wireless card to work without a hassle. The MacBook Air is one I bought in 2018 and whose battery is effectively dead. After using it for a few years, I decided to wipe macOS from it and use it a crash-and-burn computer for my Linux installations.
If you want to follow along, here are the tasks involved:
Ready? Let’s get started. . .
Step 1: Download Ubuntu 24.10 or Ubuntu 24.04
To download Ubuntu Desktop, visit the distribution’s download page. Note that while I used Ubuntu 24.10 Oracular Oriole for this tutorial, it doesn’t have to be that. You may choose to download the long-term support (LTS) version, that is, Ubuntu 24.04. After downloading it, transfer or flash it to a USB stick. If you’re on Windows, use one of these two apps for flashing Linux ISO images to USB stick in Windows. On any Linux distro, use any one of these three apps for flashing Linux ISO images to USB sticks in Linux.
Once you’ve completed that successfully, proceed to step 2.
Step 2: Reboot and install Ubuntu Desktop 24.10 or Ubuntu 24.04
The first task in this step is to shutdown the MacBook Air, then insert the USB stick from step 1 into one of its USB ports. Restart it by pressing the power button, then hold down the option/alt key until the screen shows something similar to what you see in Figure 1. You may see one or two disk icons labeled EFI Boot. The icon for the USB stick will be the colorful one. Use the arrow keys to select it then press the enter/return or double-click on it.
You may then see an error message on the screen that says, error: file ‘/boot/’ not found. Give it a second or two and it will disappear before the GRUB boot menu appears. Don’t bother with connecting to a wireless network, because it won’t work after you boot into the live desktop.
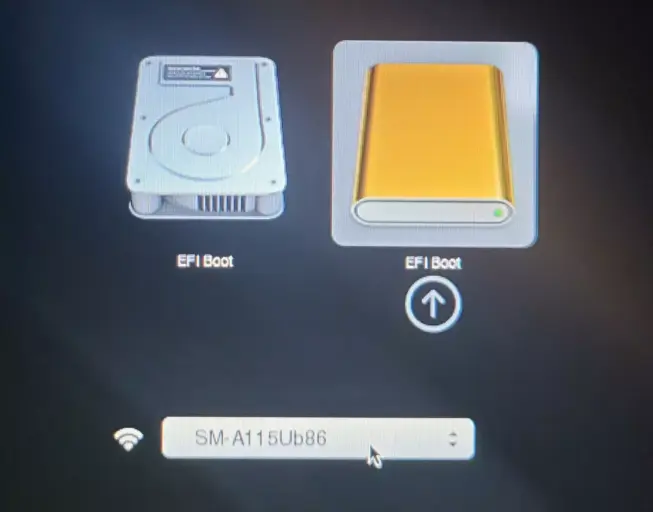
Figure 1: Booting a MacBook Air from a USB stick
At the GRUB menu, shown in Figure 2, press the enter/return key to proceed to the next step.
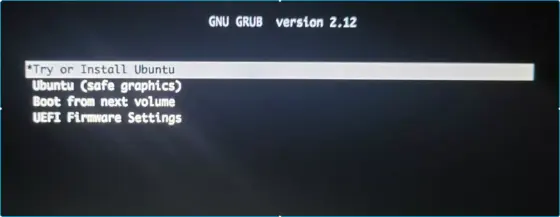
Figure 2: Ubuntu 24.10 GRUB boot menu.
That next step takes you to the Welcome to Ubuntu window. You can close that window and explore the live desktop or stay on it to continue with the installation process. Regardless of the option you choose, complete the installation and reboot the computer afterwards. It should reboot into the new operating system, after making a brief stop at the GRUB menu. You’ll notice that the built-in wireless network card does not work
We’ll fix that in the next step.
Step 3: Configure the MacBook Air for network access
If all worked out in the previous step, the MacBook Air should reboot into the Ubuntu desktop. If Internet access works without input from you, congratulations! However, it’s likely that Internet access will not work because the driver for the built-in Broadcom wireless network card is not installed. There are any number of ways you can use to get past this step, but the simplest is to first tether the MacBook Air via Bluetooth to your smartphone (Android or iPhone) or another Bluetooth-enabled computer (Linux, Mac, or Windows), then use that network-by-proxy to install the driver for the Broadcom wireless card.
For this tutorial, I tethered the MacBook Air via Bluetooth to my Android smartphone. To do that, first enable Bluetooth on your smartphone, if it’s not already enabled. Then on the Ubuntu desktop of the MacBook Air, click on the system menu (right corner) of the top bar, then on the Bluetooth button to expand it. Follow that by clicking on Bluetooth Settings.
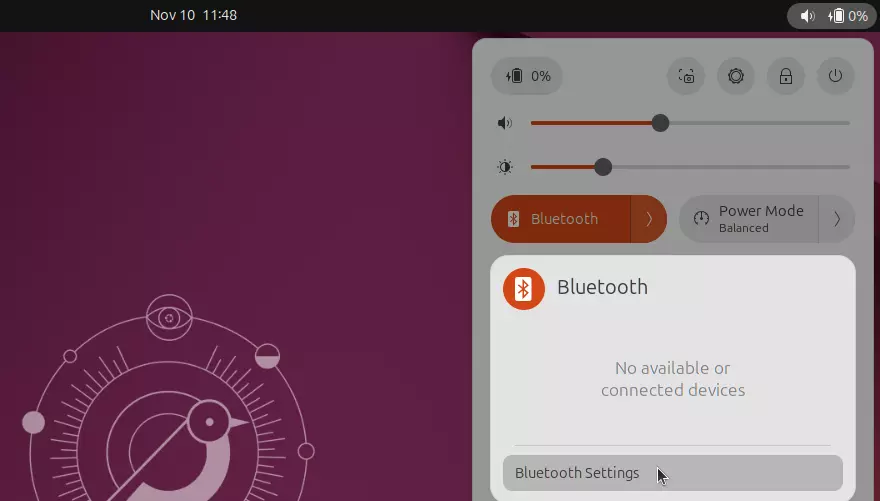
Figure 3: Bluetooth system menu option on Ubuntu 24.10 desktop
In the Bluetooth Settings window, you should see all the detected Bluetooth devices. Find the one that corresponds to your smartphone, then click on its Not Set Up.
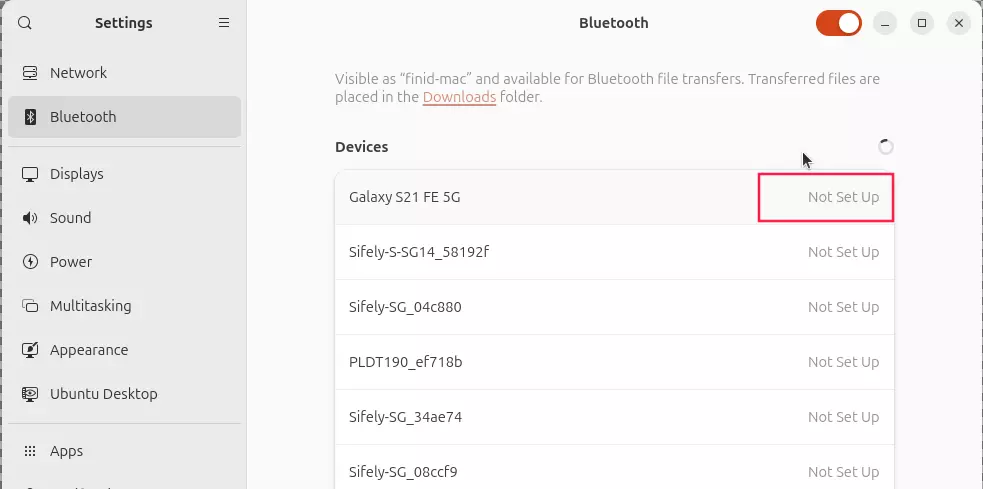
Figure 4: Detected Bluetooth devices on Ubuntu 24.10 Bluetooth Settings window.
That should trigger a message prompt on your smartphone and another message to confirm the pairing on the desktop. confirm on the desktop, then tap pair on your smartphone.
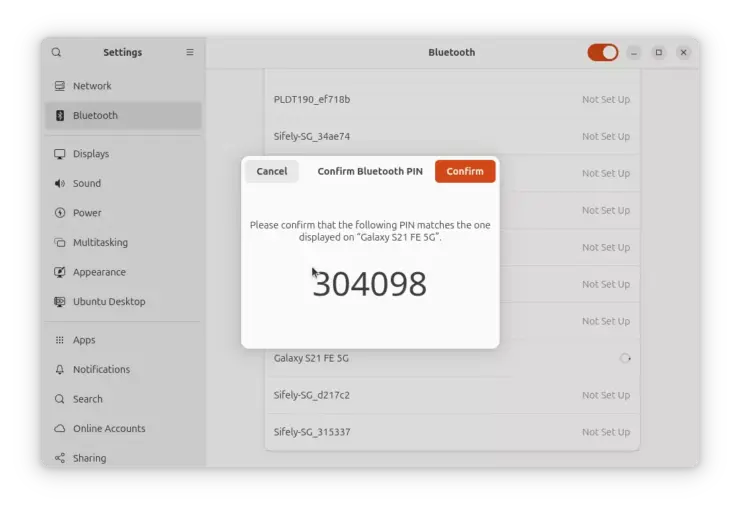
Figure 5: confirming Bluetooth pairing in Ubuntu 24.10 on MacBook Air.
Now the MacBook Air is tethered to your smartphone via Bluetooth and can use it network connection to update and install software.
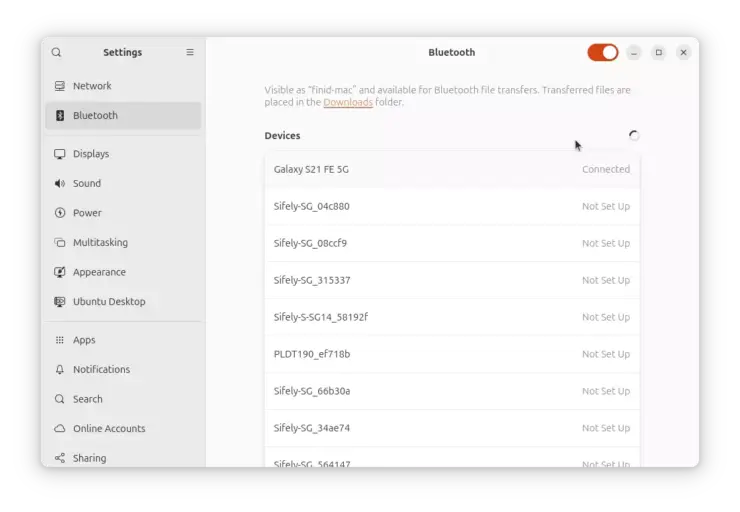
Figure 7: Ubuntu 24.10 on MacBook Air connected to a smartphone via Bluetooth.
Now that the MacBook Air has Internet connection courtesy of your smartphone’s Bluetooth, you can now install the driver for the Broadcom wireless network card with the following command (Note that due to the limited bandwidth of Bluetooth, the connection will be very slow, so be patient.):
# install the wireless network card driver

sudo apt install broadcom-sta-common broadcom-sta-dkms
After that command has completed, you can now proceed to the next and final step.
Step 4: Reboot and update your MacBuntu
Now all that’s left to do is to reboot the computer. Afterwards, log back in. You MacBook Air running Ubuntu 24.10 or Ubuntu 24.04 should have now have a working wireless network card. So go ahead and connect to a wireless network. Afterwards, update its package database with the following command:
# update the package database on Ubuntu 24.10
sudo apt update
Then upgrade all available packages with the next command. The y flag at the end tells the apt command to install any upgrades it finds without prompting you to confirm:
# upgrade all packages on Ubuntu 24.10
sudo apt upgrade -y
Now you can reboot one last time and enjoy the latest release of Ubuntu on your MacBook Air.
By the way . . .
If you would like to install Linux Mint 22 (Wilma), Linux Mint 22.1 (Xia), or a future release of Linux Mint 22 line on your MacBook Air, read my other article on how to install Linux Mint 22.1 on a MacBook Air.

