For those new to Linux and, therefore, to disk partitioning in Linux, here’s a comprehensive tutorial on how to create disk partitions manually for installing the latest edition of Ubuntu – Ubuntu 15.10, code-named Wily Werewolf.
Some familiarity with the terms associated with disk partitioning in Linux will go a long way in helping you to understand what you’ll be doing, so it’s recommended that you take a few moments to read A beginner’s guide to disks and disk partitions in Linux.
This guide will cover how to create partitions manually using a GPT (GUID Partition Table) partitioning scheme, and also using an MBR (Master Boot Record) partitioning scheme.
We’ll begin with a GPT-type scheme.
Creating GPT Partitions: If you have a Windows 10 computer that you’re also attempting to install Ubuntu on, you’ll be creating partitions using a GPT scheme. And if you’re attempting to set up a dual-boot system between Windows 10 and Ubuntu 15.10 on a single hard drive, you’ll be creating just three partitions – each mounted at / (root), /home and swap.
For this tutorial, we’ll assume that you want to create partitions manually on a hard drive with no other operating system on it, so you’ll be creating the complete set of partitions for a computer with UEFI firmware. That means creating an EFI System Partition (ESP), a root, /home and swap partitions. The /home partition is optional but recommended.
So if you’re ready, download an installation image of Ubuntu 15.10 from here. After downloading it, burn it to a blank DVD or transfer it to a suitably-sized USB stick. After that’s completed, boot the computer with the installation media that you just created in place.
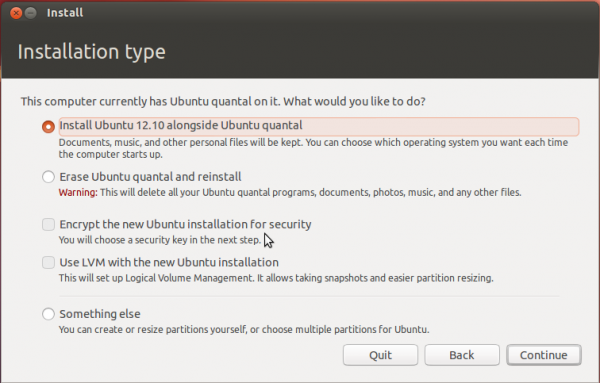
You’ll be given the option of booting into a Live desktop or straight to the installer. Either way, after the installer starts, navigate to the step shown in Figure 1. This shows the partition methods.
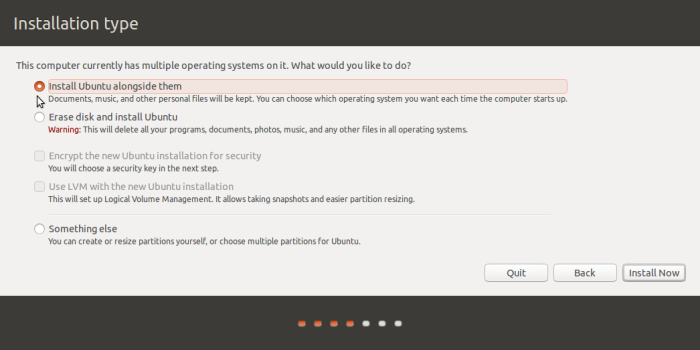
Figure 1: Ubuntu 15.10 partition methods
We’ll be creating partitions manually, so select the Something else option and click Continue.
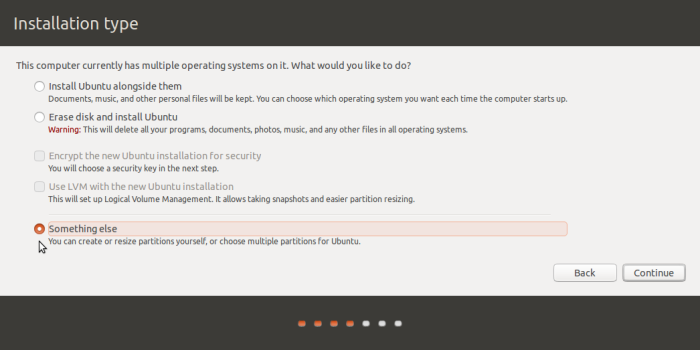
Figure 2: The “Something else” option on Ubuntu 15.10
That should open the installer’s manual partitioning tool, which will list all the hard drives detected by the installer. If you have existing partitions on the target hard drive, delete them. You do that by selecting each partition and clicking on the – button.
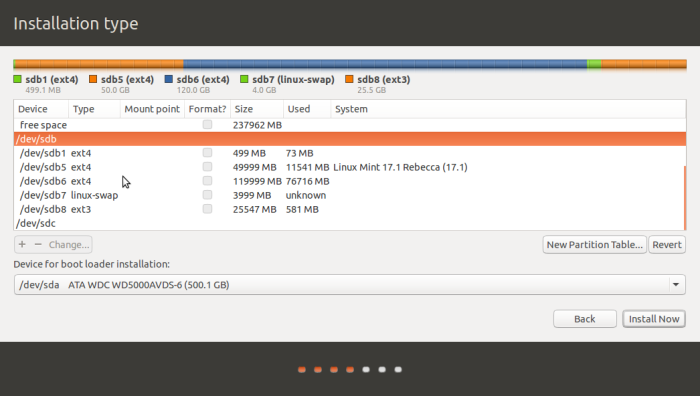
Figure 3: Manual partition tool of Ubuntu 15.10
After the partitions have been deleted, select the free space and click on the + button to start creating partitions.
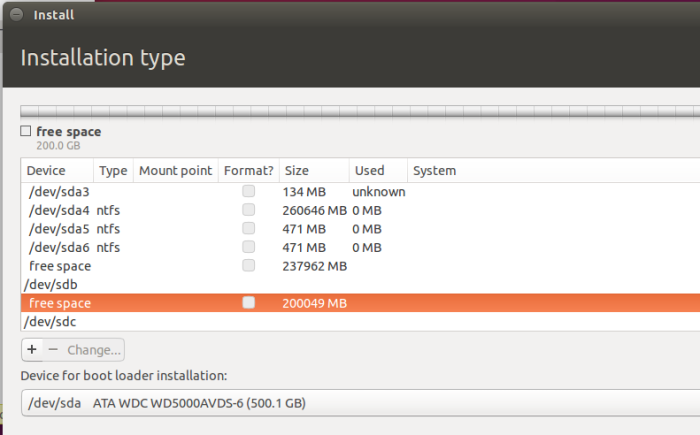
Figure 4: Creating partitions on Ubuntu 15.10
For the ESP partition, a disk space of around 250 MB should be enough. From Use as, select EFI System Partition, then click OK.
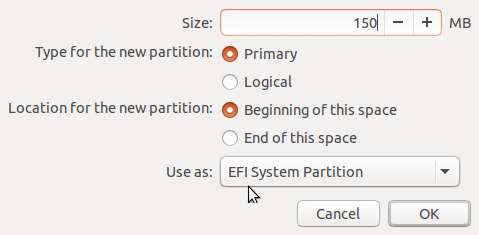
Figure 5: Creating the EFI System Partition on Ubuntu 15.10
The minimum recommended disk space for installing Ubuntu 15.10 is 6.9 GB, so an amount higher than that is good. For this test system, I allocated 15 GB to it. From Mount point, select /. OK.
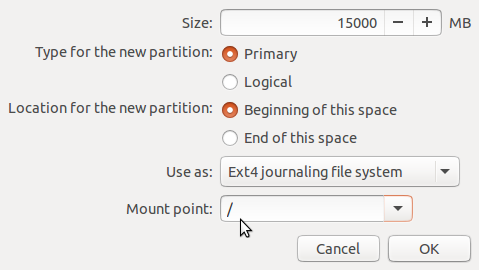
Figure 6: Creating the root partition on Ubuntu 15.10
The home partition is the one that gets most of the available disk space. For the mount point, select /home. OK.
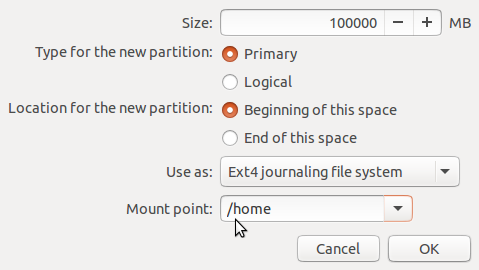
Figure 7: Creating the home partition on Ubuntu 15.10
For the swap partition, a disk space of 1000 MB to 4000 MB (1 GB to 4 GB) is good. From Use as, select swap area. OK.
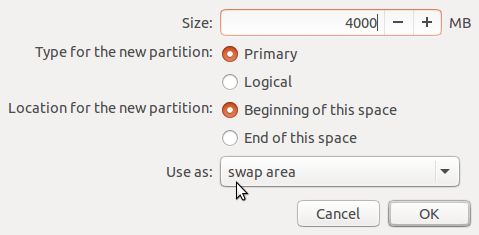
Figure 8: Creating the swap partition on Ubuntu 15.10
Back to the main disk partitioning window for the last time, you should see all the partitions you created. Verify that the correct Device for boot loader installation is selected, then continue with the rest of the installation. The device for boot loader installation is the ESP partition.
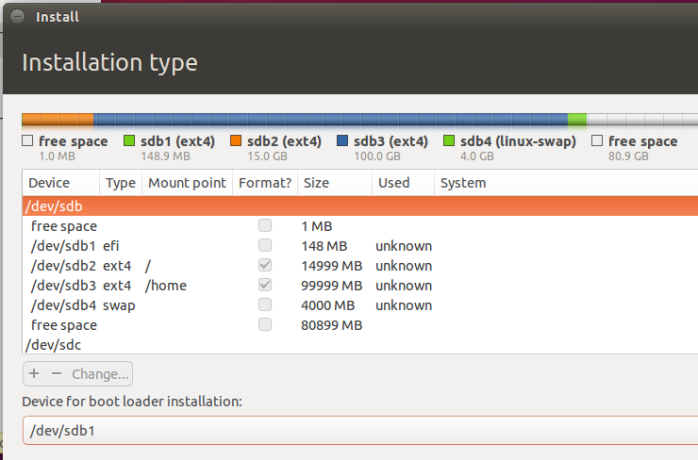
Figure 9: Completed disk partitions for installing Ubuntu 15.10
You’ll be prompted to verify the partitions the installer will format. OK. That ends the section on creating GPT disk partitions for installing Ubuntu 15.10.
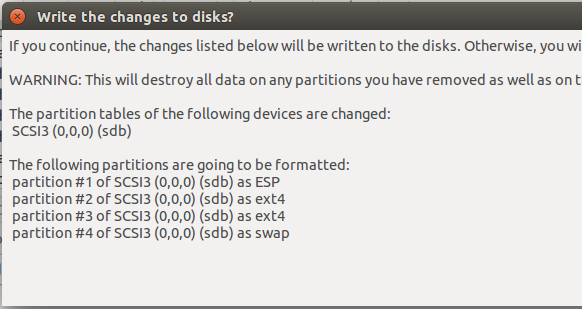
Figure 10: Partitions to be formatted for installing Ubuntu 15.10
Creating MBR partitions: MBR partitions are typically created on older computers that don’t have UEFI firmware, but can also be created on newer computers if EFI mode is disabled, or if Legacy BIOS mode is enabled. For disk partitioning on an MBR scheme, you need to create a boot partition (mounted at /boot), a root partition, a /home partition, and a swap partition. /boot and /home are optional but highly recommended.
As with GPT partitions, select Something else at the disk partitioning methods step, then click Continue.
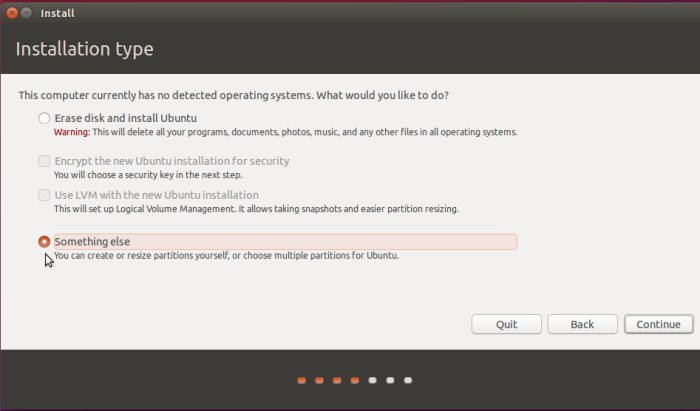
Figure 11: Ubuntu 15.10 “Something else” option
On the manual partitioning tool’s window, if the hard drive is brand new and does not have a partition table, select it, then click New Partition Table to create one.
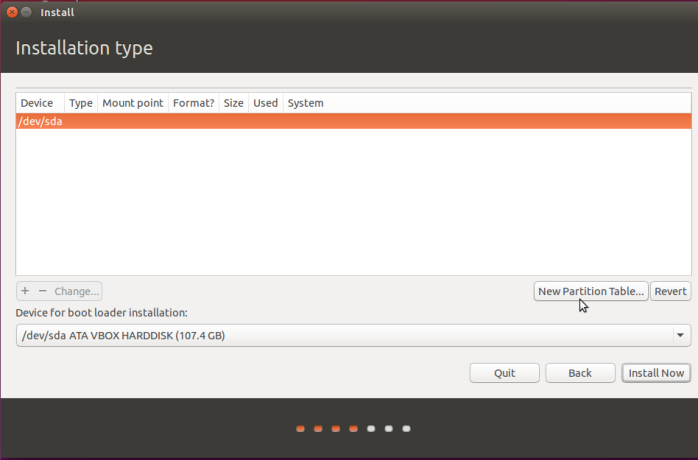
Figure 12: Create partition table on Ubuntu 15.10
Now it’s ready to be used for creating partitions, so select the free space and click the + button.
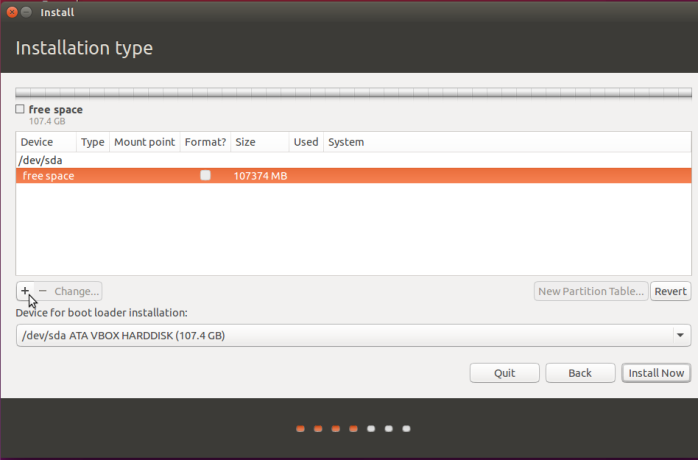
Figure 13: Start creating partitions on Ubuntu 15.10
This just shows the installer’s partition editor. You only need to specify the size, the mount point and the file system.
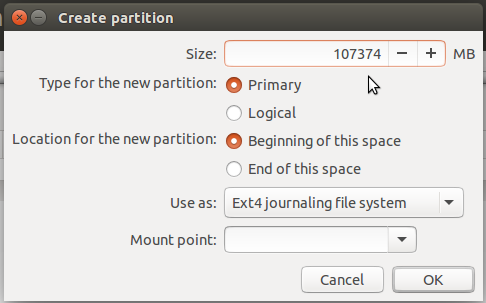
Figure 14: Partition editor of Ubuntu 15.10
For the boot partition, much like the ESP partition, a disk space of about 250 MB is enough. From Mount point, select /boot. OK.
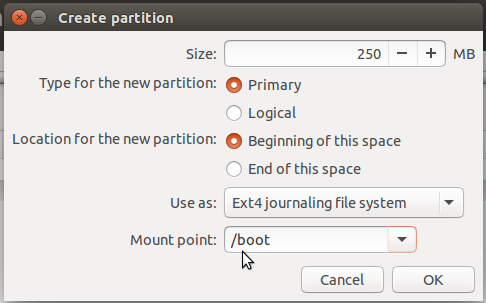
Figure 15: Create boot partition on Ubuntu 15.10
For the root partition, specify the size, and select / for the mount point. OK.
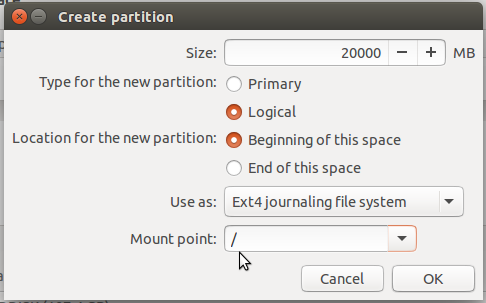
Figure 16: Create root partition on Ubuntu 15.10
As with the previous section, the home partition should be allocated the bulk of the available disk space. From Mount point, select /home. OK.
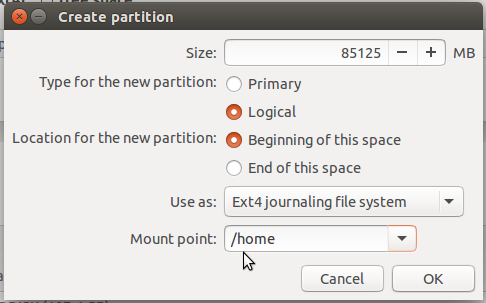
Figure 17: Create home partition on Ubuntu 15.10
For the swap partition, allocate the disk space and select swap area from Use as.
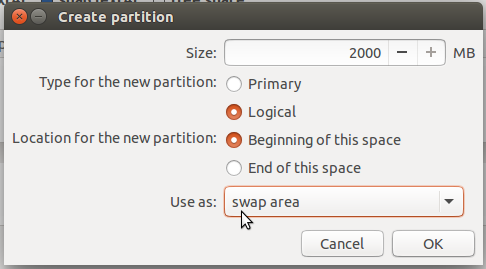
Figure 18: Create swap partition on Ubuntu 15.10
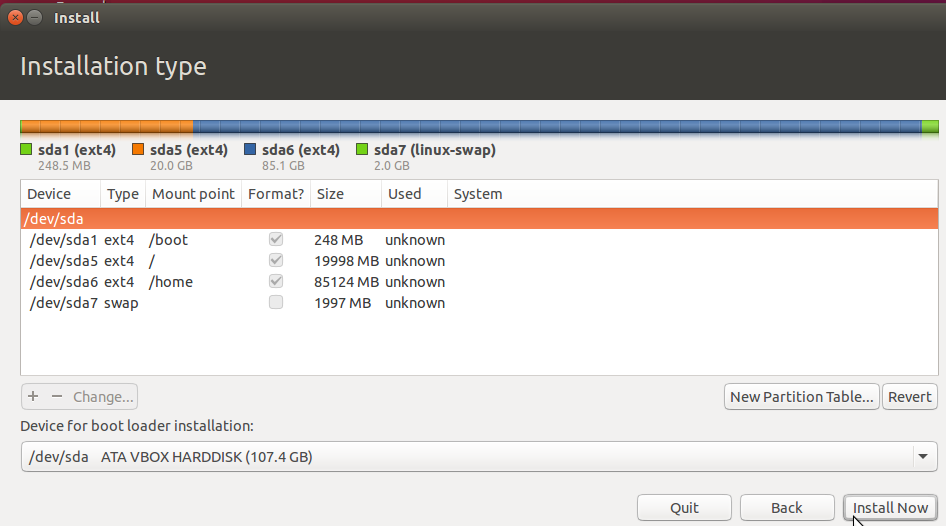
Back to the main disk partitioning window, check that all is ok, then continue with the rest of the installation. Note that for MBR partitions, you can either select the boot partition or the MBR as the Device for boot loader installation. Select the entire disk itself specifies that you want the boot loader installed in the MBR. And that ends this section, and the tutorial.
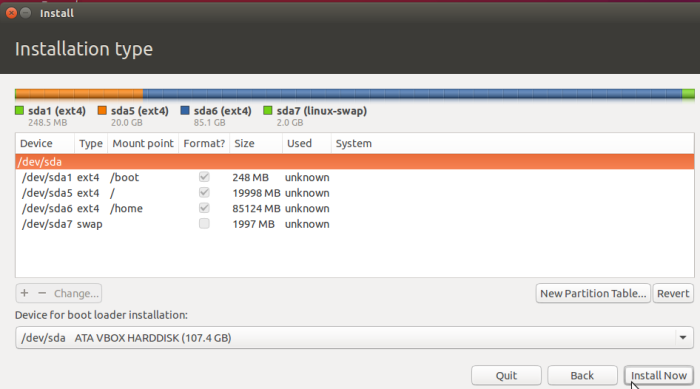
Figure 19: Completed manual partitioning on Ubuntu 15.10

