In this post, you’ll read how to dual-boot Ubuntu 15.04 and Windows 10 on a single hard drive and on a computer with UEFI firmware.
The Windows 10 installation came about by upgrading a Windows 8 machine to Windows 8.1, then to Windows 10. Before upgrading to Windows 8.1, the C drive had already been reduced to make room for a Linux distribution.
Each upgrade (8 to 8.1, then 8.1 to 10) created a new recovery partition of about 450 MB, so that there were two recovery partitions between the C drive and the free space before the installation of Ubuntu 15.04 started.
I think two recovery partitions is one too many, but I left it so you see what upgrading a modern Windows operating system does to your hard drive. In Figure 1, you can see the two recovery partitions to the right of the C drive. The last one was created by the Windows 10 upgrade script. The Unallocated space after it is what will be used to install Ubuntu 15.04.
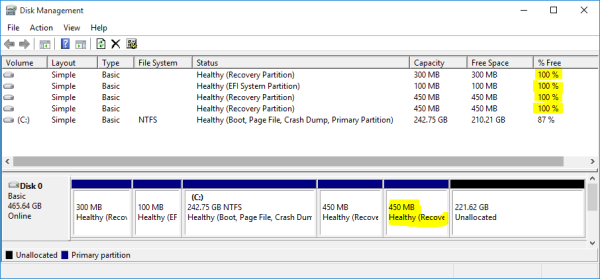
Figure 1: Windows 10 Partitions showing two recovery partitions and the free space
To follow along, you’ll need to have downloaded an Ubuntu 15.04 installation image, which is available for download here. After downloading it, transfer it to a USB stick, insert the USB stick into the appropriate port and reboot. If the machine was set to boot from a USB disk, it should reboot into the installer. Otherwise, access the computer’s boot menu as it boots and select the UEFI entry of the USB stick as shown in Figure 2.
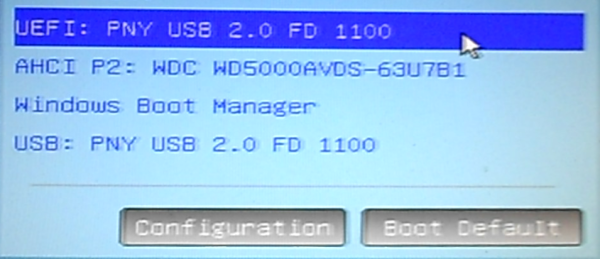
Figure 2: Entries in the computer’s boot menu. The UEFI entry boots into the UEFI-aware version of the installer
After booting into the Live desktop, launch the installer by clicking on its icon on the dock or on the desktop. Then click through the first few steps until you get to the one shown in Figure 3. The installation of Windows 10 will be detected, with the default option being to have the installer auto-partition the disk and install Ubuntu 15.04 on the available free space. However, that option will not do, as it will not create a separate partition for your home folders.
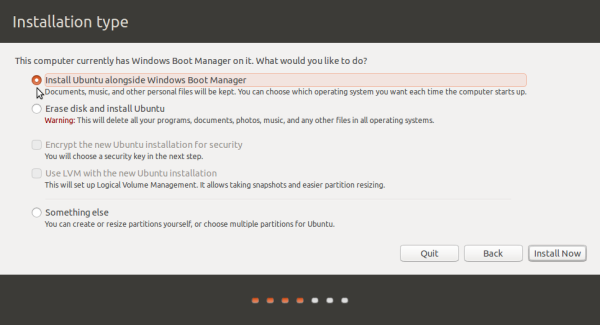
Figure 3: Disk partitioning methods of the Ubiquity, Ubuntu’s graphical installer
That means you’ll have to partition the disk manually. To accomplish that, you’ll have to select the Something else option and click Continue to open the installer’s manual disk partitioning tool.
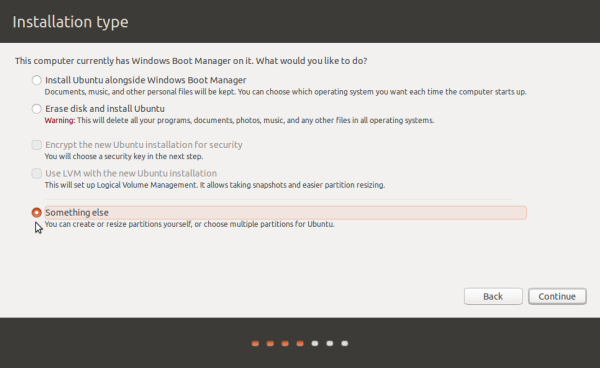
Figure 4: Selecting the “Something else” option on Ubuntu 15.04’s installer
This is the installer’s manual partitioning tool. It should show all the hard drives detected on the computer, and their partitions will be listed right after them. You should see all existing partitions and the free space under the hard drive named /dev/sda. We’ll be using that free space to create the partitions for Ubuntu 15.04. Take note of the partition of Type efi. That will be where the boot loader files will be installed. To start creating partitions from the free space, select it as shown in this figure and click on the + button.
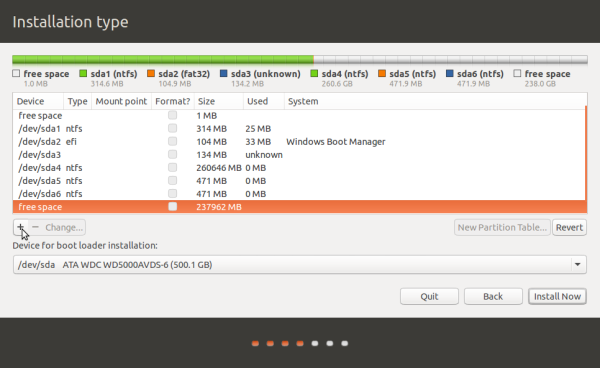
Figure 5: Manual disk partitioning tool of Ubuntu 15.04
That will open the installer’s partition editor, which is shown in Figure 6. The only fields you’ll have to specify are Size, Use as and Mount point. For the Use as value, stick with the default when creating the partitions that will be mounted at / (root) and /home. Only change it when creating the partition for swap.
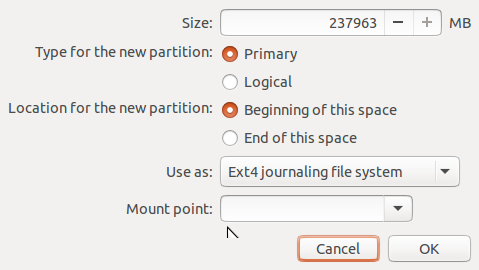
Figure 6: Ubuntu’s partition editor
The first partition will be mounted at / (root). The recommended disk space for an installation of Ubuntu 15.04 is about 7 GB, but if you intend to use it for a long time, be generous with disk space allocation. I recommended about 30 GB to 50 GB, if you have disk space to spare. Click OK when completed.
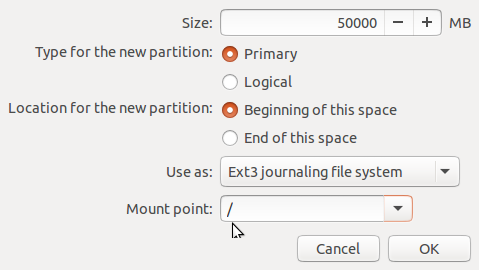
Figure 7: Creating the root partition
The second partition will be mounted at /home, which is where your home folder will be located. So give it the bulk of the disk space that’s available. OK.
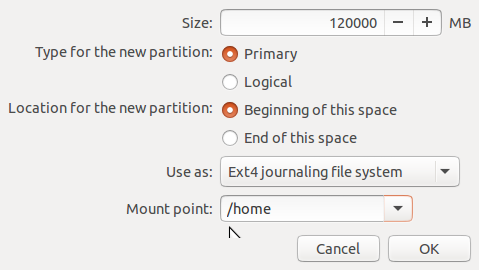
Figure 8: Creating the partition for /home
For the partition to be used as swap space, a size of 4000 MB (4 GB) is now standard for Linux distributions on 64-bit hardware, 2 GB or less for 32-bit hardware. Select swap area from the Use as box to designate it as swap. OK.
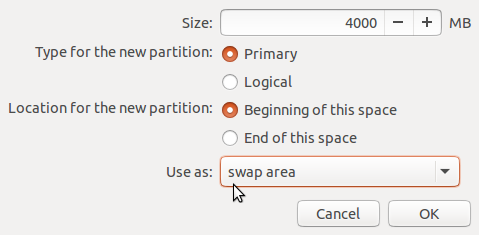
Figure 9: Creating swap space
After all the partitions have been created, double-check your work to make sure that all’s in the right place and none of the existing partitions have been mistakenly selected for formatting. Before clicking Install Now, select the partition that corresponds to the Boot EFI partition from the Device for boot loader installation menu. In this example, it’s /dev/sda2. When you’re sure all’s well, click to continue with the rest of the installation.
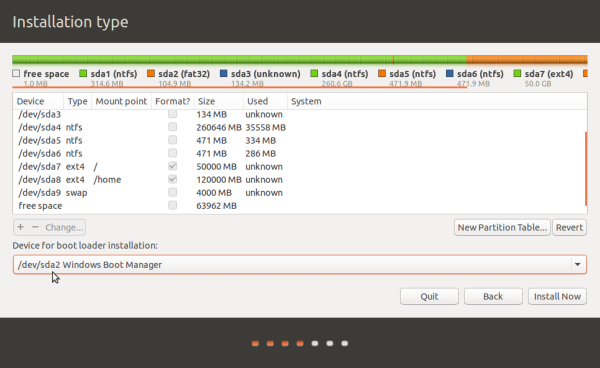
Figure 10: Selecting the Boot EFI partition as the device for boot loader installation
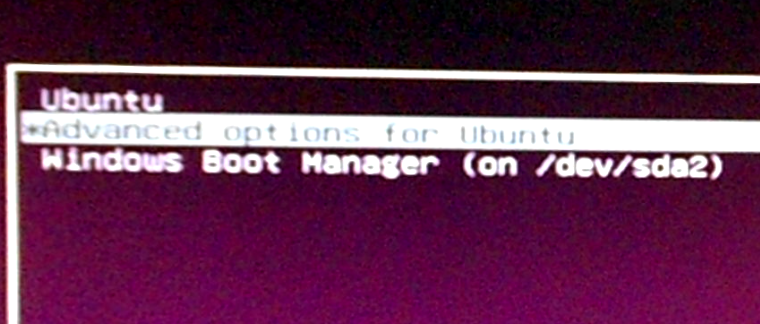
After installation, reboot the computer to boot into the new system. If it does not, access the BIOS/UEFI Setup Utility and set the default boot device to ubuntu. When next you reboot, you should see the GRUB menu with entries for Ubuntu 15.04 and Windows 10, as shown on Figure 11. Enjoy your new dual-boot setup.
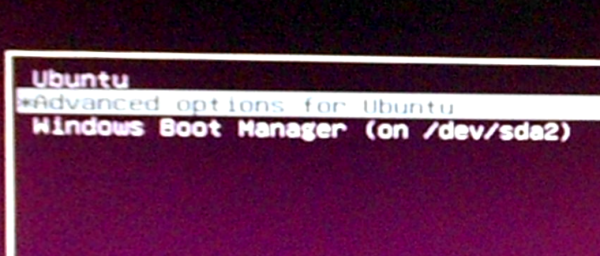
Figure 11: The GRUB screen of Ubuntu 15.04 showing an entry for the Windows 10 Boot Manager



I love you guys so much I was able to install zorin os on my windows 10 computer (UEFI). Thank you so much.
I have installed windows 10 and ubuntu. in my grub menu when i select ubunut it booting normally without any issue. if i select windows 10 some times its not booting. its giving doted lines screen. in this case i need to manually reboot the laptop 2 or 3 times then only i am able to boot windows 10.
i am using hp 15-ac026tx laptop.
Do you have the same problem if you boot into Windows 10 directly from the computer’s boot menu?
I did as per the above mentioned instructions in my Lenovo Laptop with pre-installed Windows 8.1 (which I later upgraded to free Windows 10). The installation was successfull. But then later on, after restarting the machine, I can login to Ubuntu, but I cannot login to Windows 10. I need to go to UEFI setup utility and then make the first boot option as that of Windows Boot Manager.
But on selecting that option, whenever I restart the machine it directly goes to Windows without asking me for any option. Kindly help.
That is how UEFI seems to work. The last OS that you booted becomes the default, regardless of what you see the default boot device to in the BIOS/UEFI utility.
It’s a minor issue which I think you can solve by adding an entry for Ubuntu in the Windows 10 Boot Manager by using EasyBCD, which you may download from here (free version).