Aside from the GNOME 3 desktop environment, which is used in the main edition of Fedora 21, there are Spins that use other desktop environments. Notable among them is the KDE Spin.
There are also Spins that use the LXDE, MATE and Xfce desktop environments.
If you’re familiar with the most popular desktop environments in active development today, you must be wondering, Well, what about a Cinnamon Spin?
Sorry, the Fedora project does not produce a Spin that uses the Cinnamon desktop environment. Considering that it ranks up there, in terms of popularity, with GNOME 3 and KDE, I, too, wonder why.
Notwithstanding, you can still install a Fedora 21 Cinnamon desktop by downloading the right Fedora 21 installation image. And that image is the netinstall image, which you can download from here (64-bit image) and here (32-bit) image.
The rest of this tutorial shows how to install a Fedora 21 Cinnamon Workstation on a Btrfs file system. You don’t need to change the default file system, but if you would like to play with Btrfs, which has started showing up in more places recently, Fedora 21 offers a good opportunity for that. Note that Btrfs is now the default file system on openSUSE 13.2 and is used in Docker containers. (See With Btrfs the default on openSUSE, when will other distros follow suit.)
The next step after downloading an appropriate Fedora 21 Server netinstall image for your computer is to transfer it to a USB stick or burn it to a DVD. this forum post gives a quick but potentially dangerous method of transferring an ISO image to a USB stick. After that’s done, boot the computer from the installation media you just created.
Fedora 21 netinst image is not a Live DVD, so you should see a boot menu just like you see in Figure 1. You may opt to test it (the default) before starting the installer or boot right into Anaconda.
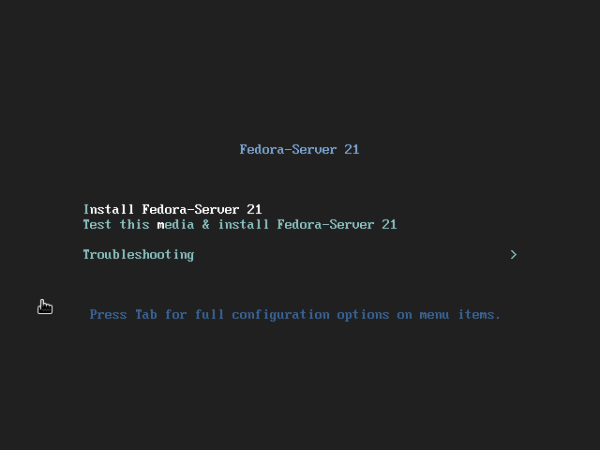
Figure 1: Fedora 21 server netinstall boot menu.
Regardless of the option you took in the step shown in Figure 1, the screen after that should be the language selection window. There should be nothing to do there, so click to proceed to the next step. And that next step should be the Anaconda Hub, shown here in Figure 2. Remember that the installation media was made from a netinstall image, so be sure to have the computer connected to the Internet. If that’s already done, the only buttons you’ll need to click are highlighted. You only need to click on the Network and Hostname button if you wish to customize the hostname, otherwise, you don’t have to touch it.
To choose the software category to install, click on the Software Selection button.
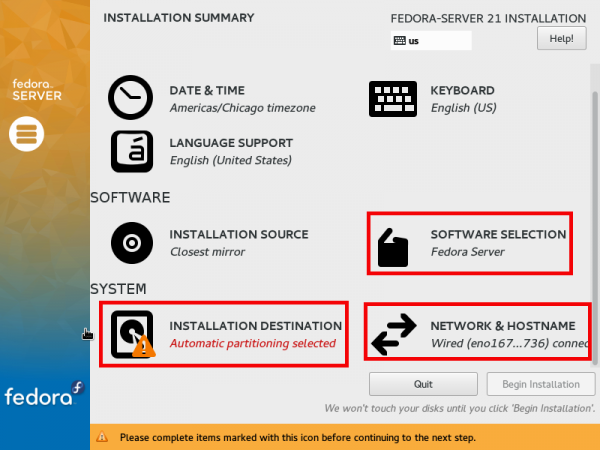
Figure 2: Fedora 21 Server netinstall Anaconda Hub.
By default, a server package category will be selected, so scroll down and click on the Cinnamon Desktop radio button. To the right, you can further customize what you want installed. Once you’re satisfied with your choices, click Done.
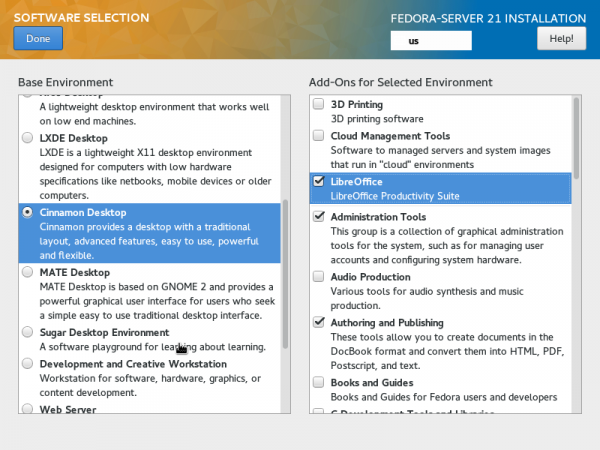
Figure 3: Fedora 21 Server netinstall package installation options.
This shows the Network and Hostname window.
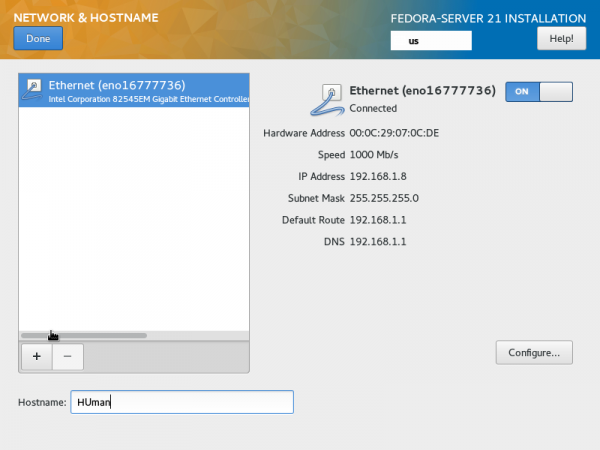
Figure 4: Changing the hostname in Anaconda of a Fedora 21 Cinnamon installation.
And this, shows the Installation Destination window, where you point Anaconda to the target hard drive. If you’d rather use LVM, the default partitioning scheme, make sure that the target hard drive is selected, then click Done. However, if you wish to test-drive a Btrfs system, click on I will configure partitioning.
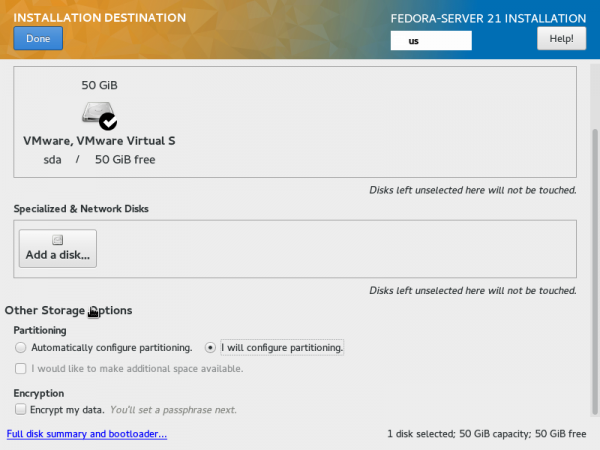
Figure 5: Target hard drive selection step in Anaconda during a Fedora 21 Cinnamon installation.
This shows the default selections on the manual disk partitioning window. To change the partitioning scheme, click on the combo box that shows LVM.
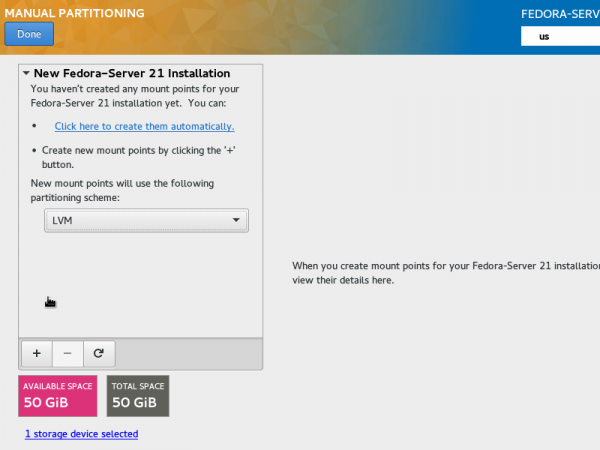
Figure 6: Manual hard drive partitioning in Anaconda during a Fedora 21 Cinnamon installation.
With the right partitioning scheme selected, it should now show Btrfs. To have Anaconda create the partitions automatically – based on the chosen partitioning scheme, click Click here to create them automatically. The other option would be to create them manually.
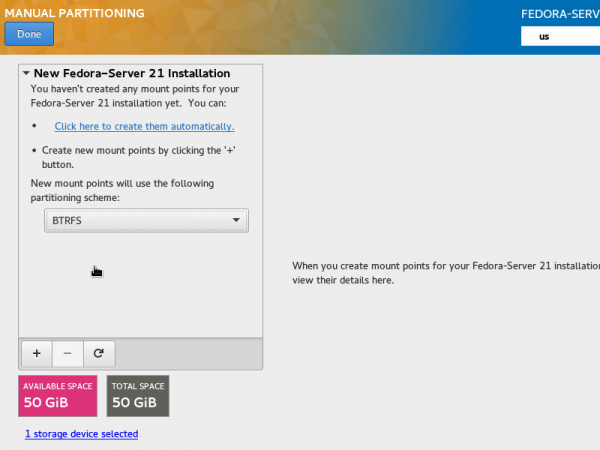
Figure 7: Changing the partitioning in Anaconda to Btrfs on a Fedora 21 Cinnamon installation.
This shows the default partition setup, which should be the same on your system if it’s using Legacy BIOS firmware and if there’s no other OS on the target hard drive. On a PC with UEFI firmware, there should also be a /boot/efi partition. If you chose to have Anaconda create the partitions automatically, you can always resize them to suit.
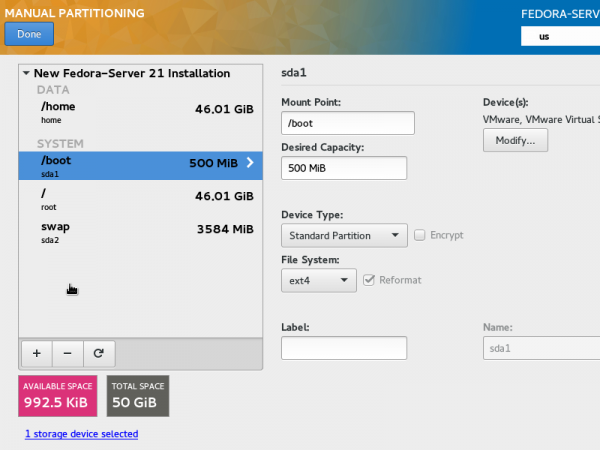
Figure 8: Ext4 is still the default file system for the boot partition.
Unlike on openSUSE 13.2, where the installer creates a separate partition for the root and home volumes, Anaconda creates a single volume, so the entire system, except for the boot partition, is on a Btrfs file system. If everything looks good to you, click Done.
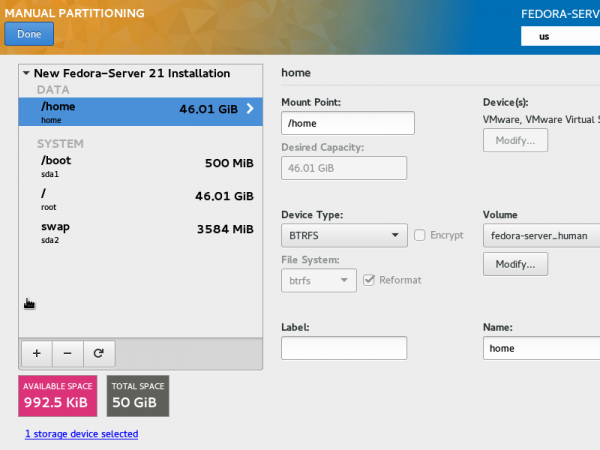
Figure 9: Components of a Btrfs volume as seen in Anaconda on Fedora 21.
Click Accept Changes.
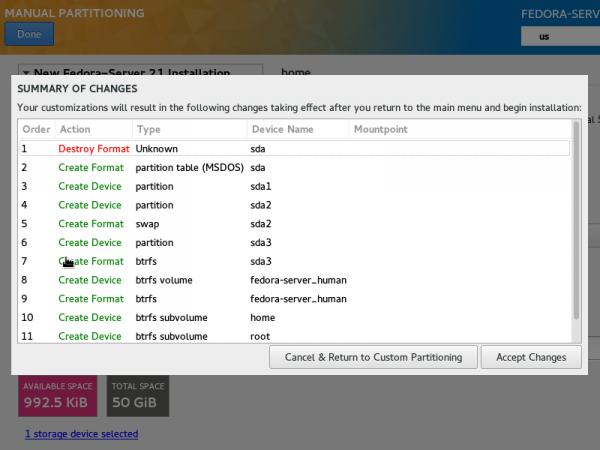
Figure 10: Tasks to be completed by Anaconda for installing Fedora 21 Cinnamon on a Btrfs file system.
That should bring you back to the hub. You may now click Begin Installation.
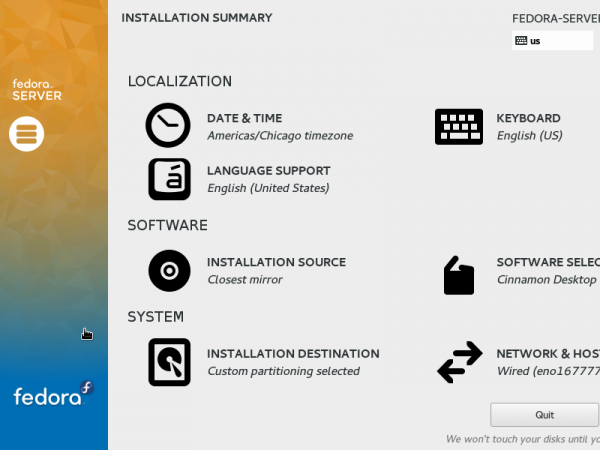
Figure 11: The Anaconda hub on Fedora 21 showing completed tasks.
Note that installation takes a lot longer than if you were installing from an installation image pointing to a local package source, so step back and relax.
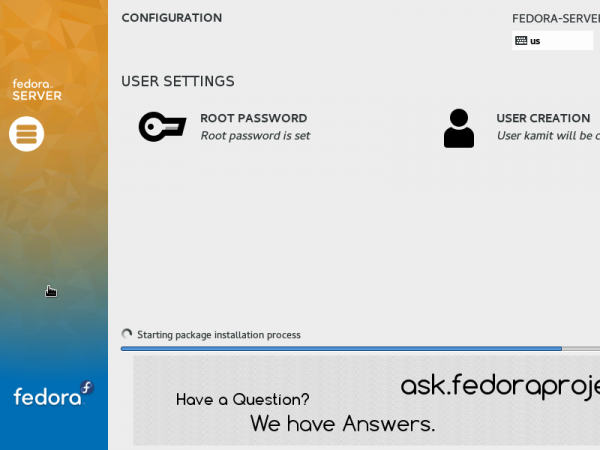
Figure 12: Fedora 21 Cinnamon installation progress.
After installation, you should have a very good Fedora 21 Cinnamon desktop.
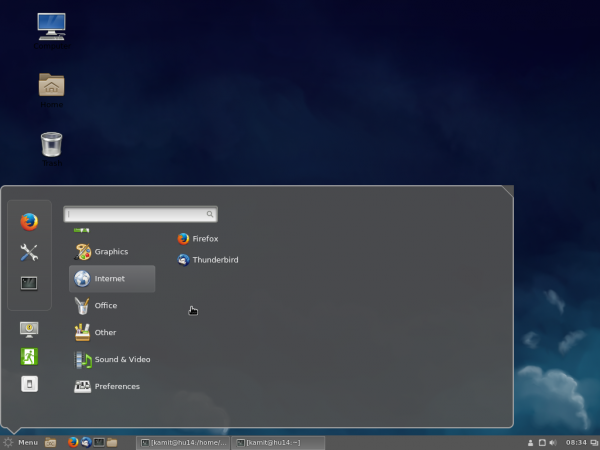
Figure 13: Fedora 21 Cinnamon desktop showing the menu.
And it should be running Cinnamon 2.4.5, the very latest version of the desktop environment brought to you by the Linux Mint project.
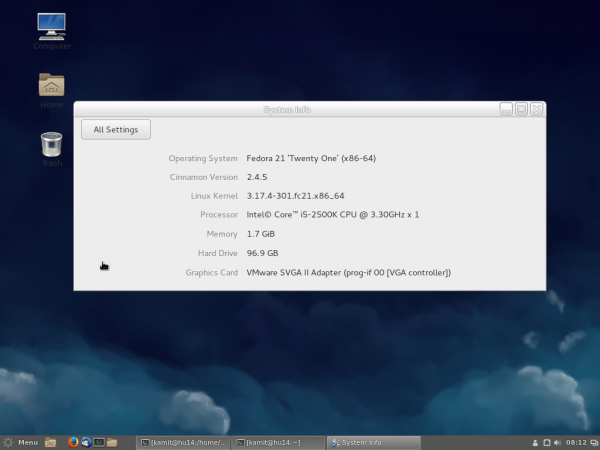
Figure 14: A new installation of Fedora 21 Cinnamon should be sporting Cinnamon 2.4.5.


