This tutorial offers a step-by-step guide on how to dual-boot Windows 8 and Ubuntu 13.10 on a single hard disk drive (HDD), with Ubuntu on a btrfs filesystem.
This dual-boot setup is on a system with Legacy BIOS, that is, non-UEFI and using an MBR disk partitioning scheme, which means that GPT is not involved. Because of this, it can also be used as a guide to dual-boot Windows 7 and Ubuntu 13.10.
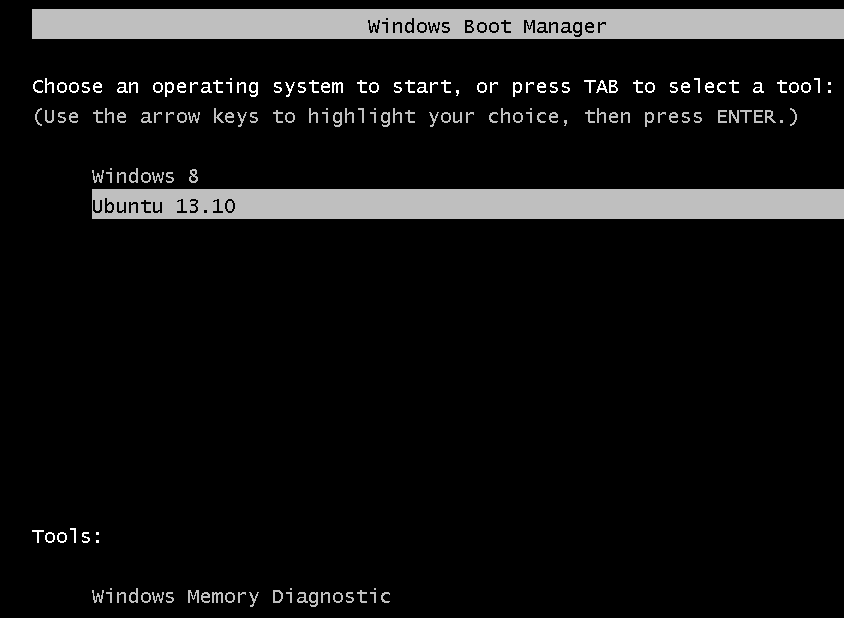
GRUB 2, the boot loader used by Ubuntu 13.10, will be installed in the boot partition of Ubuntu and EasyBCD will be used to add an entry for Ubuntu in the Windows boot menu. The result is that the Windows boot manager will be the master boot manager, so that every time the computer is rebooted, you will see this ugly boot menu.

To start, you either need a system running Windows 8 or Windows 7, an installation media of Ubuntu 13.10 – 32- or 64-bit. The steps involved are:
- Shrink the HDD to create free space for Ubuntu 13.10
- Install Ubuntu 13.10 on the recovered space
- Add an entry for Ubuntu on the Windows 8 or Windows 7 boot menu
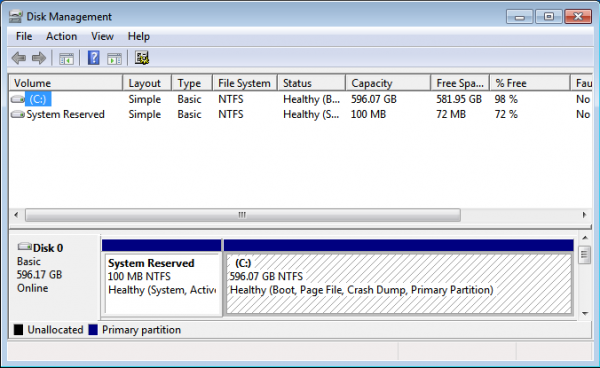
1. Shrink the Windows C Drive: Launch the Windows partition manager. You should see a window that looks just like the one shown in the image below. Right-click on the C drive or a Windows partition that you would like to use. Just be sure that it is not the system partition.

Select Shrink Volume.

This image shows the Window partition editor. You just need to specify by how much the editor should shrink the partition.

For my test installation, I chose to allocate just 200 GB to Windows. The remaining 600 GB or so will be used to Ubuntu 13.10. Click Shrink.

The result of that operation is shown in this image. The unallocated partition is what will be used to create the partitions for installing Ubuntu 13.10. You may now reboot the computer, but be sure to insert or connect the media that the installation image of Ubuntu 13.10 is on before rebooting.

2. Install Ubuntu 13.10: When the computer reboots, you may either boot to the Ubuntu 13.10 Live desktop, or start the installer without first making that customary stop at the Live desktop. Click until you get to the Installation type step. Be default, the installer will offer to partition the drive automatically. But that’s not what we want. We want to create partitions manually.

For that, the Something else option is want you need to select. Continue.

That should open the Advanced Partitioning Tool’s window. You should see the free space recovered from Windows, as well as the Windows partitions. To start creating partitions, select the free space and click on the “+” button.

That opens the installer’s partition editor. Because Ubuntu is going to be installed on a btrfs filesystem, at least three partitions are needed – one for /boot, another for Swap, and the last for the btrfs volume.

For the boot partition, assign it enough disk space that will take into account the potential for increase in disk usage. Typically, 150 MB to 300 MB should do. For this test installation, I allocated 300 MB to it. For file system, you could go with ext4 or ext2. Either one will do. Be sure to select /boot for Mount point, then click OK.

Back to the main Advanced Partitioning Tool’s window, you should see the new partition that you just created. Select the remaining free space and click on the “+” button again to create the next partition. This step will have to be repeated for all the other partitions.

For Swap, a disk space of 2 GB (2000 MB) should be enough. From the Use as menu, select swap area, then click OK.

For the partition which will be formatted using btrfs, you can allocate a much disk space as you have available, From the Use as menu, select btrfs journaling file system, then select / as the mount point. OK.

Back again to this window, all the partitions you need to install Ubuntu 13.10 on a btrfs file system should be listed. Before clicking Install Now to begin package installation, you need to specify where GRUB, the boot loader should be installed. By default, the installer will want to install it in the Master Boot Record (MBR) of the HDD. But that’s not the goal. We want GRUB in the /boot partition. To make that happen, select the partition that matches the boot partition on your system from the Device for boot loader installation menu. For this test installation, it is /dev/sda5.

You may now click Install Now. After the installation has completed successfully, the computer should reboot into Windows. Now, for the final step.

3. Add an entry for Ubuntu 13.10 in the Windows boot menu: To do that, you need to download a program called EasyBCD. It’s free for personal use. You may download it from here. Install it as you would install any other Windows application. Afterwards, launch it. This screen shot shows EasyBCD’s main interface. To add an entry for Ubuntu 13.10, click on the Add New Entry tab.

The click on the Linux/BSD tab. From the Type menu, select GRUB 2. That’s the version of GRUB used by Ubuntu 13.10. And from the Drive menu, select the partition that correspond to the boot partition. For this test installation, it is Partition 3 (Linux 285 MiB). Click on the Add Entry button. To preview the entries that wil appear on the Windows boot menu, click on the Edit Boot Menu button.

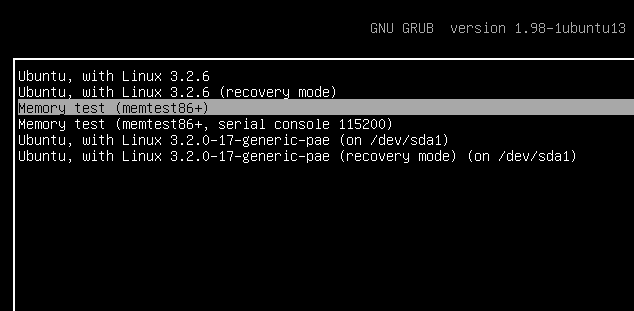
You should see a couple of entries just like the one in this screen shot. Exit EasyBCD, then reboot the computer. You should see that ugly boot menu you saw at the beginning of this tutorial. If you select Ubuntu 13.10 from the menu, you will be presented with another boot menu. This time, it is that of GRUB.

If you don’t want to see this menu anytime you opt to boot into Ubuntu 13.10, edit /etc/default/grub, then change GRUB_TIMEOUT = 10 to GRUB_TIMEOUT = 0. Then type sudo update-grub to effect the change. That should do it.


Hi, I’ve followed your tutorial. I really would like to boot Ubuntu (in my case 14.04.2) using the Windows Boot Manager. But I just get errors, when trying to boot. Here you’ll find all details, Update 3 contains the actual error messages, I get. Maybe you have a clue. Any help is very appreaciated. Thanks in advance. Link: http://askubuntu.com/questions/645902/dual-boot-using-windows-boot-manager-does-not-work
Is your computer using UEFI firmware or the old BIOS?
You’re using a guide written for an older edition of Ubuntu to install a later version. And if your computer has UEFI firmware, then you just compounded your problem. this guide will be of better assistance
Very interesting guides!
I would be very interested in a guide of how to slice and re-combine installed Linux. Say, it is sitting on the same disk as Windows. My installed OSes are tweaked, apps installed so it would take considerable amount of time to re-install them from a scratch with different configuration for the boot and swap partitions as well as different Grub location.
I would like to take a new disk, partition it and bring there my “old” Linux partition from another disk. I think I could use something like Acronis to copy and write my Linux partition to that new disk, but how do I make it bootable? My current setup is such that Grub “took over” the original Windows’ MBR.
I am also a little confused about UEFI vs BIOS. My motherboard is an UEFI board with Windows and Linux “sitting” on the 128 GB SSD with MBR on it. I also have a couple of 3 TB HDDs in the system for data, but they are partitioned in a way that the “truecrypted” partitions are about 1.5 TB each for an easy access of these large HDDs from the apps and portable Windows from the HIREN’s rescue disk. Does this mean that UEFI feature isn’t “used”?
For the first problem, you could just clone the Linux setup to the new disk. That shouldn’t be difficult, though I’ve never had to do it myself.
Regarding UEFI vs BIOS, modern motherboards have a mode called Legacy Compatiblity Mode, or a similar term. That just means that they can operate in UEFI as well as Legacy BIOS mode. So it is possible to create an all-MBR partition scheme on a computer with UEFI firmware. In that case, the UEFI feature is not being used, on that particular disk.
Hope that ansers your question.
I’m in the process of publishing an article that shows how to dual-boot modern Linux distribution, like Ubuntu 14.04 and Fedora 20, with Window 7 on a computer with UEFI firmware, but using MBR partitions. Check back in a day or two for that.
That’s exactly what I’d like to do: separate Windows and Linux partitions to two independent disks. Your guide helps in task of restoring/creating Windows MBR.
This, by the way could be done with use of Windows install disk as well.
The process of cloning and especially restoring Linux to a new disk is far less familiar to me.
I would like to read about this in detail, if possible.
I think this could be interesting for many other readers of your piece. I am, as many Linux newbies, not sure if Linux installation disk can help create a new Linux MBR on the new location, or how exactly do it with the other tools.