BackTrack Linux is now known as Kali Linux. You may read all Kali Linux articles and tutorial at http://linuxbsdos.com/category/kali-linux.
Yet another article about BackTrack 5, a Linux distribution designed for pentesters and security professionals or those who want to mess with all the best security and penetration testing applications the free software community has to offer.
This latest article provides the steps you need to dual-boot it and Ubuntu 12.04 on a computer with a single hard drive. The previous article was titled How to dual-boot BackTrack 5 R2 and Windows 7 alongside each other.
Though this article is about dual-booting BackTrack 5 and Ubuntu 12.04, which is yet to be released, it could be used for doing the same with current (Ubuntu 11.10) and prior versions of Ubuntu. This is because the installer has not changed across those releases. In any case, you only need to worry about this if you are going to install Ubuntu anew for this operation. If installing Ubuntu anew, it does not matter whether you use using the current stable version of Ubuntu (Ubuntu 11.10) or the beta version of Ubuntu 12.04, which is what was used for this tutorial.
If, as with the system used for this tutorial, you have an existing installation of Ubuntu, then you do not have to worry what version of Ubuntu you are using. All you need to do, if you want to follow the same steps outlined in this article, is to download an installation image of BackTrack 5 R2 from here. Note: There is a KDE and a GNOME edition of BackTrack 5. The KDE edition was used for this article. Burn it to a DVD and boot the computer from it. The computer will boot into a Live KDE desktop. Click on the Install BackTrack icon on the desktop.
BackTrack is actually based on Ubuntu desktop, so they share the same installation program, though BackTrack’s version of the installer has a different interface. After clicking through the first three steps of the installation process, you will see a window similar to the one below.
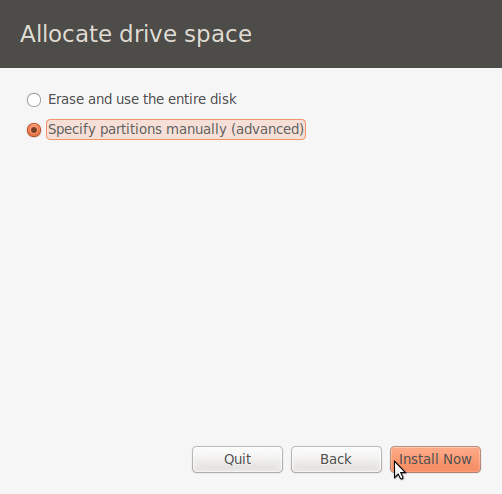
If, like the computer used for this article, yours has a default installation of Ubuntu (12.04 or 11.10), which means that it is installed on two partitions (/ and Swap), then you could select the first option (Install them side by side, choosing between them each startup) or the last one (Specify partitions manually (advanced)).

If you go with the first option, BackTrack’s installer will also attempt to create a root partition and a Swap partition, leaving you with two Swap partitions on the system. While there is nothing wrong with that, I think it is just a waste of disk space. So, the best option is to select the manual disk partitioning option.

Which means that at this step, you select the last option and click Forward.

That should bring you to the Advanced disk partitioning tool. If your installation of Ubuntu does not have free, unpartitioned space, you will have to resize the root partition manually. To do that, select the root partition, which should be /dev/sda1, and click the Change button. After specifying the desired shrink size in the window that opens, you will be returned to the Advanced partitioning window. To create the root partition for BackTrack 5, select the free space and click Add.

This is the partition creation window. For BackTrack 5, only one partition is going to be created. It will share the Swap partition that is already on the system. Note that by default, the installer will attempt to create this partition as a logical partition. While that is just fine, you may also choose to create it as a primary partition. If the terms being used here is making your head spin, you might want to read guide to disks and disk partitions in Linux.

If I had used the default, the window should look like this, that is, after specifying a suitable disk space, selected the mount point, /, and the file system, ext4.

On the other hand, if I had opted to create the root partition as a primary partition, the window should look like the one below. For this tutorial, I chose to create it a primary partition, and clicked OK.

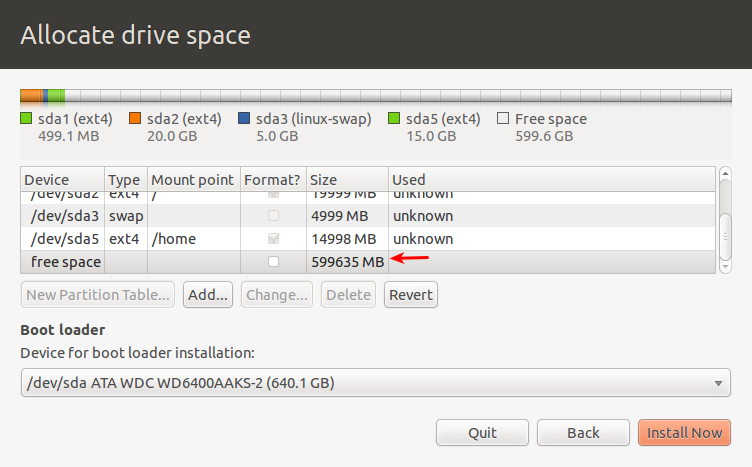
Back to the main window, the BackTrack partition is shown as /dev/sda3, because I created it as a primary partition. If it had been created as a logical partition, it would have been listed as /dev/sda6. Click Forward to move to the next step.

Which gets you to the installation summary step. This is where you can modify where GRUB, the boot loader, will be installed. By default, it will be installed in the Master Boot Record, overwriting Ubuntu’s version. Because we are dealing with two Linux distributions, that should not pose any problem. So click Install.

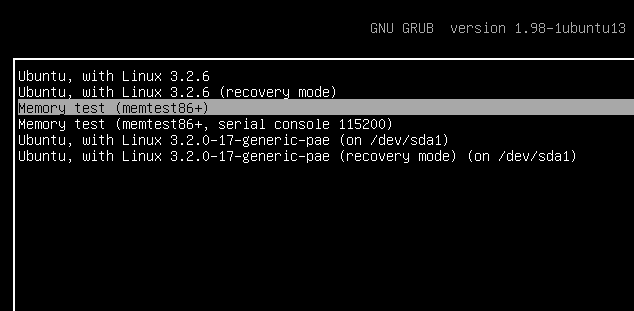
After installation and rebooting, you should see a GRUB menu that looks just like this. I am sure you noticed that the entry for BackTrack 5 is also listed as “Ubuntu.” Enjoy!


how do i stop dual booting ubuntu with backtrack
Please explain
Nice Nice tutorial , thanks !
I have 161 gb free space on my C:, but when I chose specify partions manually there were only two choices, the first one was 8 gb, the second one was 417 mb which is not enough space to install backtrack. what is the problem???
Give us a list of all the partitions you see at that step of the installation process, their size and device labels, that is, sda1, sda2, etc
Great Tutorial… Thank you
Nice .. Thats what I was looking for. Great tutorials with great explanation. Gonna give it a try now. Was trying to set up dual boot on my own and then realized its a good idea to search for a tutorial online just to be safe.