Previous tutorials published on this website about dual-booting Fedora and Windows 7 have shown how to do it by creating partitions for Fedora manually, either on an existing or a new installation of Windows 7. This tutorial will show how to do it, by modifying the logical volumes automatically configured by Anaconda, the Fedora system installer. The hard drive will have an existing installation of Windows 7. If you prefer setting up Fedora partitions manually, read How to dual-boot Fedora 14 and Windows 7. Though written for Fedora 14, the steps are the same for Fedora 15.
The Windows 7 installation has three primary partitions, which means that all the Fedora 15 partitions will be logical. That is not a problem because Linux can be installed on logical partitions. The third Windows 7 partition on the computer I used for this tutorial is an NTFS data partition that may be shared with Fedora 15.
To start, download the Fedora 15 installation image that you would like to use from here. The main Fedora 15 edition, which uses the GNOME desktop environment, and the Spins, all use the same installation program, so it does not matter which one you download. Fedora 15 is yet to be reviewed on this website, but if you are interested in the Spins, the desktop Spins have all be reviewed here. See Fedora 15 LXDE review, Fedora 15 Xfce review, and Fedora 15 KDE review.
So, boot the computer using the CD or DVD you burned, start the installation program, and click until you get to the step shown in the image below. The option you choose here will depend on the state of the hard drive. The purpose of this tutorial is to show how to configure dual-booting by modifying the partitions automatically created by the Fedora installer, so you may choose the second, third, or fourth option. Make sure to enable “Review and modify partitioning layout” before clicking Next.

With just one primary partition left (the partition table cannot have more than four primary partitions), the installer uses it as an extended partition, under which it creates two logical volumes – one for the boot partition of 500 MB, and the other for the LVM Physical Volume. If the free space used to create the Physical Volume is less than about 75 GB, the installer will only create two logical volumes. One for Swap, and the other for /, the root directory. If the available disk space is more than about 75 GB, the installer will configure an additional logical volume for /home.
LVM is the acronym for Linux Logical Volume Manager. You may read more about it here.
The problem with the logical volumes created by the installer, is that all the available disk space is allocated to them, leaving nothing to use for growing logical volumes or creating new ones, if the need arises. A rule of thumb, when configuring LVM, is to assign just enough disk space needed to install the system. The unused space will be used to grow logical volumes, or create new ones. What is then recommended here is to reduce the size of the logical volume for root. The one for Swap has just enough space. It will not need to be reduced. If the installer configured a separate partition for /home, you should reduce its size, too. To do so, simply double-click on the logical volume.

Starting with the one for root, the edit window shows the assigned properties. A new installation of Fedora 15 takes up less than 3 GB of disk space, so clearly, the installer-assigned disk space is way too much.

We can trim it down to 5 GB and still have more than enough space to complete the installation successfully. Every other property remains unchanged. OK.

Now that the logical volumes have been trimmed down, you may choose to create another one for /home. Having a separate partition or logical volume for /home is always a good choice. To create it, double-click on the free space, or select the free space and click Create.

For the new logical volume, we want to mount it at /home, use the same file system as the others, and assign about 10 GB to it, which is more than enough for initial installation. Click OK, and again at the main edit window.

So, we have modified the logical volumes, created another one and mounted it at /home. In the process, we have freed up some space that we could use to grow logical volumes that have run out of space, or to create new logical volumes, if there is a need. Click Next to continue the installation.

By default, the installer will want to install GRUB, the boot loader, in the Master Boot Record of the hard disk. That is a good location if you want GRUB to be responsible for dual-booting. If that is your choice, you do not need to do anything else. Just click Next to complete the installation. When you reboot, there will be an entry for Fedora 15 and Windows 7 in GRUB’s boot menu.
When dual-booting Windows and a Linux distribution, my recommendation is to install GRUB in the first sector of the boot partition. That is because Windows will overwrite GRUB during an upgrade. Also, Windows has been known to write small files to the boot manager, during an upgrade or when installing a Service Pack. Even Windows’ anti-virus programs have been shown to write small files to the MBR. The result of all that, if Windows’ boot manager is not in the MBR, is that whatever is there will be messed up.
To change GRUB’s location. click on Change device.

There are two possible location for GRUB, the default, which is in the Master Boot Record of the hard drive, and the boot partition of Fedora 15. Our preferred location for this tutorial is in the latter. Select it and click OK,

Verify that the correct location is shown on this window before clicking Next to complete the installation.

After installation, the computer will reboot into Windows 7. The final task is to add an entry for Fedora 15 in the boot menu of Windows 7. The easiest method of doing that is to use EasyBCD, a free application by NeoSmart Technologies. Download and install it like you would any other Windows application.
This is the main window of EasyBCD. To add an entry for Fedora 15, click on the Add New Entry tab, then on the Linux/BSD tab. Fedora 15 uses GRUB Legacy, so select that entry from the Type dropdown menu. From the Device menu, select the partition where GRUB was installed. If you used the same partitioning scheme as this tutorial, it should be Partition 4 (Linux – 500MiB). Click Add Entry, then on Edit Boot Menu to view the change.

This is a preview of the order of listing in the boot menu. You can change the order here and modify the wait time before the default entry boots. Exit EasyBCD and reboot,

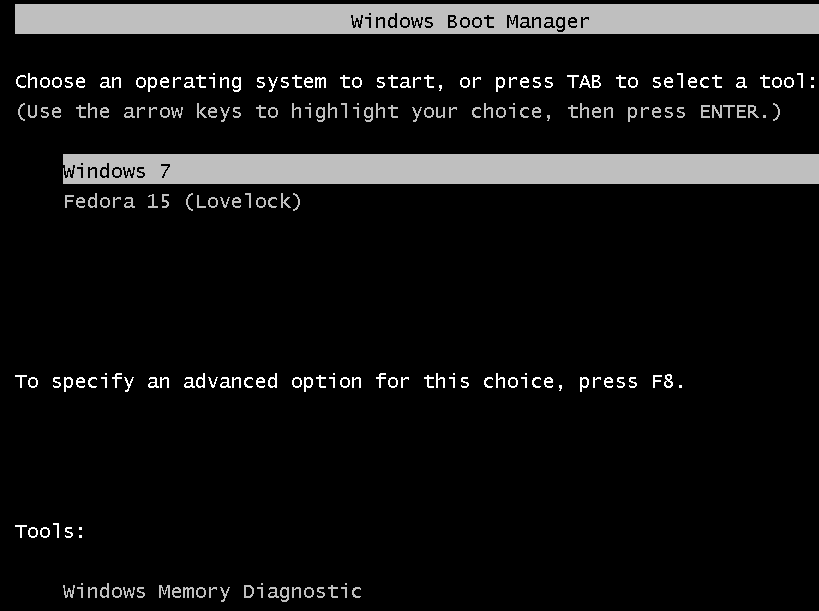
On reboot, Windows’ boot menu will show entires for Fedora 15 and Windows 7. You can change the order of listing from the Edit Menu tab of EasyBCD. That is all it takes to dual-boot Fedora 15 and Windows 7 on a computer with one hard disk.

You can have quality articles like this delivered automatically to your Feed Reader or Inbox by subscribing via RSS or email. This website now has a Questions and Answers section. Use the commenting system for simple comments, but for more involved assistance, please use the Questions & Answers section.


These tips are of great help indeed! I have been clueless about this Fedora 14 and soon after I came across your post, I was enlightened because of such information presented. Thank you so much for sharing this, exactly what I was looking for!
I had a Windows 7/Fedora 14 dual boot system running successfully. I had Windows 7 on /dev/sda and Linux on /dev/sdb. I had set it up using EASY BCD.
I then installed Fedora 17 Linux on /dev/sdb and I thought I had put grub in the first sector of /dev/sdb1 which was mounted on /boot. But I can’t set up EASY BCD to boot Fedora. I am now trying EASBCD 2.12. I seem to have two choices.
I can choose grub(legacy) and specify /dev/sdb1 as the location or I can choose grub2. In the first case, when I try to boot Fedora, I get a single word on the screen saying GRUB and nothing happens. In the second case, I can’t specify the location and it seems to want to put it in C, which I’m sure is wrong.
When I use a Fedora 17 Live CD to boot, I don’t find what iexpect in /boot/grub or /boot/grub2.
Can anyone tell me what is going onand what to do?
I must say that I had great expectations from KDE 4. It disappointed me! KDE has become something like Windows Vista. They have destroyed all his power. Options dialogs that were huge and were giving great flexibility in configuration now become couple of checkboxes . This is very bad! I couldn’t even find how to autamaticaly align to grid desktop icons.
Except that KDE 4 was very very buggy. taskbar works very bad, desktop environment too.
I hope that this is just one of the first versions of KDE 4 and it will become better in future.
Then when finally system was installed I started it for the first time. Login screen was something ugly! Not only by design but also by functionality. What they have done with super login screen that existed in Fedora 8! To login with root account you need everythime to click on the “Other User” button for text box to appear. Then it asks for desktop environment (KDE or GNOME). The most shitty thing in the login screen is that it is unable to remember the last desktop environment that you have used. It always want to start Gnome and if you are a KDE user you have to select KDE at every login.
Yesterday I have installed Fedora 9. First of all I want to say that I was waiting for this release for a very long time and I had expected stable, well tested OS from Fedora. But unfortunately it started disappointing me just from installation process.
When I have booted from Fedora 9 DVD to start installation process it asks for checking installation media. I said OK and it started to test. After test finished it ejected DVD and said that this is ok to install from this media. I pressed Enter. Setup loaded tray and said just “Error”, without any explanation. Then I pressed again Enter, it ejected again. Then loaded and again “Error”! What a shit!!! I was unable to continue the installation, so I rebooted computer and started from beginning. This time I said “no” when it asked to check installation media. Setup continued.