![]() Fedora 14 is the latest update to the Red Hat-sponsored, Linux distribution. It is one of a handful of Linux distributions that use LVM, the Linux Logical Volume Manager, as the default disk partitioning scheme. The installer creates three logical volumes by default, besides the non-LVM /boot partition. The three logical volumes, for /home, /, and swap, are the minimum recommended for a desktop installation. The problem with the default installation is that all available disk space is allocated to the logical volumes, living none for future use when it might be needed to grow a partition, or create a new logical volume. This installation guide takes you through the process of editing each logical volume to free up disk space, space that is not needed for the system to run. At the end (of this tutorial), I will show an example of how to resize (grow) a logical volumes, a basic LVM management task.
Fedora 14 is the latest update to the Red Hat-sponsored, Linux distribution. It is one of a handful of Linux distributions that use LVM, the Linux Logical Volume Manager, as the default disk partitioning scheme. The installer creates three logical volumes by default, besides the non-LVM /boot partition. The three logical volumes, for /home, /, and swap, are the minimum recommended for a desktop installation. The problem with the default installation is that all available disk space is allocated to the logical volumes, living none for future use when it might be needed to grow a partition, or create a new logical volume. This installation guide takes you through the process of editing each logical volume to free up disk space, space that is not needed for the system to run. At the end (of this tutorial), I will show an example of how to resize (grow) a logical volumes, a basic LVM management task.
When writing these tutorials, I always like to exclude those images that are not pertinent to the subject matter. And so the first image in this tutorial is taken from the step where disk management starts. The default option is to install to Basic Storage Devices, like you would find on a personal computer. The other option is for enterprise-grade installations. Click Next to continue.
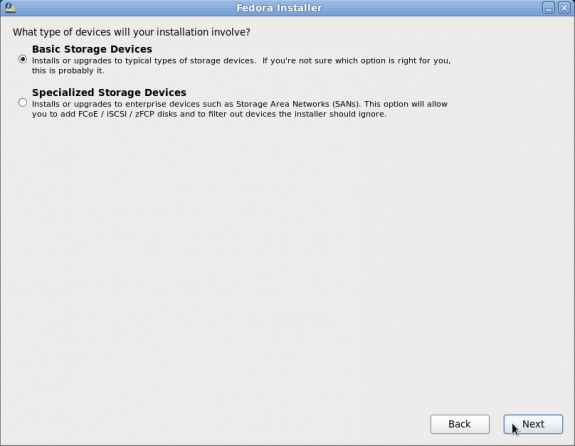
Installation options
The Fedora installer offers several disk partitioning methods. The default is shown below, and would be ok if Fedora is the only OS you want on the disk. Just like the default, the other options are self-explanatory. Because the objective of this tutorial is to modify the default partitions, be sure to enable “Review and modify partitioning layout.” And to take advantage of Fedora’s one-click, full disk encryption scheme, enable “Encrypt system.” Next.
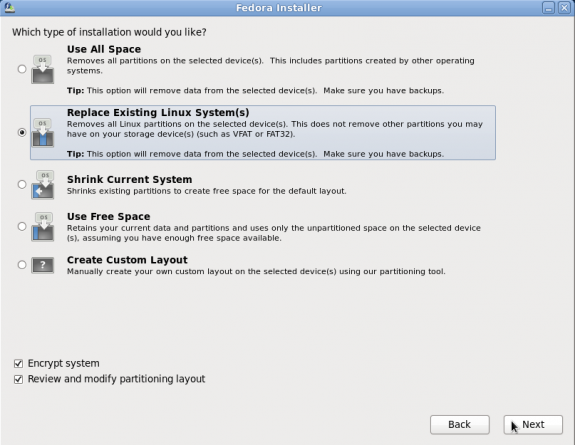
Disk partition methods
These are the default partitions and logical volumes created by the installer. We have two primary partitions, one of which is for /boot, and the other is the Physical Volume, that is, the primary partition initialized for use by LVM. If you enabled the encryption option as in this example, the Physical Volume will be encrypted. The test system, which was in a virtual environment, had a disk size of 100 GB, all of which the installer allocated to /boot and the three logical volumes. This is where we begin to modify the logical volumes to free up space, leaving just enough on the logical volumes to install the system.
You can see in this example that about 50% of the available disk space was allocated to lv_root, the root file system, and a similar percentage to lv_home. Since a default installation of Fedora 14 uses less than 2.5 GB of disk space, nothing will be adversely affected if you reduce the size of the logical volumes. To start editing the logical volumes, select each and click on the Edit button, or just double-click on the one you want to edit.
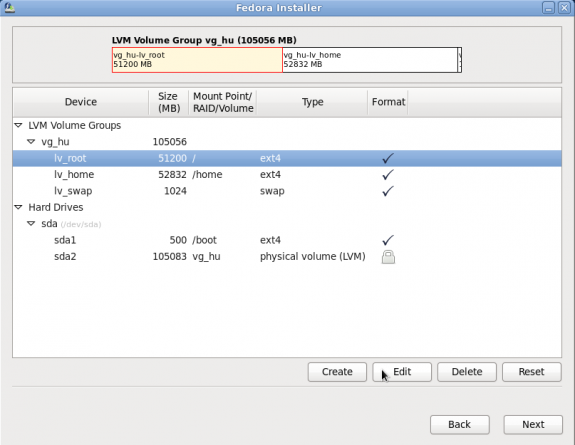
Default partitions
Note: the only entry that is not editable at this step is the physical volume. Try it and you will get the alert shown below.
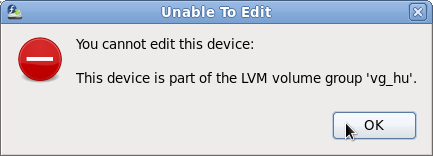
Volume edit error message
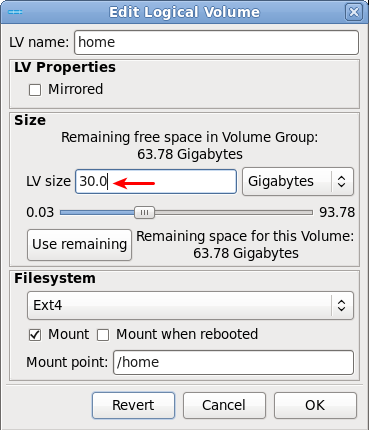
Ok, if you selected any logical volume for editing, the following window will be opened. The first one being edited here is lv_root. The primary goal is to reduce the size, but we can also edit the name of the logical volume. I prefer the logical volume names to be without the lv_ prefix. So lv_root I would rename to just root, lv_home to home, and lv_swap to swap.
Knowing that a new installation of Fedora 14 can be installed on less than 2.5 GB of disk space, reducing the size of lv_root to any value above that should be fine. For this example, I have reduced it to 8 GB. 3 GB should be good too. The name of the logical volume will also be changed as suggested in the previous paragraph.
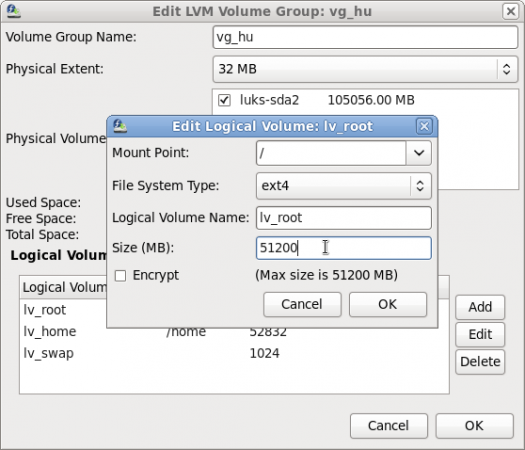
Default /root logical volume

