![]() As a desktop distribution built atop FreeBSD, PC-BSD makes available to the desktop user all the cool technologies inside FreeBSD. One of those cool technologies is ZFS, the Zettabyte File System, a file system developed by Sun Microsystems (acquired by Oracle Corporation) for the Solaris operating system. ZFS has no parallel in the Linux/BSD world. It packs features that no other file system in the Linux kernel has (btrfs is a potential answer for ZFS in the Linux kernel, but it is still a work in progress).
As a desktop distribution built atop FreeBSD, PC-BSD makes available to the desktop user all the cool technologies inside FreeBSD. One of those cool technologies is ZFS, the Zettabyte File System, a file system developed by Sun Microsystems (acquired by Oracle Corporation) for the Solaris operating system. ZFS has no parallel in the Linux/BSD world. It packs features that no other file system in the Linux kernel has (btrfs is a potential answer for ZFS in the Linux kernel, but it is still a work in progress).
This post presents a step by step guide on how to install PC-BSD 8.1, the latest version of PC-BSD, on a single-disk, encrypted ZFS file system. While using ZFS on a single disk system does not take full advantage of the powerful features of ZFS, this configuration allows a user who might not have access to a multiple disk machine to play with some of the basic features of ZFS.
Experienced BSD users likely will not need this tutorial, but if you are new to the BSD world, this ability to use ZFS should be a very good reason to distro-hop, if temporarily, to PC-BSD. Note that the minimum memory requirements for running ZFS is 512 MB. Failure to adhere to this simple requirement could lead to unpredictable results.
To start, I’m sure you have downloaded an iso image of PC-BSD 8.1, transferred it to a medium of your choice (DVD, USD), and booted up your computer from it. If all that has been completed, you should see the image shown below on your screen. Next.
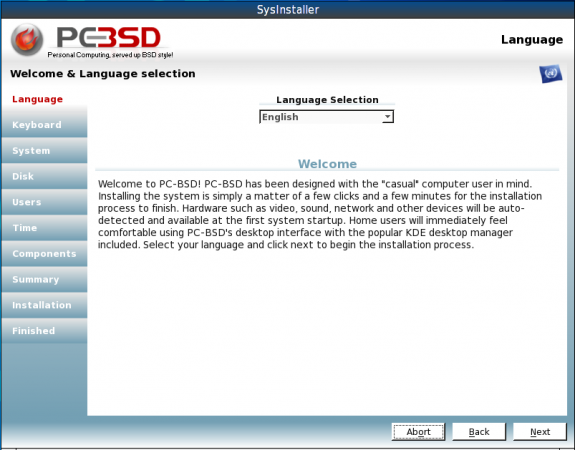
PC-BSD's intuitive installer
To reduce the number of images used in this tutorial, the next two images immediately following the above in the installation process have been omitted. These are for the Keyboard layout and language selection.
This is the fourth step in the installation process, where all the Installation options are presented. For this tutorial, we are performing a fresh installation of PC-BSD, burned on a DVD. Next.
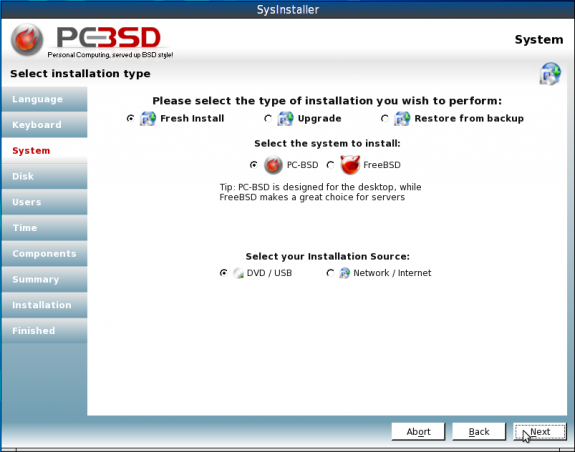
Installation options on PC-BSD 8.1
These images were taken from an installation in a virtual environment. Another installation was running on a real computer with 4 GB of RAM and a 600 GB hard disk. The virtual installation had just 62 GB of disk space. To configure ZFS, click on the radio button next to Customize Disk Partitions (Advanced).
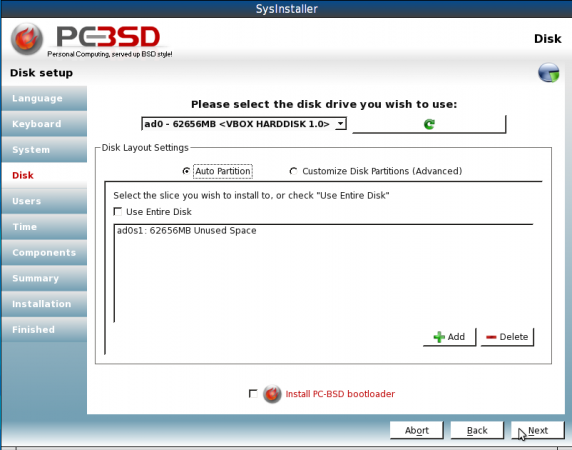
Disk available on the computer
With the Customize Disk Partitions (Advanced) option selected, click on the “+” button to start creating partitions. Keep in mind that on a default installation, the PC-BSD installer creates four partitions for /, swap. /var, and /usr with most of the disk space going to /usr. For this custom installation, we are going to do something different. We are going to create three partitions for the following:
- /boot
- swap
- and the third partition for the ZFS root pool
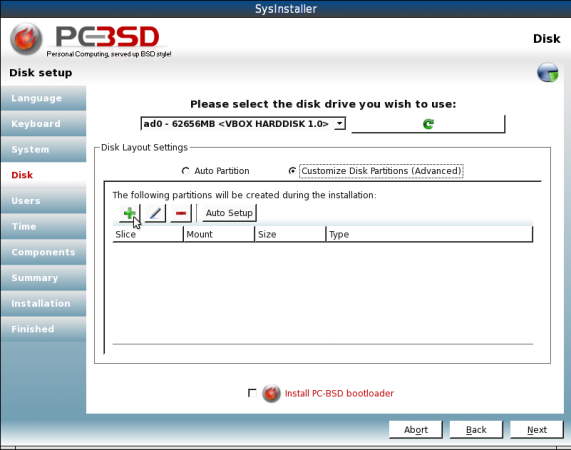
Custom disk partition option
The first partition we are going to create is for /boot. On a fresh installation where /boot occupies a separate partition, about 250 MB is used. So with an eye to the future, allocate a lot more disk space than this to /boot. In this example, 750 has been allocated. Choose the appropriate file system under Type, leave Enable Encryption unchecked, and click Save.
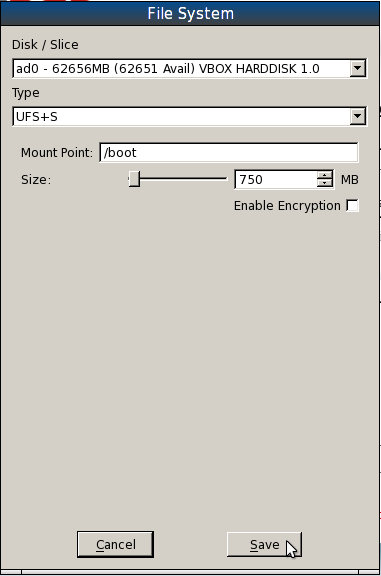
Creating the /boot partition



awesome walkthrough. thanks!