The first two articles on dual-booting Windows 7 and Linux distributions published here involved installation on a computer with a single hard drive. Those articles on dual-booting Fedora 14 and Ubuntu 10.10 with Windows 7 are available here and here. This article will cover a different use-case, dual-booting Windows 7 and Ubuntu 10.10 or Linux Mint 10 on a computer with two hard drives. The computer used for this installation is a relatively old one that once saw service as a Web server. It has 512 MB of memory, two hard drives – a primary (80 GB) and a secondary (40 GB).
The primary hard drive has an existing installation of Windows 7 Ultimate. The objective here is to install Ubuntu or Mint on the second(ary) disk. There are several methods of setting up this system, but I have chosen the simplest. If you need help setting up a configuration different from that presented here, join the Mint forum or Ubuntu forum, ask your question and I will do my best to get you the appropriate answer.
Ok, back to the main task. So, we have a computer with two hard disks, with Windows 7 installed on the first disk, and Ubuntu or Mint to be installed on the second disk. Note: The images used in this tutorial were from an installation using Mint 10. Since Mint uses the Ubuntu installer, the steps would be the same if you are installing Ubuntu instead of Mint. The only difference will be the colors.
To reduce the number of images used in this tutorial, we fast forward to the step in the installation process where disk partitioning is about to start. The installer presents three disk partitioning methods. Our choice is going to be the last one – Specify partitions manually (advanced). Forward.

This is where the fun starts. Here, the installer shows all the disk and disk partitions it found on the system. The first disk (/dev/sda) has two partitions – /dev/sda1 and /dev/sda2. These are the partitions where Windows 7 is installed. The second disk – /dev/sdb, has no operating system on it. That is where Mint (or Ubuntu) is going to be installed.

This image just shows the other disk where Mint (or Ubuntu) is going to be installed. The installer does not allow all to be shown without scrolling. Select the free space as shown and click on Add to create the first partition.
For this tutorial, four partitions are going to be created. The first should always be for /boot, then a swap partition, and the other two for / and /home. You can create as many partitions as you want, but these are the minimum recommended for a desktop computer.

The first partition you will need to create will be for /boot. The installer will, by default, create it as a primary partition, and that is acceptable. A /boot size of 200 MB to 500 MB should be enough. Distributions like Fedora and those based on it now default to a /boot size of 500 MB. Be sure to select /boot as the mount point. For file system type, the default is ext4. Because of the overhead issue that comes from using a journaling file system, there is an ongoing debate whether /boot needs ext4. One group says that it does not, while another says that it does not matter. Where do I stand on this? It does not matter. Use what ever you feel is the right one. I have never had any issues from using a journaling file system for /boot. But that does not make it right. If you are not comfortable using a journaling file system on /boot, use ext2. Note that virtually all Linux distributions that use a separate /boot partition, use ext4. MeeGo, by the way, uses ext3 (another journaling file system for /boot). When you have made the choice you feel comfortable with, click OK.

With /boot created, select the free space as shown and click on Add to create the next partition. This step will have to be repeated for every partition you need to create.

The next partition will be for swap. The installer will attempt to create this and subsequent partitions as logical partitions, but I like to make them primary (I am only creating four). If you are going to create more than four partitions, you will, of course, need to create logical partitions. A swap space of 2 GB to 5 GB should be enough. Be sure to select “swap area” from the first dropdown menu. OK.


I followed the guide strictly on every detail, Ubuntu works fine but when I try to load Windows it shows the loading splash screen but then goes black and the HD light keeps blinking but nothing happens except my fans start going crazy like its over heating, HALP!
Can you run Windows in standalone mode on the HDD?
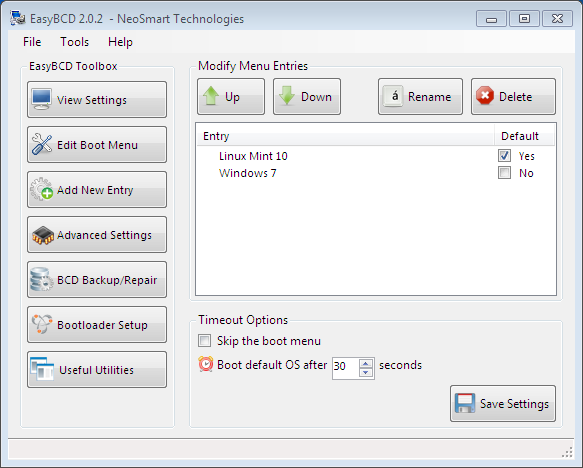
sorry not sure what exactly you are asking. initially, i did a fresh install of windows 7 and ran all the updates, then i ran Ubuntu from the CD and installed it as per the guide on the second hard drive. i rebooted and windows loaded up automatically, then i installed/ran EasyBCD to add the Ubuntu entry and set GRUB2, then when I rebooted after that I can run Ubuntu fine but Windows hangs on the black screen just after you see the initial splash Windows 7 loading screen. I can get into Windows Safe mode as well.
hold the presses, it appears that the black screen of death was caused by an updated nvidia driver in Windows 7, everything appears to work once I restored to a point before the drivers were updated.
I followed the directions and everything went smooth. But when I try to boot up ubuntu I get sent to a grub prompt. Do you have any ideas on what is going wrong?
Tough to say. Where did you install GRUB, /dev/sdb or /dev/sdb1?
Can you boot into Windows? If you can, try reinstalling Ubuntu. If you followed the steps as described, it should work.
Windows will boot up fine and I believe I installed GRUB in /dev/sdb. Would it make a difference that I’m installing ubuntu on a external hdd? I will try to reinstall like you suggested and see if that helps.
Installing to an external drive, something I feel is not necessary, is likely the problem. If installing to an external drive, what’s the point of dual-booting. You could just install Ubuntu to the external drive instead of attempting to dual-boot with Windows.
Dual-booting makes sense only if installing to internal drives on the same computer.
I tried this install method and everything went ok. But when I try to boot up Ubuntu a grub command line comes up. Any ideas what I did wrong?
I have 2 sata hard disks. On one I have windows 7. While installing linux on the other, i didn’t use the manual partitioning method but the ‘use entire disk’ one. Will it still work if I use BCD program to modify the Windows Boot Manager?
Yes, it will, but I hope you understand what happens with the default installation: In your case, the installer will install GRUB in the MBR of the first drive. That makes GRUB responsible for dual-booting both operating systems. While this will work. It also means that you do not need to use the BCD program to modify the Windows Boot Manager.
Use the BCD program to modify the Windows Boot Manager only if you want Windows Boot Manager to be responsible for dual-booting both operating systems.
Thank you very much for the guide.
It is a simple & well tailored tutorial.
Brilliant. Everything was such a breeze.
One issue though i faced was the boot loader.
After installation of Mint, neither operating system was booting.
A disk read error has occurred message would pop out.
Figured my way out though!
Now all is in good shape and running well!
Thanks again
Thanks. What did you do to solve the “disk read error” problem?
I tried this method with one small difference. I installed windows on the second disk and ubuntu on the first disk. Everything worked fine with the exception of one thing. Anything I installed on linux was not saved to /home. I kept getting errors saying that / and /boot were full. Did I do something wrong?
If the system is saying / and /boot are full, are they?
Use the disk utility to see whether they are. Or just launch a terminal and type df -h to see what’s going on.
That aside, the method you used could cause you plenty of pain down the line. When dual-booting Windows and Linux, the recommended method, the path of least-trouble-down-the-road, is to install Windows first.
Thanks, I reset my smaller hd as sata1 and am redoing everything. Hope it all works out. Thanks for the quick response
I did the dual boot but when i start my laptop it only starts with ubuntu, i want the option which comes before starting to choose the os to start, but it did not come and only laptop starts with ubuntu and i cant start my laptop with windows 7
If you installed Ubuntu on the third HDD, the only reason it is starting with Ubuntu is you installed GRUB, the boot loader, on the MBR of the first hard disk. It also tells me that you used the default, auto-partitioning mode. If you had switched to the advanced, manual partitioning mode, you would have had the option to install GRUB somewhere else.
But even with GRUB installed on the MBR of the first disk, it should have added an entry for Windows 7 in the GRUB menu. The question is this: What did you not do right? Did you follow the directions as laid out in the link I suggested in my last comment?
Your best bet now is to edit GRUB’s config file and add an entry for Windows 7.
I am assuming that you did not install Ubuntu in the same space that Windows was installed, that is, you did not delete the Windows installation.
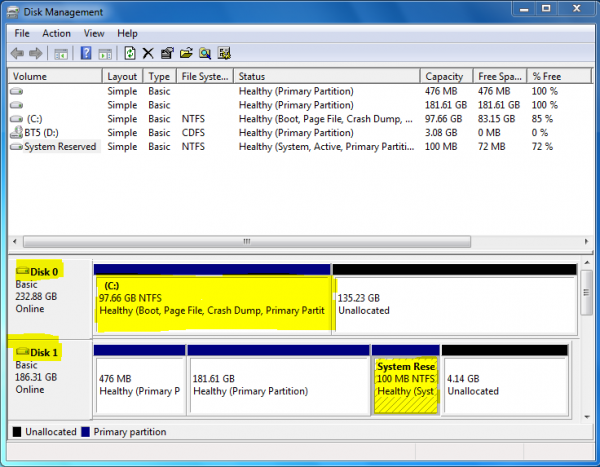
SOLVED – I’m posting for every one having the problem. Before altering the windows bootloader with easyBCD you have to assign a drive letter to the windows hidden system partition. Then you can the entry for mint. After reboot everything works sweetly.!! If you do not want the drive to appear in my computer, you can exclude it by altering a group policy using gpedit.exe in cmd.
I’m glad you solved the problem, and thank you for sharing.
Done that already after setting up easyBCD and didn’t work. Do you recon I have to do it before setting up easyBCD? I was also thinking if there is a way to change the drive scan order (If I’m putting correctly) in grub2 so that ntfs partitions are omitted during mint’s start up. Could this solve the problem and if so how can i easily do it?
Thnx..
Followed the guide step by step. Upon restarting, after selecting Linux Mint 10″ on win bootloader, I get the Ttry (HD0,0): NTFS5: No ang0″ message. It stays on screen for about 30sec (maybe more) and after that linux starts normally. How can I make that disappear so that Mint loads faster?
I have never encountered that message, but others have reported that it is caused by the presence of an unlettered partition in windows – likely the system partition. And the fix is to find that partition under Disk Management, and rename to a drive letter.
Sorry for accidentally posting the answer under my own question..
Followed the guide step by step. Upon restarting, after selecting Linux Mint 10″ on win bootloader, I get the Ttry (HD0,0): NTFS5: No ang0″ message. It stays on screen for about 30sec (maybe more) and after that linux starts normally. How can I make that disappear so that Mint loads faster?
JESUS what a mess…
@finid – my reply is this..finally..
Done that already after setting up easyBCD and didn’t work. Do you recon I have to do it before setting up easyBCD? I was also thinking if there is a way to change the drive scan order (If I’m putting correctly) in grub2 so that ntfs partitions are omitted during mint’s start up. Could this solve the problem and if so how can i easily do it?
Thnx..