This tutorial gives a step-by-step guide on how to dual-boot Linux Mint 22 (Wilma) and Windows 11, with the Linux distro installed on an external drive and GRUB, the Linux boot manager, installed on the same drive that the distro is installed on. You’ll learn how to manually partition the external hard drive for the Linux Mint installation and how to make sure that GRUB is installed on that external hard drive, so there will be no interference between Windows 11 boot manager and GRUB.
If your computer has 2 internal drives, a better approach is to install Windows 11 and Linux Mint 22 on separate drives.
Before you proceed, make sure that you have completed the following preliminary tasks:
- Disable Secure Boot, Fast Boot, and Fast Startup in Windows 11.
- Download the installation ISO image of Linux Mint 22. All three desktop environment variants (Cinnamon, Mate, and Xfce) supported by Linux Mint use the same installer, so the steps in this tutorial apply to any ISO image you download, regardless of the variant you choose.
- Flashing the ISO image to a USB stick in Windows 11 or flashing the ISO image to a USB stick in Linux is the final preliminary task you need to complete.
Pre-Disk partitioning installation steps
The computer used for this tutorial is a store-bought Lenovo IdeaPad, so it came with Windows 11 pre-installed on an NVMe (M.2) drive. The external hard drive for the installation of Linux Mint 22 is an SSD, but you could use any storage drive that you have, like an HDD or even the same type of M.2 drive that Windows 11 was installed in.
When you have the installation USB stick ready, shut the PC down, then insert both the installation USB stick and the target external drive into available USB ports.
Now, reboot the PC, pressing the F12 key repeatedly as the computer boots up until the boot menu appears. If the F12 key does not bring up the boot menu, consult your computer’s documentation to find the key that does. As shown in Figure 1, you should see an entry for Windows 11 boot manager and an entry for the installation USB stick. Use the down arrow key to select the latter, than press the Enter button.
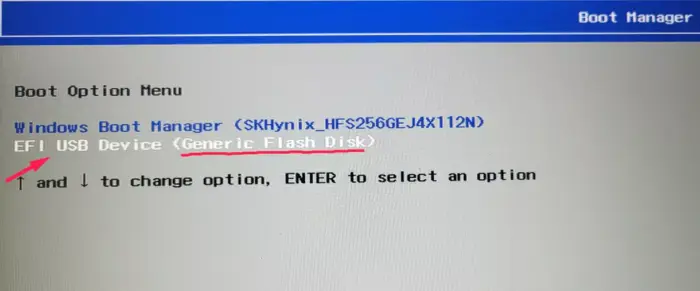
Figure 1: The boot menu on the Lenovo IdeaPad laptop used for this tutorial showing entries for the Windows 11 boot manager and the installation USB stick.
The computer should reboot into the Linux Mint live desktop. Then double-click on the Install Linux Mint icon on the desktop to launch the installer. Your language should be automatically selected in the first installation window shown in Figure 2. Otherwise, select, then click Continue.
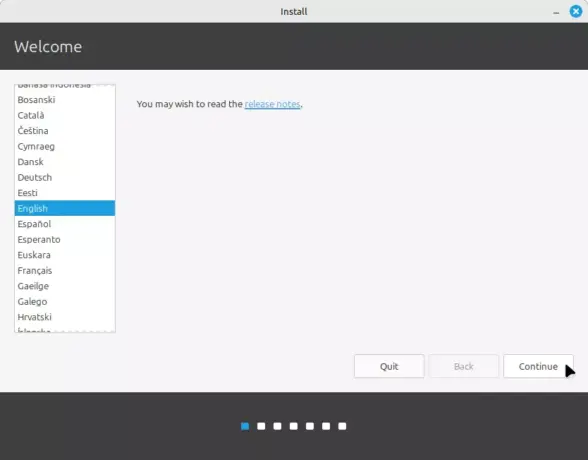
Figure 2: Linux Mint 11 installation
In the next window, shown in Figure 3, the installer should auto-detect your keyboard layout. If not, click the Detect Keyboard Layout button, then on Continue.
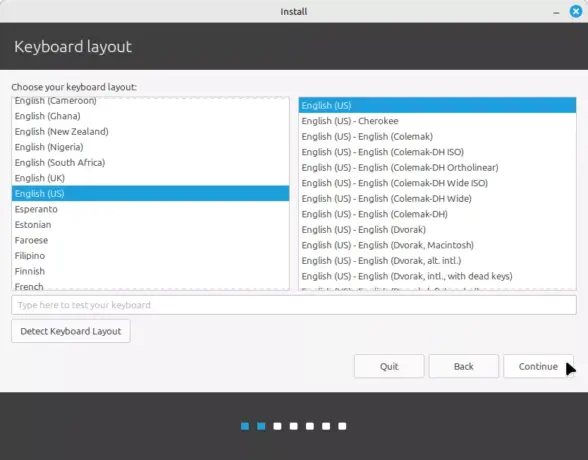
Figure 3: Linux Mint 22 installation keyboard
Installing non-free (proprietary) multimedia codecs makes it possible to use those after installation, so it’s always a good idea to install them by selecting Install multimedia codecs. Continue.
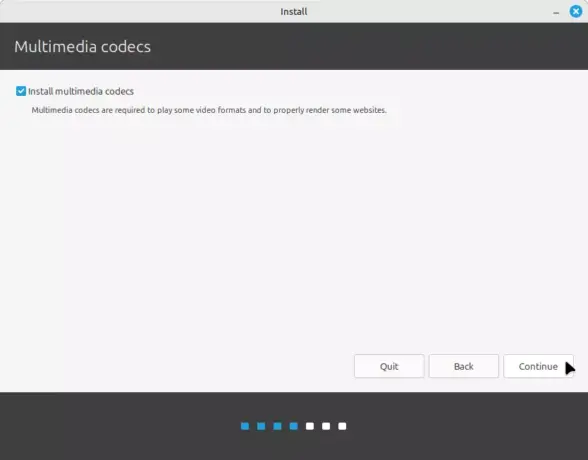
Figure 4: Install multimedia codecs.
Whether you see the message window shown in Figure 5 depends on whether you did or did not shutdown your computer before connecting the external hard drive that Linux Mint 22 will be installed on. You’ll see the message window if you did not shut the computer down before attaching the external hard drive. Click Yes to let the installer unmount the drive’s partitions.
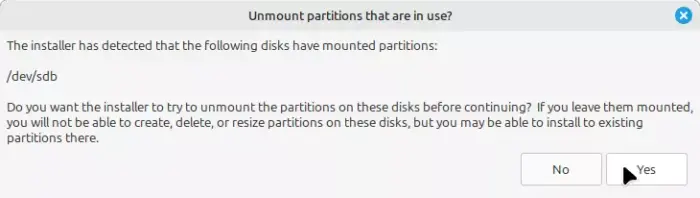
Figure 5: Unmount external hard drive’s partitions.
Disk partitioning installation steps
The next window you see in the installation process lets you choose how the installer should install Linux Mint on the detected hard drives. Because you want to install Linux Mint 22 on the external hard drive, the option to select in this step of the installation process shown in Figure 6 is Something else. That should make it possible for you to manually partition the external hard drive. Continue.
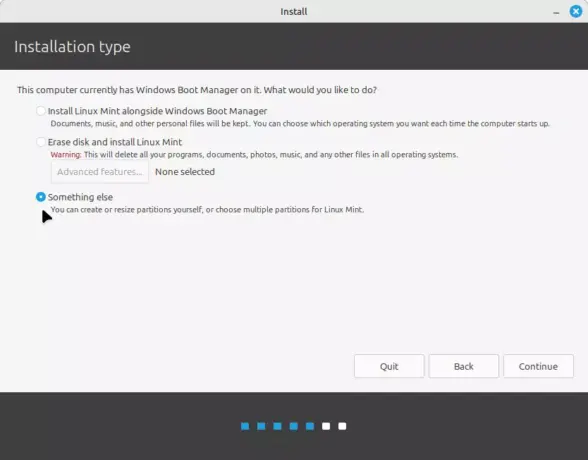
Figure 6: Selecting the right installation type.
In the next window shown in Figure 7, you’ll see all the disks and disk partitions detected by the installer, except for those of the USB stick that the installer is running on. You can see that Windows 11 is installed in the NVMe drive (/dev/nvme0n1). Because of the limitations of the window, you’ll have to scroll down to see the external hard drive (/dev/sdb) and its partitions (see Figure 8 after this).

Figure 7: Windows 11 partitions as seen by the Linux Mint 22 installer.
As shown in Figure 8, the external hard drive used for this tutorial had existing partitions on it.

Figure 8: Existing partitions on the external drive on which Linux Mint 22 will be installed on.
If yours is the same, select each partition and delete it by pressing the – button. Do that until only a free space is left.
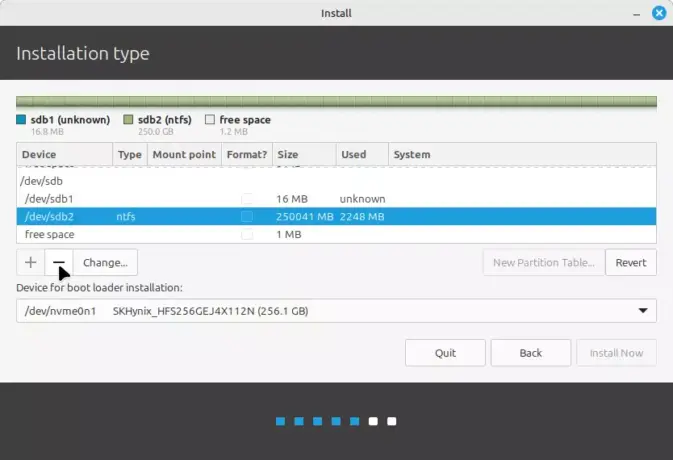
Figure 9: Deleting existing partitions from the external hard drive.
Now you can start creating partitions. To do that, select the free space and click on the + button. (Do this for each partition you want to create.)
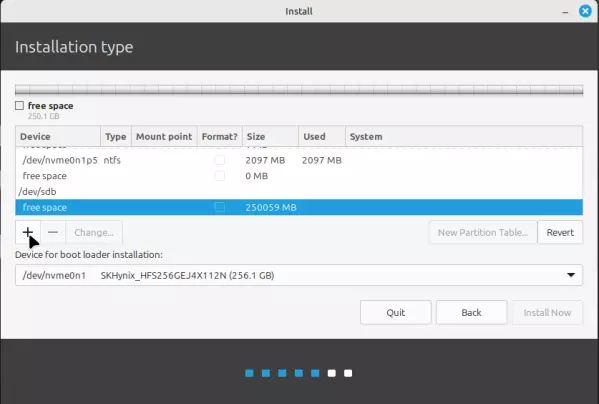
Figure 10: Free space for creating partitions for installing Linux Mint 22.
That will open a window where you can create the first partition, which will be used to install the boot manager (GRUB) files. The EFI System Partition automatically created on Windows 11 and Linux distros is usually about 270 MB in size, so assigning that amount of disk space to this partition should do just fine. Keep other options as shown and select EFI System Partition from the Use as dropdown. Click OK.
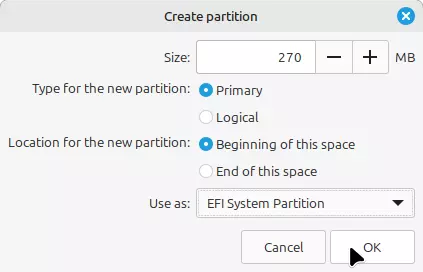
Figure 11: Creating the Linux Mint 22 EFI System Partition
The next partition created for the system used in this tutorial was assigned the rest of the disk space available on the external drive. Again, leave other options as shown and select Ext4 journaling file system from Use as and / from Mount point. OK.
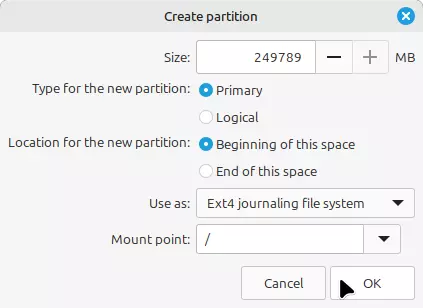
Figure 12: Creating the root partition for the installation of Linux Mint 22.
After creating all the partitions you need, the next task is to tell the installer where to install the boot loader (GRUB) files. By default, it will want to install it in the EFI System Partition of the internal drive, the one where Windows 11 is installed on. That’s not a good idea, so the recommended place to install GRUB is in the EFI System Partition you created earlier. You do that by selecting the device where that partition is from the Device for boot loader installation dropdown. In this case, it’s /dev/sdb. Click Continue after selecting the equivalent device for your installation.
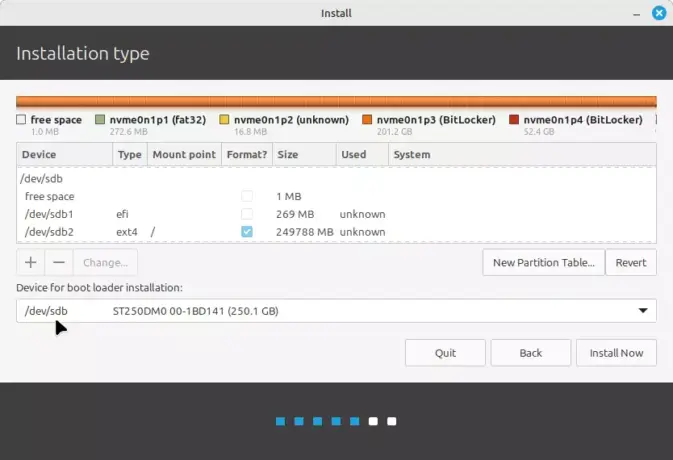
Figure 13: Choosing where to install the boot loader files for Linux Mint 22.
This is just the installer informing you what it’s going to do, which is, format the partitions you created earlier. Continue to begin installing the system.
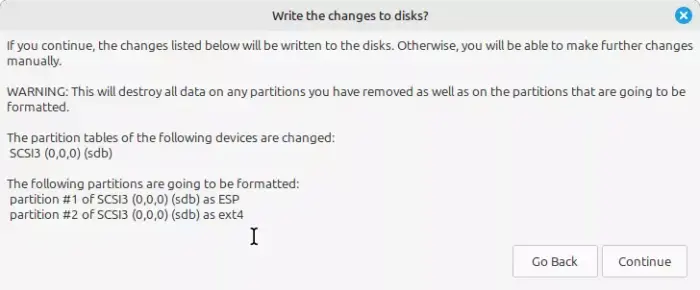
Figure 14: Partitions to be formatted by the Linux Mint 22 installer.
Post-disk partitioning installation steps
If you computer is connected to the Internet, the installer will detect your timezone automatically. Otherwise, select it by clicking on the timezone map. Continue.
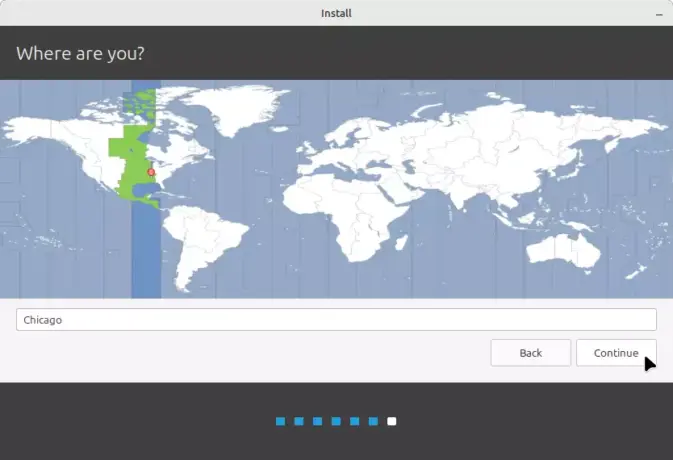
Figure 15: Timezone setting during the installation of Linux Ming 22.
The final task to do while the installer is still installing software is to create the user account you’ll use on the system. It’s always a good security practice to require a password to log in. And you may opt to encrypt your home folder. Continue.
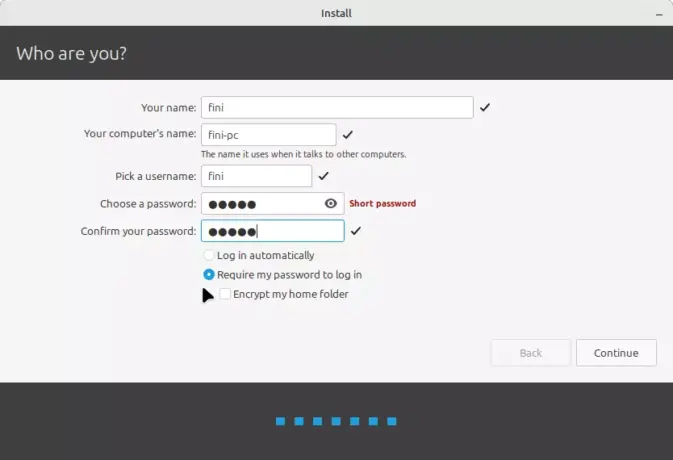
Figure 16. Creating a user account for Linux Mint 22.
Once installation is completed, the installer will prompt you to either continue using the live system or restart the computer. Unless there’s something else you want to do on the live system, choose Restart Now to reboot into your new installation of Linux Mint 22 Wilma.
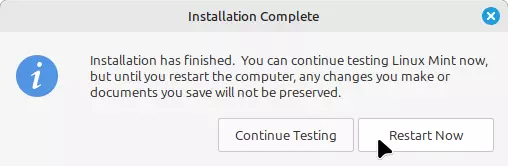
Figure 17: A prompt from the Linux Mint 22 installer.
Finally, you’ll be prompted to “Please remove the installation medium, then press Enter:” Pressing Enter after removing the installation medium should trigger a reboot. If it does not, press or press and hold the power button to shut the computer down, then press the power button again to restart. If all went well, you should see a GRUB menu similar to the one shown in Figure 18, with an entry for Linux Mint 22 and also for Windows 11, so you can choose what OS to boot into.
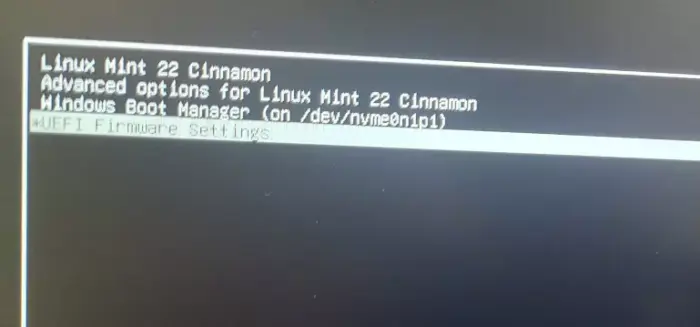
Figure 18: Linux Mint 22 GRUB boot menu
Miscellaneous items
If you press the F12 key as the computer reboots, the boot menu shown should now contain and entry for Linux Mint 22 and the Windows Boot Manager entry.
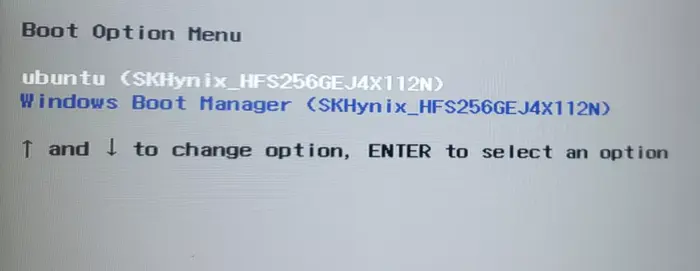
Figure 19: Lenovo IdeaPad boot menu showing Windows 11 and Linux Mint 22 boot manager entries.
If at any time you’re dropped to a grub prompt as you attempt to reboot the computer after selecting the Linux option from the boot menu, pressing the Ctrl-Alt-Delete key combination should prompt another reboot and bring up a proper GRUB boot menu.


