Kubuntu is a desktop distribution based on Ubuntu, and Kubuntu 15.10, the latest, stable, edition, is based on Ubuntu 15.10. Both were released late last month.
This tutorial shows how to dual-boot Kubuntu 15.10 and Windows 10 on a computer with UEFI firmware, and on a single hard drive. A future tutorial will show how to dual-boot both operating systems on a computer with two hard drives.
For this tutorial, you’ll, of course, need to have a computer with Windows 10 installed, one with free space on the C drive that can be recovered to use for installing Kubuntu 15.10. In Figure 1, which is a screenshot of the Windows 10 partition manager on the computer used for this tutorial, the free space recovered from the C drive is highlighted.
From that free, unallocated disk space, we’ll create the following partitions for Kubuntu: a root partition; a partition for your home folder (optional, but nice to have); and a swap partition.
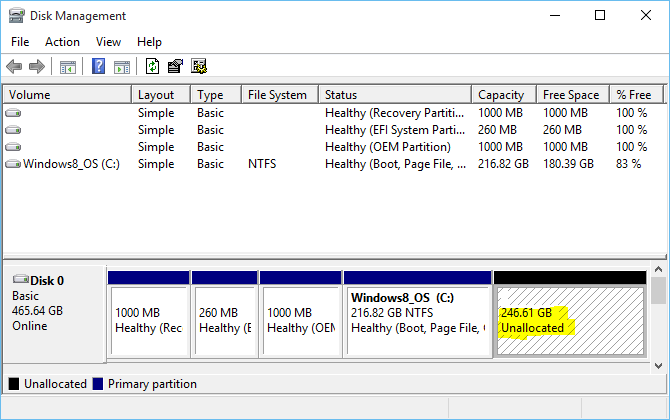
Figure 1: Windows 10 partitions as seen from the Windows 10 partition manager
You’ll also need to download an installation image of Kubuntu 15.10 from here. Then burn it to a blank DVD or transfer it to a USB stick. Once that’s finished, put the installation media in place and reboot the computer. Just as the system is booting and before it boots into the default boot device, access the boot menu by pressing either the F11 or F12 key.
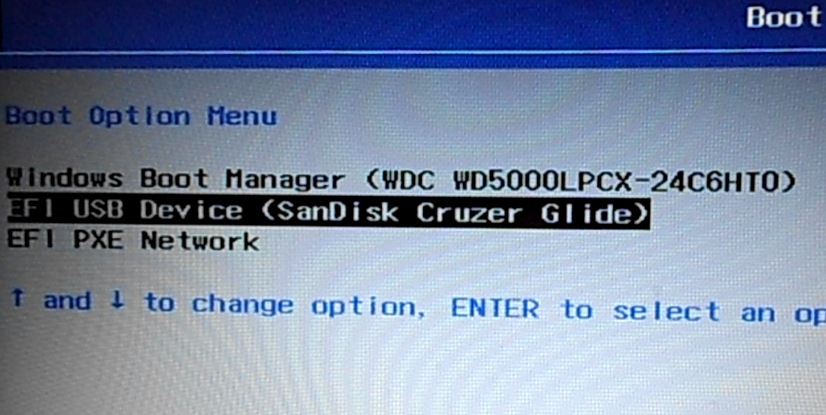
While on the boot menu, select the entry that will boot into the UEFI-aware version of the Kubuntu 15.10 installer. On the boot menu of the computer used for this tutorial, that entry is shown in Figure 2. When you select it and press the ENTER key, you’ll be taken to another screen where you’ll be given the following options: ubuntu (this is the option to select, as it will boot into the Kubuntu 15.10 Live desktop); OEM Install (this is for PC vendors, so ignore it); Check disk for defects (use if you need to verify that the installation media has no defects).
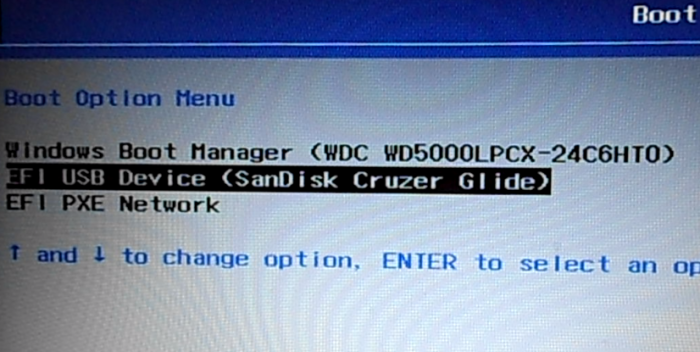
Figure 2: The boot menu on a Lenovo G50 showing entries for a USB stick and Windows 10 Boot Manager
After booting into the Live desktop, launch the installer by clicking on its icon on the desktop. Then click through the first few steps until you get to the one shown in Figure 3. The options here are the disk partitioning methods. By default, the installer will want to wipe Windows 10 from the disk and install Kubuntu 15.10 in its place. Since that’s not what you want, you’ll have to select another option that will make it possible to create partitions for Kubuntu using the free space that was recovered from the C drive.
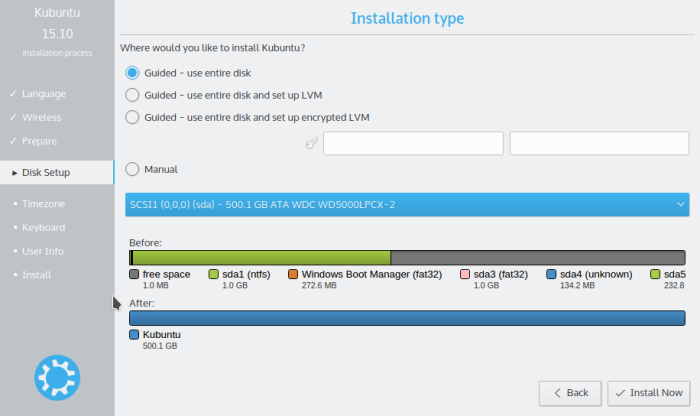
Figure 3: Kubuntu 15.10 partition methods
That option is Manual, so select it and click Continue.
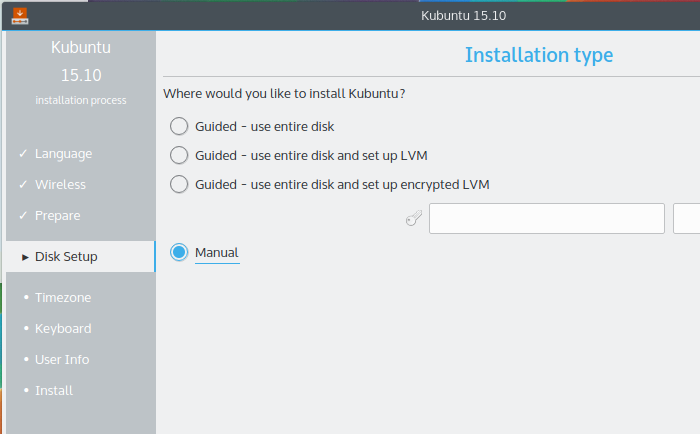
Figure 4: Kubuntu 15.10 installer manual partition option
That should open the installer’s manual disk partitioning tool, where the disk and disk partitions detected on the system should be listed. Depending on your installation of Windows 10, the first four or five partitions will belong to it, followed by the free space recovered from its C drive. Make a note of the partition of Type efi. That’s the EFI System Partition (ESP), and it will be the device for installing the boot loader. For this tutorial, it’s /dev/sda2.
To start creating partitions for Kubuntu 15.10, select the free space and click the Add button. This step has to be repeated for all the partitions you’ll create.
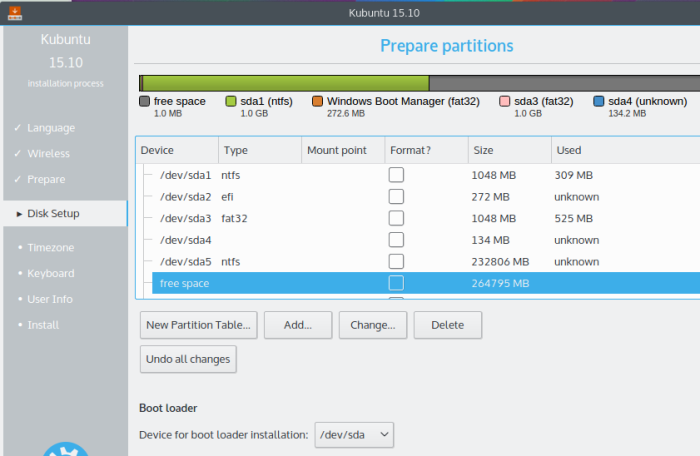
Figure 5: Kubuntu 15.10 manual disk partitioning tool
That should open the installer’s partition editor. For each partition that you create using this tool, you only need to specify the size, the file system (from Use as), and the mount point (from Mount point).
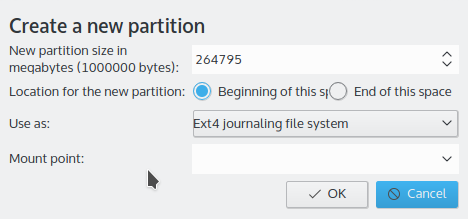
Figure 6: Kubuntu 15.10 partition editor
For the root partition, give it about 15,000 MB (15 GB) to 20,000 MB (20 GB). That’s about twice the recommended minimum disk space for installing Kubuntu 15.10. For the mount point, select /. The default file system is what should be selected for this partition and the next one, so leave Use as unchanged. Click OK.
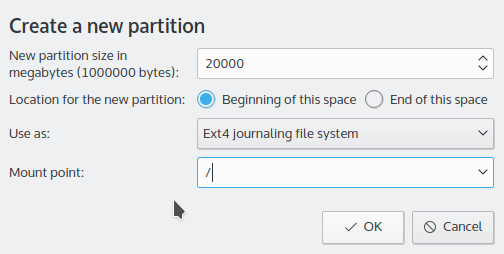
Figure 7: Creating root partition for Kubuntu 15.10
For the home partition, allocate most of the available disk space to it, then select /home from Mount point. OK.
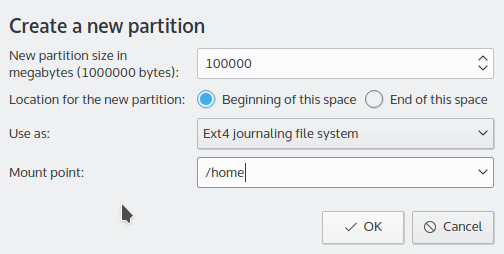
Figure 8: Creating home partition for Kubuntu 15.10
The last partition will be for swap, disk space that the system may use as virtual memory. A size of 1,000 MB (1 GB) to 4,000 MB (4 GB) is recommended. From Use as, select swap area. OK.
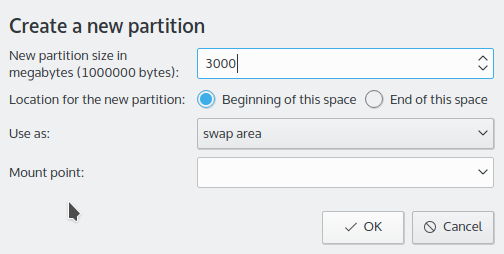
Figure 9: Creating swap partition for Kubuntu 15.10
Back to the main disk partitioning tool’s window one last time, select the correct device for installing the boot loader under the Boot loader section. After making the right selection, click Install Now.
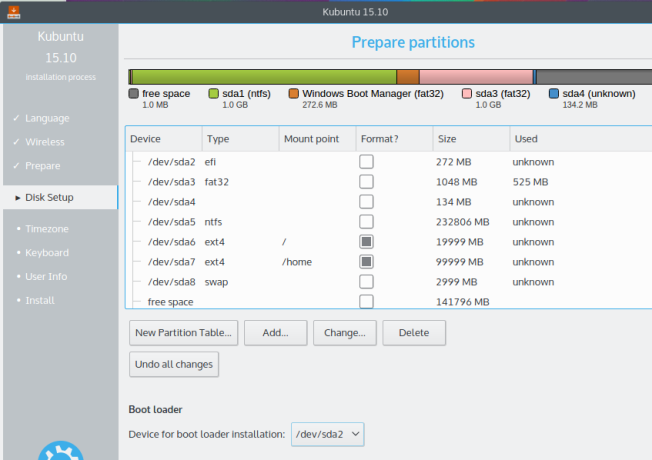
Figure 10: Completed partitions for dual-booting Windows 10 and Kubuntu 15.10
At this step, verify that the correct partitions are going to be formatted, then click Continue.
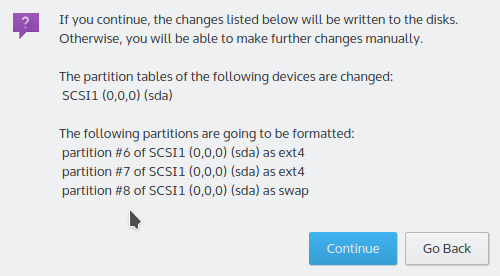
Figure 11: Kubuntu 15.10 partitions to be formatted
After the installation has completed, reboot the computer. It should reboot into Kubuntu 15.10, but only after making a brief stop at the GRUB boot menu, where you’ll see entries for the Windows 10 Boot Manager besides a few entries for GRUB. After booting into Kubuntu 15.10, reboot into Windows 10 just so you’re sure that it still works.



Oh boy, I wish I had found this guide before attempting my first dual-boot.
Suffice to say, most of the guides online said to keep boot loader path as /sda and I did that. Everything went along successfully and then turns out I couldn’t access Windows 10, wiped the whole drive and will try and learn from the mistakes of not doing enough research
This guide will work for 19.10 as well right?
It should, but I’m writing an update for these tutorials. Stay tuned.
I have been running the same laptop with various Linux distros for ten years. Just got a new laptop and not having set up a dual boot in a decade this resource was invaluable as things have changed a bit! Only thing I had to do differently was download a third party partition editor for the Linux installer to recognize the free space. Awesome! Thanks!