The first task to perform when you’re trying to set up a dual-boot system between Windows 11 and a Linux distro, like Fedora, Linux Mint, or Ubuntu, is to download the distro’s ISO installation image and flash, or write, it to a USB stick. This article gives you the 3 applications that I’ve found to be the simplest and easiest to use in Linux.
They are . . .
dd
dd is a command line tool that’s a part of GNU Core Utilities, so it’s available on every Linux distro. It copies input to output, with optional data conversion. It is both a powerful and dangerous tool, given how easy it can be used to overwrite the system drive. The joke is that dd stands for disk destroyer, but the name is said to have been inspired by the Data Definition (DD) statement of IBM’s Job Control Language (JCL).
In any case, here’s a quick guide on how to use it to flash a Linux ISO image to a USB stick.
Say you downloaded an ISO image named favorite-distro.iso to your working directory and the target USB stick is mounted at /dev/sdc. The following command is how you’ll use dd to flash that ISO image to the USB stick:
# writing an ISO image to a USB stick using the dd command
#
sudo dd if=favorite-distro.iso of=/dev/sdc bs=1M conv=sync status=progress
You use sudo to run the command because dd requires root privileges. if means input file, so you pass it the ISO file you downloaded. of means output file – the target USB stick, which, in this case, is the hypothetical /dev/sdc. bs (block size) specifies how many bytes to read/write at a time (the default is 512 bytes). bs is actually a combination of ibs (input block size) and obs (output block size). conv=sync tells dd to convert by padding each input block to ibs with trailing zero bytes. status=progress causes dd to print periodic transfer statistics to stderr (standard error), or to the screen.
balenaEtcher
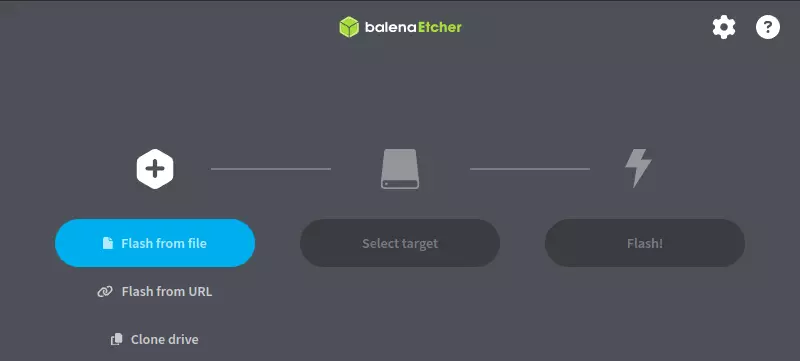
balenaEtcher is a cross-platform that software that runs on Linux, Windows, and macOS. It’s open source and gives notification after it completes a flash operation. It also hides your system drives, so you do not accidentally overwrite them. Aside from being able to flash a downloaded ISO image to a USB stick, you can also flash directly from a URL.
A bonus with Etcher is that it can also be used to clone your system drive. You may grab an installation image for Linux from the project’s download page. After installation, launch the application and start flashing. The interface is very intuitive to navigate, so you don’t really need any documentation on how to use it.
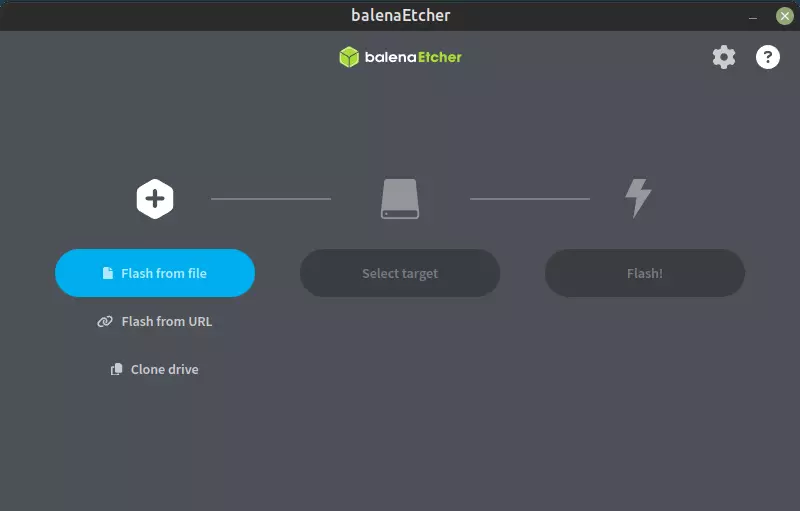
Figure 1: Using balenaEtcher to flash a Linux ISO image.
Ventoy
Ventoy is also a cross-platform application (runs on Linux and Windows, but not on macOS) for flashing Linux ISO installation images to USB sticks. However, it has a lot more features than balenaEtcher, though most of those you’ll never need, like being able to flash more than one Linux ISO image to the same USB stick. You may grab an installation file for Linux from the project’s download page, then learn how to run it.

Figure 2: Ventoy for flashing Linux ISO to USB stick.
Aside from balenaEtcher and Ventoy, quite a few Linux distros ship with their own graphical application for flashing ISO images to USB sticks, so if don’t feel like using any of the aforementioned, search your distro’s repos for a similar application.

