VestaCP is an open core Web hosting control panel similar to cPanel. It’s a popular replacement for cPanel when you don’t want to pay cPanel’s monthly fee. I actually use it to host several websites on Vultr but perform most of the system management from the command line.
DKIM, short for DomainKeys Identified Mail, is a security scheme for email designed to prevent email spoofing. With DKIM configured, a mail server will only send mail if it originates from its domain. But if not properly configured, it can lead to the common Relay access denied error.
This tutorial shows how to properly configure DKIM on VestaCP to avoid that error and also email spoofing.
Enabling DKIM for a domain
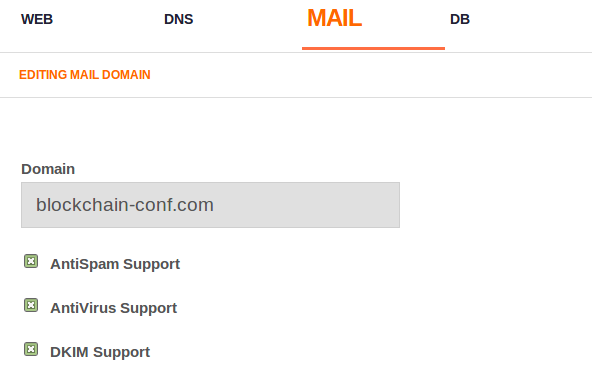
DKIM is configured per domain, so you’ll have an option to enable it when creating a domain, as shown in the image below.

Figure 1: Enable DKIM support in VestaCP for a domain
After the domain has been created, you now have to create a text (TXT) record for the domain using its DKIM public key at your domain registrar (this is for when you’re using an external DNS, not the built-in DNS feature of VestaCP).
So you now need to get the DKIM public key. Where can you find it?
Access the server using a console, and using the v-list-mail-domain-dkim command, which will accept the username the domain was created under and the domain itself as arguments, you will be able to get the private and public keys. The bottom part of the output will be the domain’s DKIM public key. That’s what you need. Copy and paste it into an editor. You’ll need it in the next section:
# Getting the DKIM keys of a domain # "username" is the one the domain was created under # domain is the domain itself, e.g., example.com v-list-mail-domain-dkim-----BEGIN RSA PRIVATE KEY----- GySW9qQg9yNIq+Ir9FW/BZj4g4YgaDKjBBDyXcjD80zhqMe4M9oWif6Y8vX/yRDl 4IzClP36dv6OiCz9BdczxZ+dKJWVu6fkD3d5Kx3xtA== -----END RSA PRIVATE KEY----- -----BEGIN PUBLIC KEY----- MIGfMA0GCSqGSIb3DQEBAQUAA4GNADCBiQKBgQDCVc23awQJDzkcQh0O4+OR3hbZ ... SIS1megWfcMl5D7PnwIDAQAB -----END PUBLIC KEY----- #
Creating a DKIM TXT record for the domain
Since we’re setting this up for use with an external DNS, that is, DNS that’s not controlled by VestaCP, getting this part done takes place at your domain registrar. I use Namecheap, so the following screenshots are from my Namecheap account’s dashboard. If that’s what you’re using too, log into the dashboard, then click on the Domain List tab on the left. Find the domain you wish to create the record for, then click on its Manage button.

Figure 2: Managing a domain on Namecheap
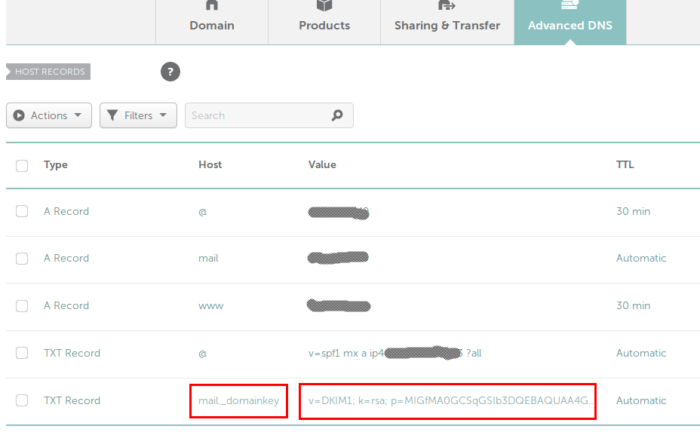
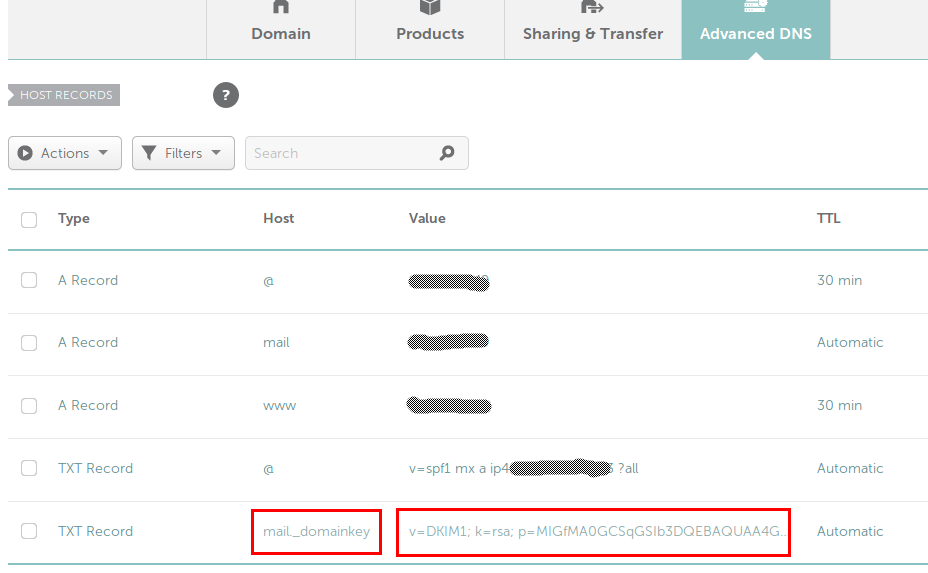
That should take you to the page shown in Figure 3. Click on the Advanced DNS tab, then below the list of existing records, click on ADD NEW RECORD. You want to create a TXT record, so select that option. For the Host field, you need to add mail._domainkeys. That’s the default selector created by VestaCP when you first set up DKIM. The Value field is where you add the domain’s DKIM public key you saved from the previous step. But you add it using the format shown below. v specifies the version of DKIM. k indicates the signing algorithm, which in this case, is RSA. p takes the DKIM public key itself. Be sure to not corrupt the public key while pasting it:
# Format for adding a DKIM public key

v=DKIM1; k=rsa; p=Copy-And-Paste-The-DKIM-Public-Key-Here

#
When you’re finished adding the record, save it. Now you have to test whether DKIM works.

Figure 3: Creating a DKIM TXT record for a domain on Namecheap
Verifying that DKIM works
To test whether your DKIM setup works, send an email from an email address under the target domain. At the other end (the recipient’s end), viewing the raw message headers of the email will show a section under DKIM Signature. If you see that, then DKIM is working. You may also use MXToolBox or mail tester to check the DKIM record.
That’s it for how to configure DKIM in VestaCP to use with an external DNS. Stay tuned for more articles on VestaCP!


You can also run:
v-list-mail-domain-dkim-dns
…and this will spit out the TXT records you need to add (you still have to make sure you have DKIM enabled in VestaCP though, as per your tutorial)
Thank you very much, Sir. Saved my life!
The best, Frank