This article is a step-by-step guide on how to dual-boot Deepin 15 and Windows 10 on a computer with UEFI firmware.
Deepin is a desktop Linux distribution formerly based on Ubuntu Desktop but whose developmental edition is based on Debian testing. That developmental edition is what will become Deepin 15.
The last pre-stable edition was Deepin 15 beta, released a few weeks ago, so the final, stable edition is scheduled for an early 2016 release. Though a few features will be fine-tuned in that final edition, I expect the installer to remain unchanged, so this article should be good to help users set up a dual-boot system between Deepin 15 and Windows 10 on a computer with UEFI firmware. That means any recent computer, OEM (store-bought) or self-built.
The computer used for this tutorial is a Lenovo laptop that shipped with Windows 8.1, and later upgraded to Windows 10. The disk space used to install Deepin 15 was recovered from the C drive by shrinking it. After installing Deepin 15 and rebooting, there were entries for Deepin 15 and Windows 10 on the GRUB menu. GRUB is the Deepin boot loader.
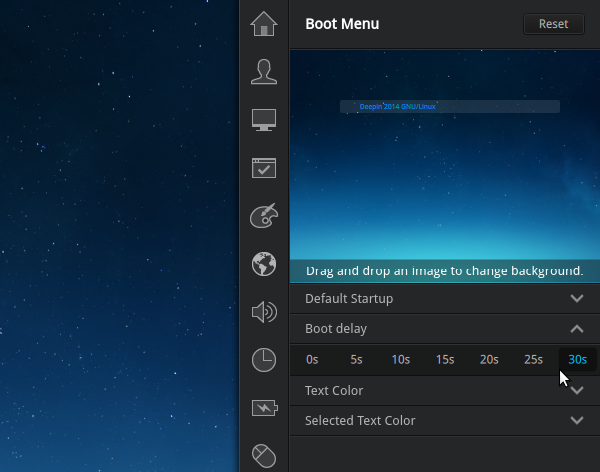
So if you follow the steps given in this tutorial, your computer’s GRUB menu should look just like the one shown in Figure 1. Selecting any of the OS entries should cause the computer to boot into the associated operating system. As a bonus, you can also access the UEFI utility by selecting the System setup entry.
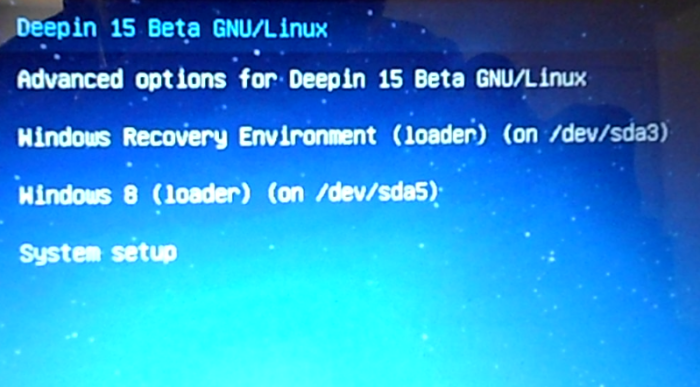
Figure 1: Deepin 15 GRUB menu
If you have not figured it out yet, to complete this tutorial, you’ll need a computer with Windows 10 installed. You may also install a fresh copy of Windows 10, but instructions on how to accomplish that is outside the scope of this article. You’ll also need to download an installation image of Deepin 15. If the stable edition has not been released yet, the most recent pre-stable edition at this time this article was published is a Release Candidate, available for download from here.
After downloading the installation image, burn it to a blank DVD or transfer it to a suitably-sized USB stick. Be aware that the Deepin 15 ISO installation image is not a Live image, so you don’t have the luxury of booting into a Live desktop, testing for compatibility with your hardware before starting the installation.
That accounts for the poor quality of the screenshots in this tutorial – they were taken using a digital camera, not from a soft-camera running on a Live desktop. As bad as they are, though, the accompanying explanations should be enough to help you figure out what needs to be done at each step.
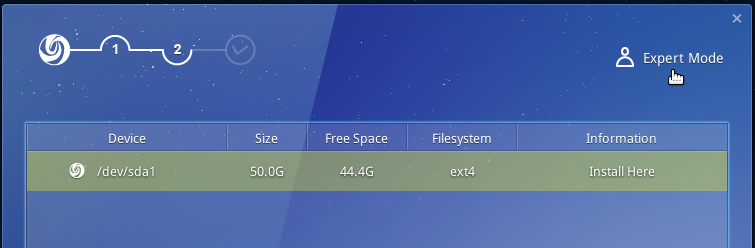
Ok, enough for introduction. If you have all the prerequisites ready, reboot the target computer with the installation media you created in place (in the optical drive or in a USB port). Boot into the installer and click until you get to the step shown in Figure 2. You should see all the disks and disk partition detected. Click on Expert Mode in the upper right hand corner.

Figure 2: Expert Mode of Deepin 15 installer
That should switch the installer to the manual disk partition tool’s window. The existing Windows 10 partitions on the computer used for this tutorial, including the free space recovered from the C drive, are shown in Figure 3. The free space is not shown in this image, but on Figure 4. The most important thing to point out in this image, is the EFI Boot Partition (/dev/sda2), where GRUB, the boot loader, will be installed.
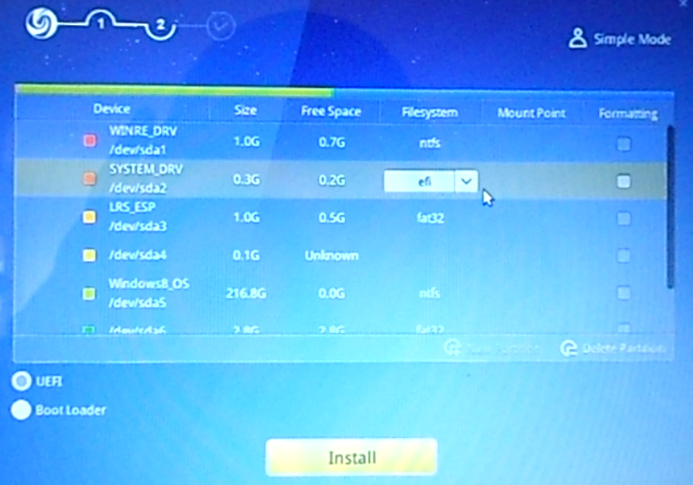
Figure 3: Existing Windows 10 partitions as seen from Deepin 15 installer
In this image, the free space is shown at the end of the partition listing. As stated earlier, the partitions that will be used for installing Deepin 15 will be carved out from that free space. For this tutorial, we’ll be creating three partitions, each mounted at / (root), /home, and swap. And created in that order. To start, select the free space and click New Partition.
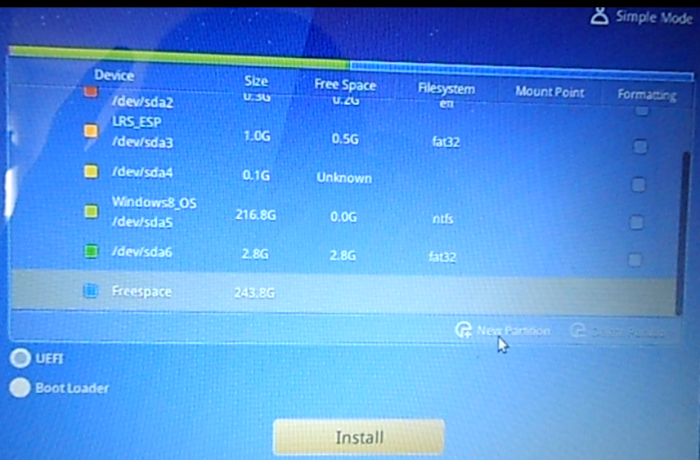
Figure 4: Free disk space for installing Deepin 15 on a Windows 10 computer
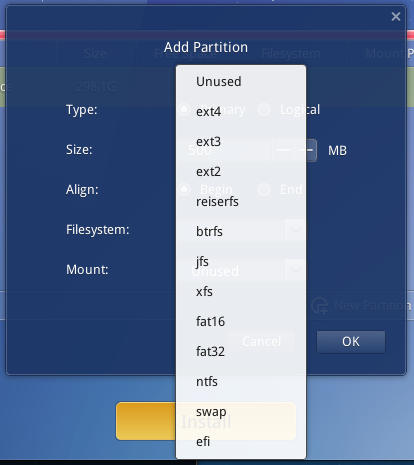
That should open the installer’s partition editor. The options you’ll need to modify are Size, Filesystem, and Mount.
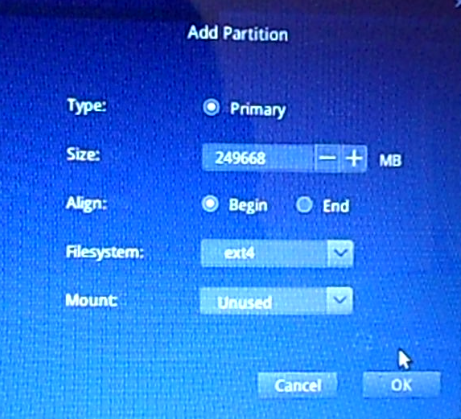
Figure 5: Deepin 15 partition editor
For the root partition, specify just the values for Size and Mount. Leave the Filesystem unchanged. For the size, any value higher than 10,000 MB (10 GB) should be enough. Be very generous with disk space for this partition, if you intend to use the system for a long time. For Mount, be sure to select /, then click OK.
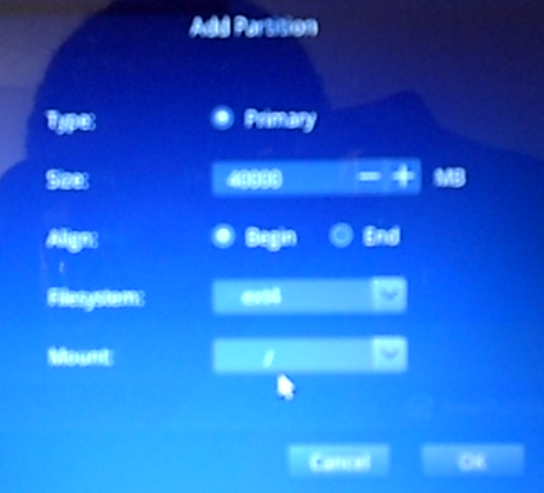
Figure 6: Create root partition for Deepin 15
For the partition that will be mounted at /home, assign it as much disk space as you can afford to, then select /home from Mount. As with the root partition, leave the Filesystem unchanged. OK.

Figure 7: Create partition for /home for Deepin 15
The last partition will be used as swap space, so select swap from Filesystem, and assign it a disk space of between 1000 MB to 4000 MB (or 1 GB to 4 GB). OK.
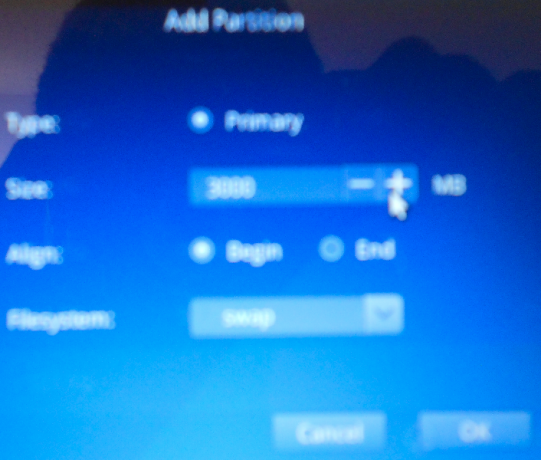
Figure 8: Create swap partition for Deepin 15
Back to the main disk partitioning window one last time, the three partitions you created should be listed below the existing Windows 10 partitions. And that’s all that needs to be done with regards to creating partitions. Look in the lower left hand section and make sure that the UEFI radio button is select. It is, by default, so the installer will install GRUB in the EFI Boot Partition.
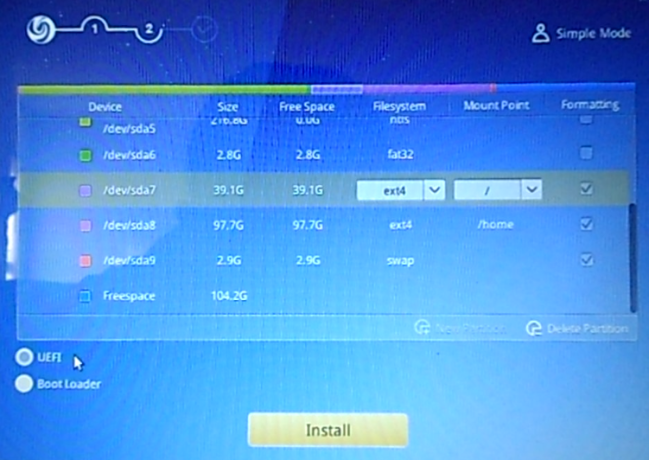
Figure 9: Install GRUB on EFI System Partition for Deepin 15
After a successful installation, you should see the window shown in Figure 10. You may now reboot the computer and enjoy your new dual-boot system.
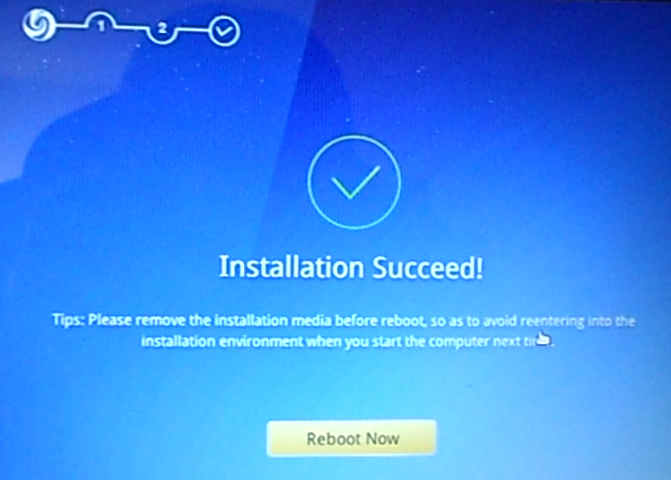
Figure 10: Successful installation of Deepin 15 on a Windows 10 computer


Please help me, I see that there is no efi partitions available all are primary NTFS. And instead of uefi, it is already selected in boot loader.
What is “already selected in boot loader”?
If you don’t see a partition of Type efi, then the system was likely installed on MBR partitions. If possible list the partitions you see there.
Hello! I have a question regarding the partition process.
When entering expert mode, my Dev/sda2 appears in ntfs mode, while my Dev/sda1 appears in efi mode. Does this mean i should change the Dev/sda2 to efi ?
Thanks in advance
No, because that will screw up your Windows 10 installation. If sda1 is your EFI partition, then you tell the Deepin installer that.
ok, so I’m supposed to install the grub in the sda1? Sorry for the question I’m still getting started with these things, just double-checking.
If sda1 is the EFI partition, then, yes, that’s where you install it.
Btw, don’t be shy about asking questions. We’re all learning.
Deepin is based on Debian, not in ubuntu
it was based on ubuntu
I have an updated win 10 from win8.1 , on one hard-drive. I would like to try to load deepin on available space, on that drive. I added another hard drive with Ubuntu 14.4, which don’t think I like it that much. I still have much to learn, but my question is if I load deepin on first drive, will I still be able to boot and see them all, or maybe just erase Ubuntu and load deepin on second drive. I have made backup discs for win 10. Not sure if they will work and don’t really want to find out. Any comments appreciated. Kevin C
I know this isn’t really a comment, let me know if not appropriate, thanks
Questions and comments are always welcome.
Since you have two hard drives, with another Linux distribution on the secoend drive, the best option is to install Deepin alongside Ubuntu on the second drive. Just be sure to install GRUB in the EFI Boot Partition of that drive.
Thanks a lot,
this guide, with images, is really important to all new users!