Ubuntu 15.10 is the latest edition of Ubuntu, the popular Linux distribution from Canonical Group Limited.
If you’re new to Linux and to Ubuntu, this brief tutorial shows a few recommended tasks that you need to perform right after logging into a new installation of Ubuntu 15.10. And if you’re reading this and have not downloaded or installed Ubuntu 15.10 yet, installation images for 32- and 64-bit architectures are available from here.
The recommended tasks has to be with privacy, security and desktop behavior that should have been enabled/disabled by default.
Let’s start with the privacy feature.
1. Disable Online Search from the Dash: If you’re paranoid about privacy and that most of what you do on your computer stays there, this is the first and most important thing you need to do right after logging into your fresh installation of Ubuntu 15.10, and before you start any application on the system. That’s because everything you type in the dash, along with your IP address, are recorded and sent to some remote location for use by Canonical and its partners.
And it’s no secret, because it’s clearly spelled out in the license agreement, which you can read from the Legal tab of the System Settings > Details module. The most important part of that agreement reads:
When you enter a search term into the dash Ubuntu will search your Ubuntu computer and will record the search terms locally.
Unless you have opted out (see the “Online Search” section below), we will also send your keystrokes as a search term to productsearch.ubuntu.com and selected third parties so that we may complement your search results with online search results from such third parties including: Facebook, Twitter, BBC and Amazon. Canonical and these selected third parties will collect your search terms and use them to provide you with search results while using Ubuntu.
Unless you don’t mind sharing you search activity and IP address with Canonical and its partners, here’s how to disable online search on Ubuntu 15.10: Launch the System Settings > Security & Privacy module, then click on the Search tab. Set the button to Off.
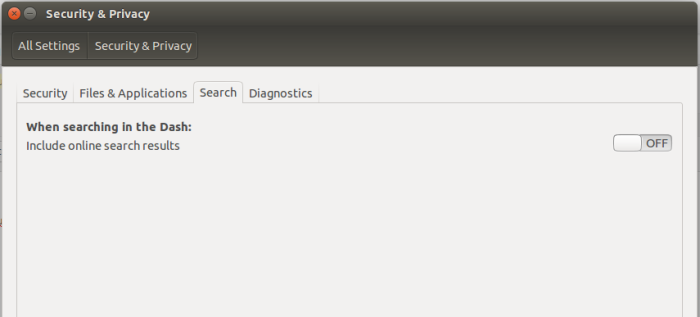
Figure 1: Disable online search on Ubuntu 15.10
Another feature you might want to disable, is on the Diagnostic tab of that module. And the option to uncheck (it’s on by default) allows the system to send diagnostic information about your system and computer to a remote server. While some of that information can be useful for the future development of Ubuntu, I don’t think they’re all necessary. So if you don’t want to share what devices are connected to your computer, how much disk space is used and more of similar information, uncheck the Send occasional information to Canonical option.
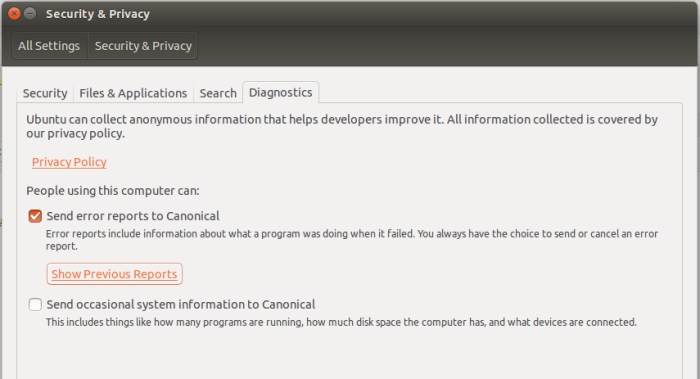
Figure 2: disable sending system information to Canonical on Ubuntu 15.10
2. Make that Amazon Icon Disappear: Along with online search feature that you disabled above, you also get shopping suggestions on Amazon whenever you type anything in the dash. If you don’t want to be shopping at Amazon.com every time you use the dash, here’s how to disable the feature and make that Amazon icon in the launcher pull a Houdini. From a terminal, type the following command: sudo apt-get remove unity-webapps-common.

Figure 3: Amazon webapp icon on the Ubuntu 15.10 dock
3. Install Gufw and Activate the Firewall: UFW, the Uncomplicated FireWall, is the firewall application on Ubuntu 15.10, and Gufw is its graphical interface available for installation on Ubuntu. Though UFW can be enabled from the command line, installing Gufw makes it easy to enable and manage for less experienced users. To accomplish that, that is, install Gufw, type the following command: sudo apt-get install gufw. After installation has completed successfully, launch Gufw from the dash. Figure 4 shows the application in its disabled and default state. Now you just need to enable it by turning it on.
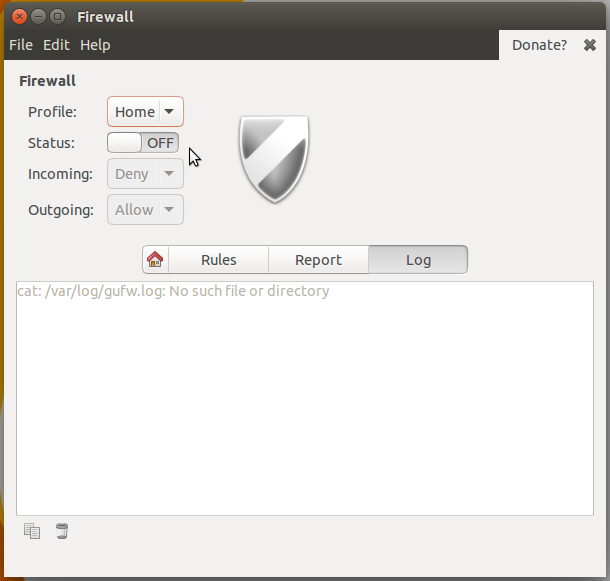
Figure 4: Gufw firewall in its disabled state on Ubuntu 15.10
And here’s the same application window in the enabled state. Because the firewall is in a state of stateful inspection, that is, all incoming connections are not allowed, while all outgoing connections are passed, you do not need to create any new rules. That default is enough to protect your computer until you start installing applications that need to accessed from remote clients.
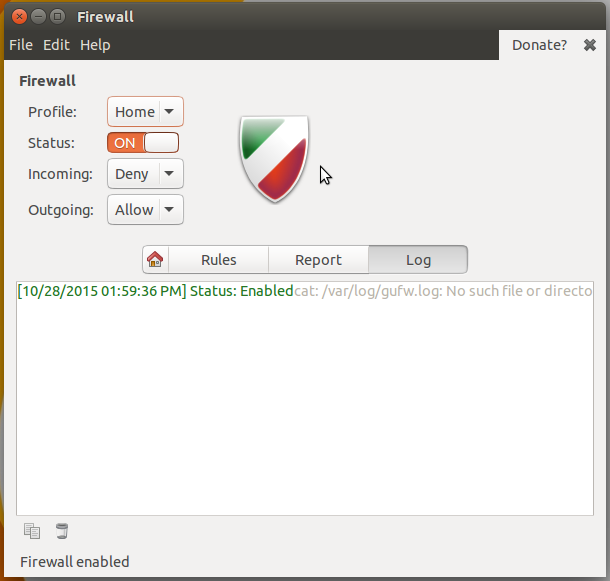
Figure 5: Gufw firewall in its enabled state on Ubuntu 15.10
4. Enable Virtual Desktop: One of the most “innovative” features that Microsoft introduced in Windows 10 is called Task View. On Linux and other Unix-like operating systems, we call it virtual desktop or virtual workspace. And it’s been an integral part of such systems since forever. The difference is that on Windows 10, it’s enabled by default, while on Ubuntu 15.10, it’s not. Virtual desktops virtualizes your viewable desktop space, so you can have several desktops that you can use to open applications on.
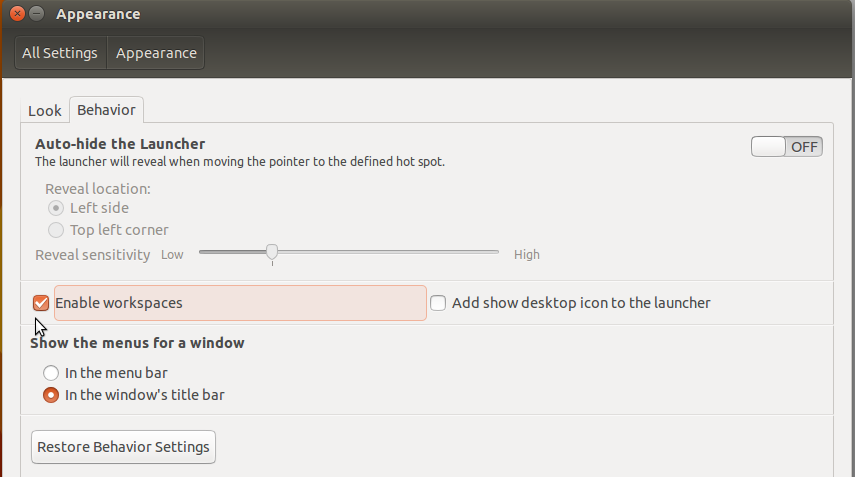
To enable virtual desktops, launch the System Settings > Appearance module. In the Behavior tab, click the checkbox next to Enable workspaces. An icon that you can use to switch between workspaces should appear on the launcher. By default, there are four virtual desktops, which should be more than enough. Still on the Behavior tab, there are a couple of other features that you may also enable.
For example, selecting the In the window’s titlebar option under the Show the menus for a window section will cause a window’s menu to be displayed where it truly belongs – in the window’s titlebar. The default is annoying. Another option you may enable here causes the launcher to hide/unhide, which is useful on laptops or desktop computers with small displays.
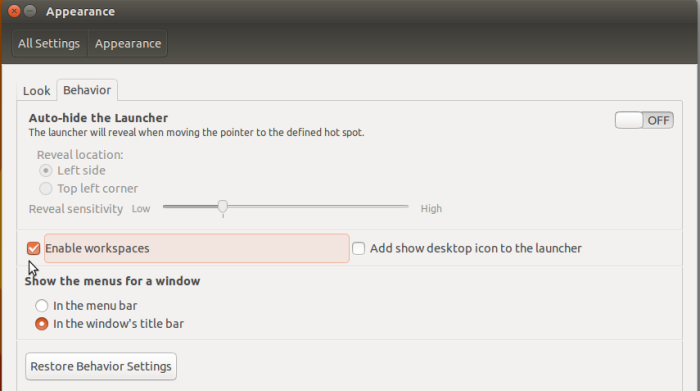
Figure 6: Enable virtual desktops and other behaviors on Ubuntu 15.10



To remove anything from dash, just R click the icon then ‘remove from dash’