What you’ll read in this tutorial is simple: How to triple-boot Windows 7 (or Windows 8), Linux Mint 17.1, and Kali Linux 1.1 on a single hard drive and on a computer with UEFI firmware.
This article is, in a sense, a continuation of how to Dual-boot Linux Mint 17.1, Windows 7 on a PC with UEFI firmware, which was published yesterday (February 27 2015). Extending that setup to include the latest edition of Kali Linux was not simple, but it was not difficult either.
You just have to know how to get around a couple of steps that could cause it to fail. But for you, the task has been made easy, because this tutorial offers a step-by-step guide on how to get it done.
How To Get From Here To There: To accomplish this task of triple-booting Windows 7 (or Windows 8), Linux Mint 17.1, and Kali Linux 1.1 on a single hard drive and on a computer with UEFI firmware, you, of course, must have access to a Windows 7 (or Windows 8) computer that you have permission to use. My test computer is a self-built desktop, but the steps should also work on an OEM (store-bought) laptop or desktop.
After that, enough space has to be recovered from the C drive to use for installing Linux Mint 17.1 and Kali 1.1 in that order. Since the steps to install Linux Mint 17.1 alongside Windows 7 on the same hard drive has been given in Dual-boot Linux Mint 17.1, Windows 7 on a PC with UEFI firmware, visit that link to get that part of the task completed. After that, return to this page to complete the last stage – install Kali Linux 1.1 on that same hard drive.
To make that last stage easier and simpler, leave enough free space after installing Linux Mint 17.1. That free space will be used to install Kali Linux 1.1. The layout of the disk partitions on the hard drive, after installing Linux Mint 17.1, as seen from the Windows partition manager, is shown in Figure 1. The Linux Mint partitions are noted in red, while the free space that will be used to install Kali is highlighted in yellow.
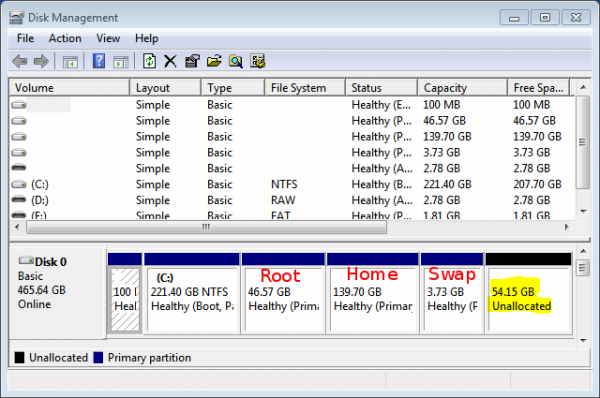
Figure 1: Windows 7 and Linux Mint 7 partitions as seen from Windows 7’s partition manager.
Step 1 – Download Installation Image of Kali Linux 1.1: After installing Linux Mint, the next step is to install Kali Linux on the available free space. But before we get to the installing part, first download an installation image (of Kali Linux 1.1) from the project’s download page. Assuming that you’re working from inside your fresh installation of Linux Mint 17.1, transfer the downloaded image to a USB stick using the command given in this forum post.
Step 2 – Install Kali Linux 1.1: If you completed Step 1 successfully, you should have a bootable Kali Linux USB stick. Connect it to a USB port on the computer and reboot. Just before it reboots into the default disk, access the computer’s boot menu by pressing the appropriate F-key (usually F11 or F12). You should see two entries for the Kali Linux installation media. The line that starts with UEFI will boot into the UEFI-aware version of the installer. That’s the one you want to boot from. So select it and hit the ENTER key.
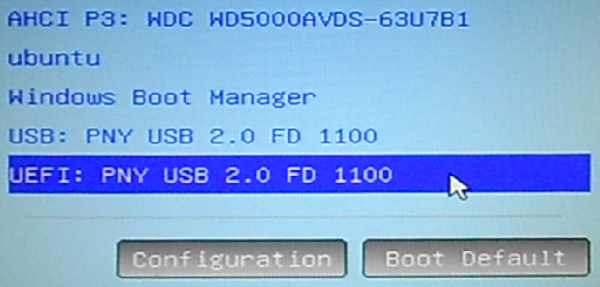
Figure 2: Computer’s boot menu showing Kali Linux installation media entries
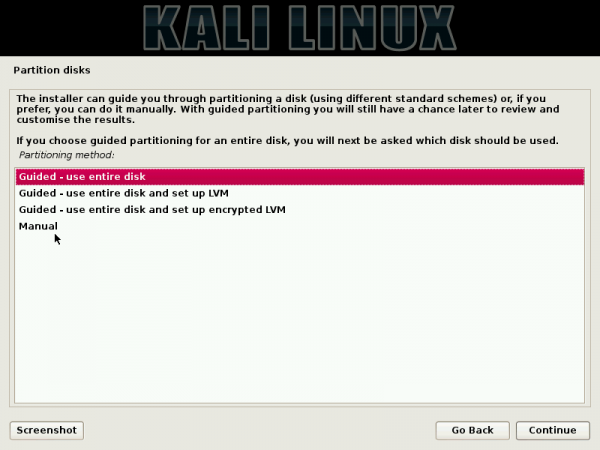
By default, that should boot the computer into the Kali Linux 1.1 Live desktop. Launch the installer from the menu, then click through it until you get to the step shown in Figure 3. The easiest method of going about this is to use the default option – Guided – use the largest continuous free space. That option will detect and auto-partition the free space left after installing Linux Mint 17.1 (refer to Figure 1).
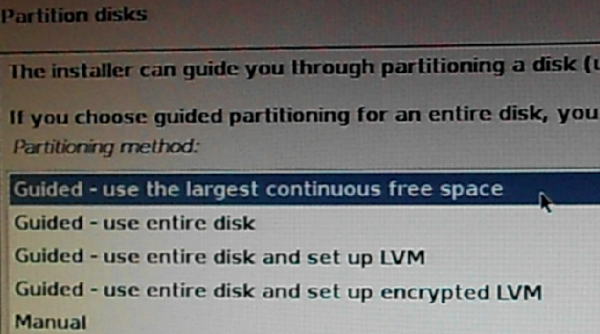
Figure 3: Partitioning methods of the Kali Linux 1.1 installer.
Before auto-partitioning the free space, you’ll be given the option to choose how many partitions the installer should create. The default – All files in one partition… – will cause the installer to create a single partition – mounted at / (root). The second option will have the installer create a separate partition for /home, where your home directory will be created. Selecting the default or the second option will do just fine, but the third option is really not needed on a desktop computer.
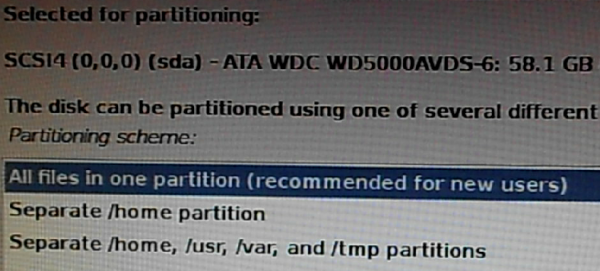
Figure 4: Disk partition options of the Kali Linux 1.1 installer.
Figure 5 shows the result of the auto-partition action. Partition #7 is the partition that was just created by the installer, where Kali Linux 1.1 will be installed. Partitions #1 to #3 are the Windows 7 partitions, while partitions #4 to #6 are the Linux Mint 17.1 partitions. Note that because we’re dealing with a UEFI system, the installer will install the boot loader files in the EFI boot partition, which, in this case, is partition #1. And because there’s an existing Swap partition, the installer did not create one, so that Swap partition will be shared between Linux Mint and Kali Linux.
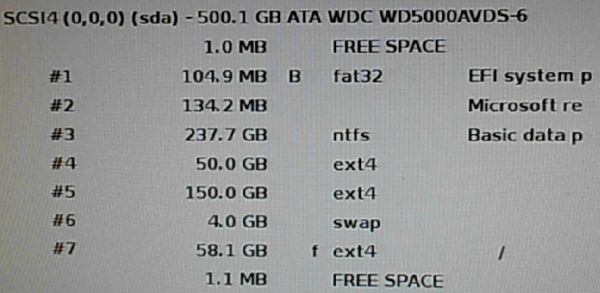
Figure 5: Disk partitions of Windows 7, Linux Mint 17.1 and Kali Linux 1.1 as seem from the Kali Linux installer.
To avoid running into the issues shown in Figure 6 and Figure 7, jump to the instructions for Figure 8.
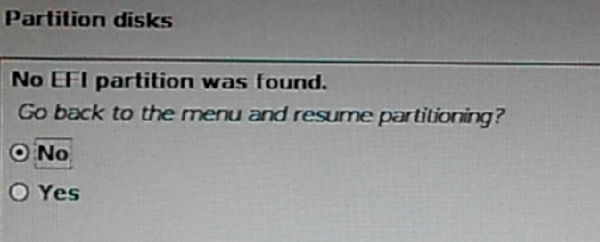
Figure 6: Error when the installer does not find a EFI boot partition.
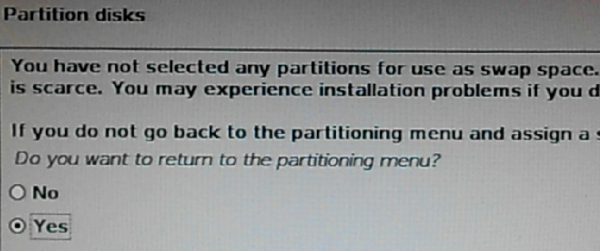
Figure 7: Warning when the installer does not find a Swap partition.
Figures 8 – 13 will be used to show what to do to avoid the issues shown in Figures 6 and 7. Let’s take care of the error shown in Figure 6 first. That will involve letting the installer know that partition #1 is the EFI boot partition. To do that, double click on that partition (#1).
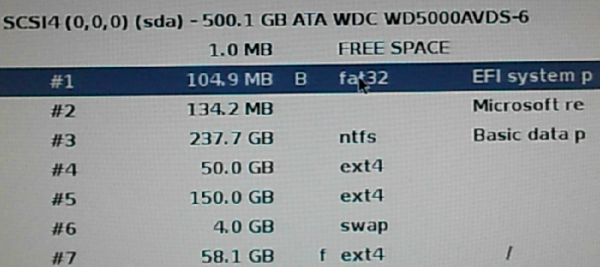
Figure 8: Double-click on the boot EFI partition to modify it.
That should open this window. Double click on the Use as line, then from the list that shows up, select EFI boot partition.
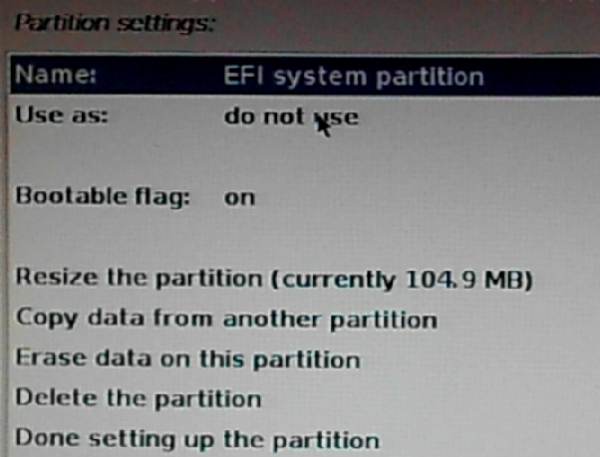
Figure 9: Modifying the “Use as” option for the EFI boot partition.
If completed correctly, the Use as line should look like the one in Figure 10. Click Done setting up the partition to return to the main installer window.
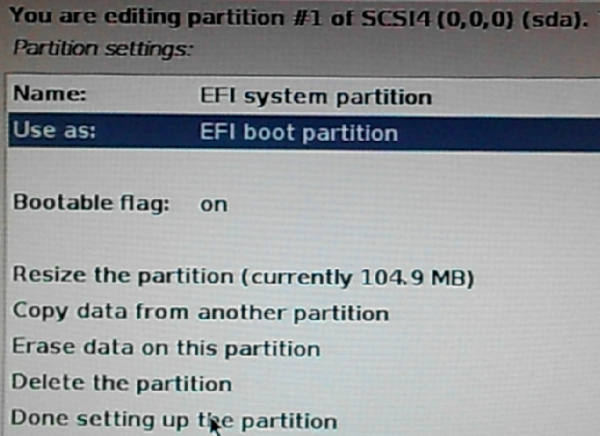
Figure 10: Modified Boot EFI partition on Kali Linux.
Now let’s make sure that you won’t encounter the warning shown in Figure 7. To start, double click on the line for the Swap partition.
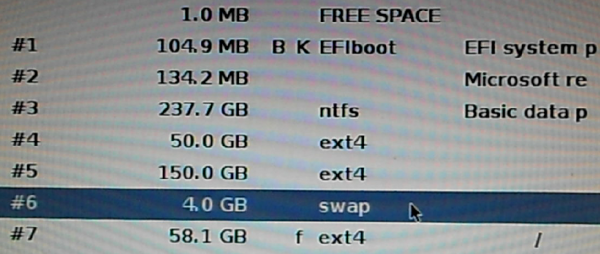
Figure 11: Double-click on the Swap partition to modify it.
Then double click on the Use as line. From the window that opens, select swap area.
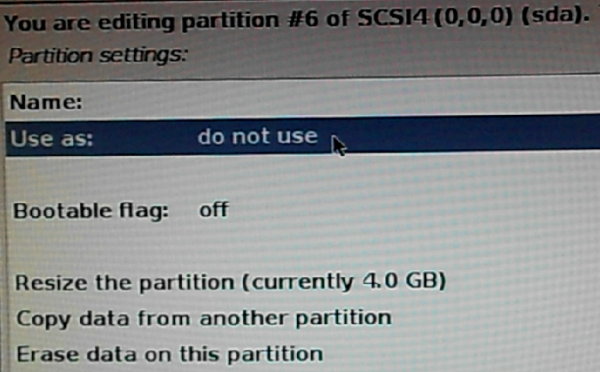
Figure 12: Modifying the “Use as” option for the Swap partition.
If completed correctly, the modified setting should appear just like the one shown in Figure 13 below. Double-click on Done setting up the partition to return to the main installer window.
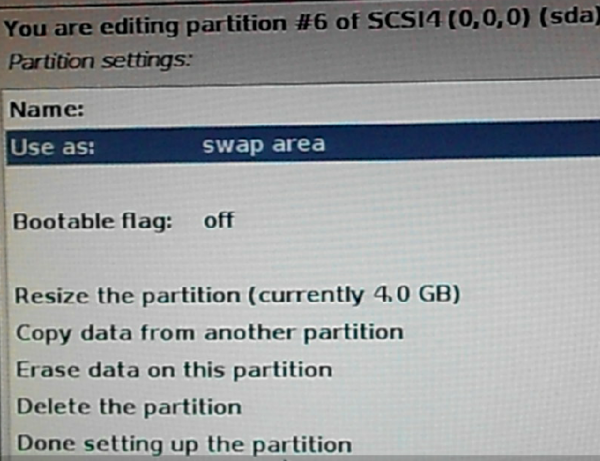
Figure 13: Modified Swap partition on Kali Linux.
Back to the main installer window, all should be set to go. Make doubly sure that everything is kosher, then click Continue.
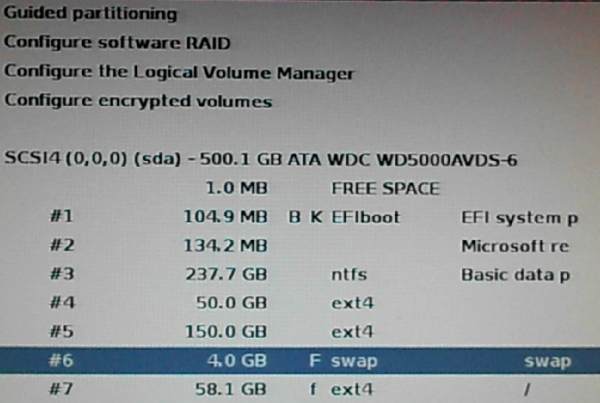
Figure 14: Complete list of partition for the triple-boot setup.
This is just the installer letting you know what partitions it’s going to format. Select Yes, then click Continue to complete the remaining installation tasks.
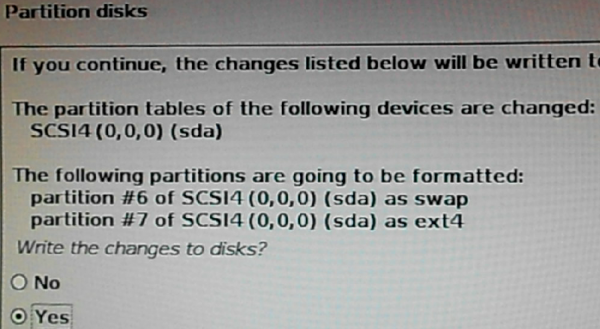
Figure 15: Swap and root partition will be formatted.
Step 3 – Reboot And Rerun GRUB-update: After installation has completed, hopefully, successfully, reboot the computer. It should reboot into Kali Linux 1.1, but not before making a stop at the GRUB menu window. As shown in Figure 16, there will be no entry for Windows 7, but that will change after running the necessary command.
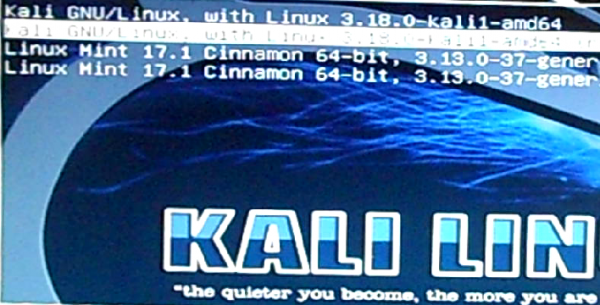
Figure 16: GRUB menu of Kali Linux 1.1 right after installation.
While inside Kali Linux, launch a terminal, then type update-grub. The output should be just like the one shown in the code block below.
Generating grub.cfg ...
Found background image: /usr/share/images/desktop-base/desktop-grub.png
Found linux image: /boot/vmlinuz-3.18.0-kali1-amd64
Found initrd image: /boot/initrd.img-3.18.0-kali1-amd64
  No volume groups found
Found Windows Boot Manager on /dev/sda1@/EFI/Microsoft/Boot/bootmgfw.efi
Found Linux Mint 17.1 Rebecca (17.1) on /dev/sda4
done
When next you reboot, the Kali Linux GRUB menu should now have an entry for Windows 7. To verify that the whole operation succeeded, reboot into each operating system in turn. If there are no issues, enjoy your triple-boot system, and pat yourself on the back.
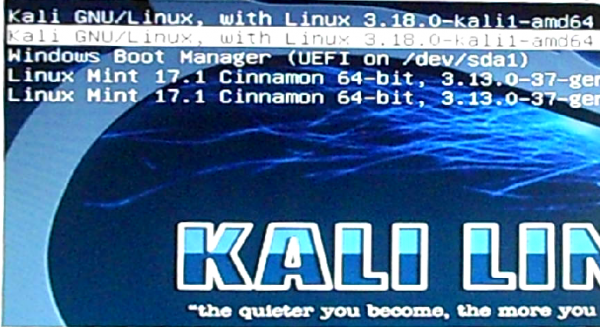
Figure 17: GRUB menu of Kali Linux 1.1 after running “grub-update”.
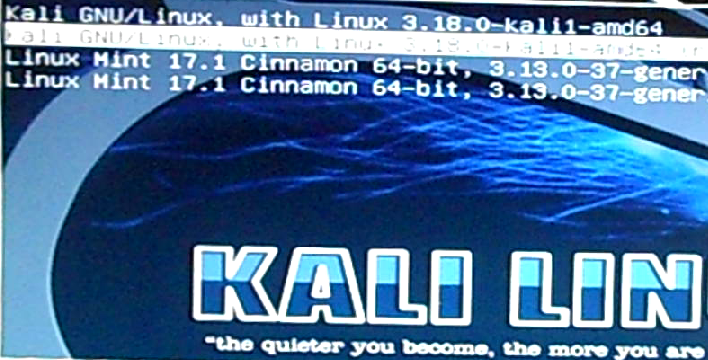
More Information: Note that because Linux Mint 17.1 was installed before Kali Linux, its GRUB menu will not have an entry for Kali Linux. To change that, launch a terminal and type sudo update-grub. The output should be just like the one shown in this code block:
Generating grub configuration file ...
Found linux image: /boot/vmlinuz-3.13.0-37-generic
Found initrd image: /boot/initrd.img-3.13.0-37-generic
  No volume groups found
Found Windows Boot Manager on /dev/sda1@/EFI/Microsoft/Boot/bootmgfw.efi
Found Kali GNU/Linux 1.1.0 (1.1.0) on /dev/sda7
done
After rebooting, you should see entries for all three operating systems on the GRUB menu, similar to what you have on the Kali Linux GRUB menu. Again, enjoy your system. Correction and comments are always welcome.



My ABSOLUTE THANKS to you my good sir. Far way the best tutorial in the internet.
Thanks Man, Best article on this topic. Searched lots of websites but man your’s one is great. Again tnx man….
You’re very welcome
hi! can i replace Linux mint with any other Linux distro like opensuse,debian,centos?windows ,kali with centos or opensuse ????
Yes, you can.
Hi dear Finid
I’mstudying informatics and because of that I became a new linux user and I came to this post recomended by the guy who made this tuto https://www.youtube.com/watch?v=M7FdL9TKiaA because I had linux mint and windows and I wanted to try lmde betsy in order to have an aproach to debian, but here you mentioned kali! I had never listen of that distro before so I started to look for info about it and I found other pentesting distros and I wanted to ask you why did you preferred Kali?
and thamks a lot for this tuto.
Kali and LMDE both based on Debian, but are targeted at different users.
Kali is best for pentesters, though it can also be used for standard desktop computing tasks.
LMDE is like any other standard desktop OS, though for more experienced (Linux) users.
Just stopped by to say that your tutorial is the most detailed and most helpful I’ve found anywhere on the World Wide Web – and this is combining from someone who’s pretty good at finding required information.
Thank you.
my windows drive is on c and the c is an ssd 128gb
i have another hdd drive in my pc and its the d drive its an hdd 2TB i want to dual boot the windows on the c and the linux on the d , both of them is on deffrent harddrive
That should be easy. Install Windows first, then install Linux on the other drive. There should be no conflict.
See Dual-boot Windows 8 and Linux Mint 17 on a PC with 2 disks and UEFI firmware.