Step 4. Install Ubuntu 14.04: To begin this step, reboot the computer with the Ubuntu 14.04 installation DVD in the optical, or the USB stick in a USB port. Whether you start the installer before booting into the Live desktop or after, click until you get to the step shown in the screenshot below. On my test installation, the installer said, “This computer currently has no detected operating systems. What would you like to do?” We know that there are two operating systems installed on the target HDD, so the only reasonable option to choose at this step, is “Something else.”

So make the right choice and click to the next step.

That should open the installer’s Advanced Partitioning Tool’s window. You should see the existing Windows 7 and Windows 8 partitions, and the unallocated space you created from Windows 7. In the Ubuntu installer, that space is marked as “free space.” To start creating the three partitions that will be used for installing Ubuntu 14.04, select it, then click on the + button right below it.

That should open the partition editor. You only need to specify a value for Size and make a selection from the Use as and Mount point menus. For the partitions created in this tutorial, I chose the use the default file system, which is Ext4 journaling file system. If you intend to do the same, then you don’t have to touch the “Use as” menu.

The first partition will be mounted at /. The minimum required disk space for it is 6.4 GB, so any value higher than that should do. Any value approaching 20 GB is better. OK.

The /home partition is where all your content will reside, so be generous with disk space here. And make sure that the mount point is set to /home. OK.

For the Swap partition, select “swap area” from the “Use as” menu. For a 32-bit system, a disk space of 2 GB (2000 MB) is recommended. For a 64-bit system, try 4 GB (4000 MB). OK.

With the necessary partitions created, you should see them listed below the Windows 7/8 partitions in the Advanced Partitioning Tool. Before clicking Install Now, you need to select the “device for boot loader installation.” It should not be /dev/sda, but /dev/sda2 or whatever the device name of your system’s EFI partition is.

After selecting the appropriate device for boot loader installation, you may continue with the rest of the installation.

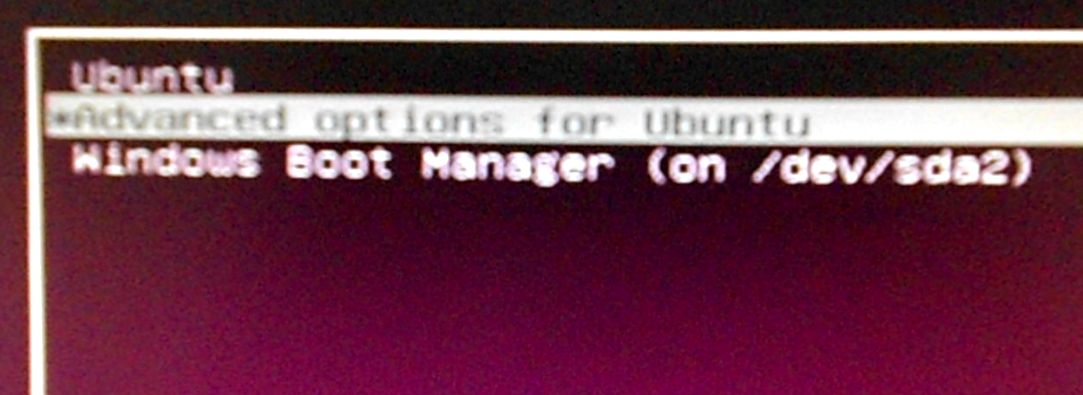
Step 5. Set the Default Boot Device: After the installation of Ubuntu 14.04 has completed successfully, you should set its boot manager as the default boot device. To see what the others are, access the system’s boot menu. This screenshot shows what the entries on mine were after the installation of Ubuntu. Selecting “Ubuntu” and pressing the Enter key should take you to Ubuntu’s GRUB menu.

This is what that looks like on my test system. Aside for an entry for “Ubuntu”, you should see an entry named Windows Boot Manager, which will load the Windows boot menu that you saw at the beginning of this tutorial. Test to make sure that you can boot into all three operating systems.

Finally, boot into your system’s UEFI Setup Utility and set the default boot device to “Ubuntu.” Note that you can also use this guide to triple-boot any Linux distribution with Window 7 and Windows 8 in this manner. If you have a question to ask, try starting a topic at this forum category.


check out my triple boot pc… windows 10, yosemite and ubuntu 14.04 https://youtu.be/SN8VIZM7lCQ
My PC is Desktop. Core2Due processor 2GB RAM 1TB HDD.
But for learning this multy boot I used another HDD which has only 160 GB!
First I Installed the Windows 8.1 according to your suggestion. It was really a very good suggestion.
On the time of installation Windows 8 will take 350MB as system partition.
I give partition only 25 GB for Windows 8 and another 25 GB for Windows 7. (Windows 8 and 7 take only 8.5 GB for installing the OS).
And windows 8 and 7 allow to make only 4 partition. Linux also allows like that. But here I need more than 4 partition. So after installing the first two OS (Win 8 & 7), I used a utility Live CD (Bart_PE) for arranging the other partitions. With the help of that bootable CD I make other partitions. 20 GB as root(/) for Linux Mint17. 18 GB for its Home. 2GB for swap area. Again 20 GB root for Ubuntu14. 18 GB as it’s Home. I give swap area as common for Mint and Ubuntu. (I think we can assign same Home area for Mint and Ubuntu. Then we can save 18 GB space here!) Their is a balance of 20 GB again. I formatted it as NTFS for Windows 8 and 7 user files. This is the partitions I made. Final important.
>> With your setup, how much of the disk space allocated to the /boot/efi partition is used?
Ans: I did not manually allocate any space for the boot file of Linux! Because my HDD has no efi partition. Instead, at final step.
* Device for boot loader installation.
I simply selected the the option which shows the name and the size of my HDD.
for eg. dev/sda ATA WDC-WD1600AVDS-6 (160 GB)
Then continue…
Thank You.
Very nice.
O.K Thank you very much. Your tutorial helped me do a lot. I have successfully done not triple but quadruple boot (Windows 8, Windows 7, Ubuntu 14, and Linux Mint17) with the help of your tutorial.
Thank you and for your tutorial.
Awesome! What brand is your PC, and what’s the size of the HDD/SSD? Desktop or laptop?
With your setup, how much of the disk space allocated to the /boot/efi partition is used?
how you managed this since it does not let you for more than 4 partitions?
MBR partitioning scheme is the one with a 4-partition limit. With GPT, there’s no such limitation.
I c, today I hear for lvm I will check it after work. Thanks.
Hi
On the 2nd page picture 2 and 7 8 shows “/dev/sda2″ is ‘efi’ partition but only 100 MB. You did not say anything about it!
Hi,
Your Tutorial is good but much confusing.
You said “you need to select the “device for boot loader installation.” It should not be /dev/sda, but /dev/sda2”
The /dev/sda2 is showing as ‘efi’ partition and has only 100 MB! It arise some doubts.
1. What is this efi partition?
2. How to create it?
3. Do we need to create an another 100 MB for that efi partition?
4. Do we need to disable fast boot of Windows 8 before setting dual boot?
https://sites.google.com/site/easylinuxtipsproject/windows
5. Please update your tutorial by clearing this area.
Thank You.
On a computer with UEFI firmware, the /boot/efi partition is where all the boot loader files are installed. If you have Windows 8 installed, that partition is created during the installation of Windows 8, so whatever size it has is what was allocated to it during the installation of Windows 8.
Therefore, if you are attempting to dual-boot a Linux distribution and Windows 8, you do not need to create another /boot/efi partition. Make that partition the boot loader device.
If you are attempting to install a Linux distribution by itself on a computer with UEFI firmware and you are creating partitions manually, one of the file systems available is /boot/efi.
Hope that clears it up.
INSTRUCTION FOR COMPUTER WHICH HAS NO UEFI FIRMWARE.
At my first attempt I manually selected the partition (that is created by Windows 8 (350MB) during the installation of Windows 8) for the last process.
* Device for boot loader installation
But on that time though Windows 8 option is showing on the boot menu. But when selecting Windows 8, It could not boot and the computer is always restarting.
Therefore, if anyone attempting to dual-boot a Linux distribution and Windows 8, on a computer WITHOUT UEFI firmware,
you do not select the last option. (This is important for the computer which has NO UEFI firmware.)
If there is any wrong selection during installation time, please only select the option which shows the name and the size of your HDD.
* Device for boot loader installation.
for eg. dev/sda ATA WDC-WD1600AVDS-6 (160 GB)
Yes, if your PC has no UEFI firmware, there will be no /boot/efi partition, so that partition will not be available to select.