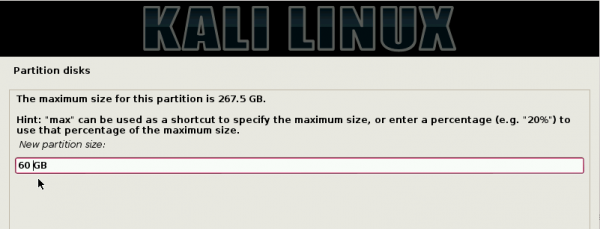
The next partition will be mounted at /. A new installation of Kali Linux takes up about 6.4 GB of disk space, so any amount greater than that will do. For the test installation, I gave it 60 GB, which is way too much, so you do not have to do the same. About 10-12 GB is more than enough. Continue.
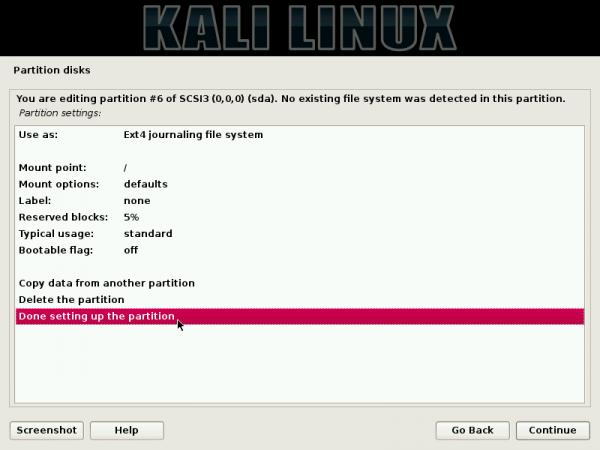
Here are the details of the new partition. Scroll to “Done setting up the partition,” then click Continue.
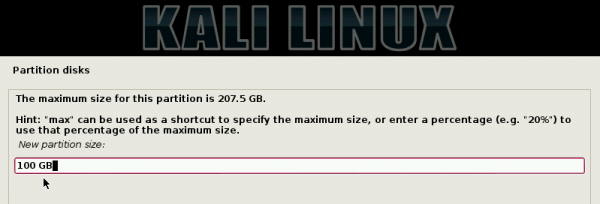
For the home partition, I gave it a disk space of 100 GB. Continue.
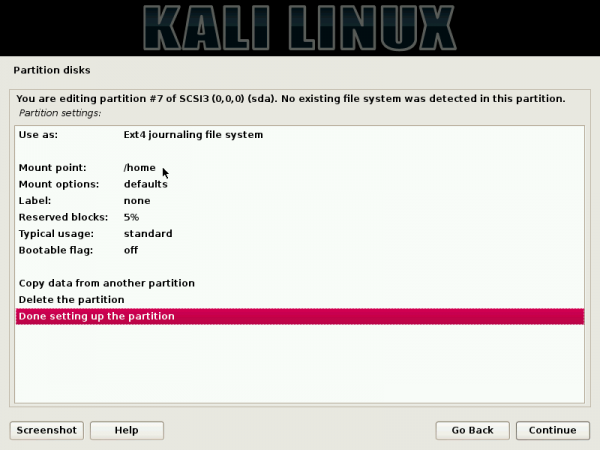
Here are the details of the new partition. Scroll to “Done setting up the partition,” then click Continue.
For Swap, 2 GB is good enough. Continue.
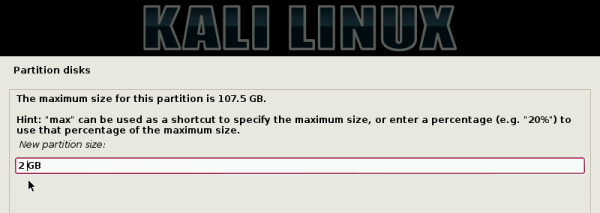
Here are the default details of the new partition. To specify that it be used as a Swap partition, double-click the “Use as” line.
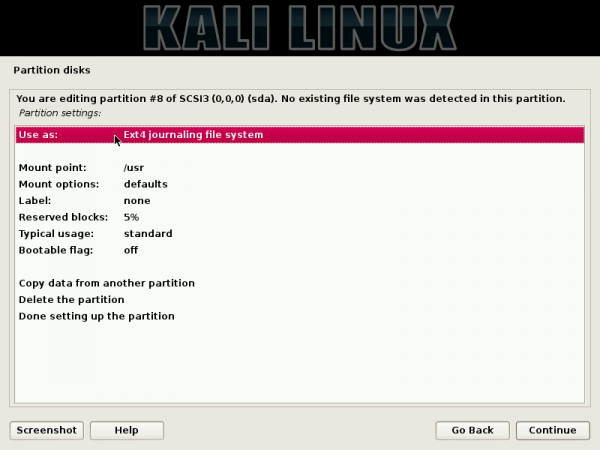
Then select “swap area.” Continue.
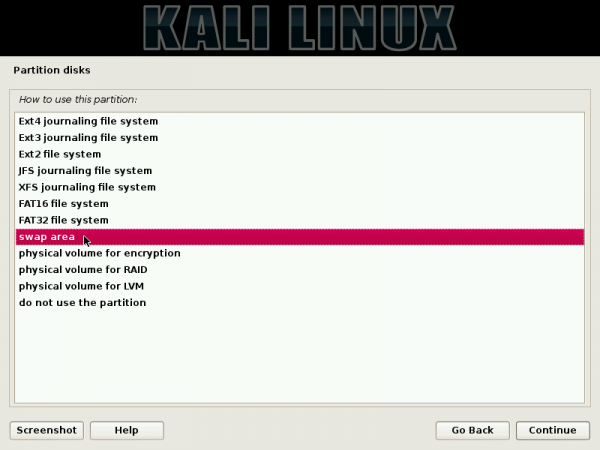
Scroll to “Done setting up the partition,” then click Continue.
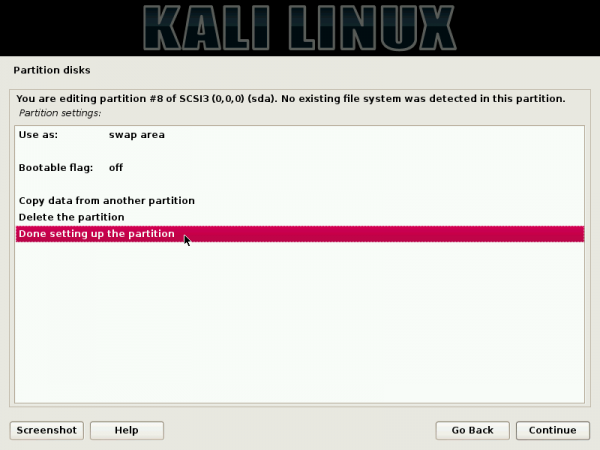
With all the partitions created, scroll to “Finish partitioning and write changes to disk.” Continue. Make note of the device number of the boot partition. Here, it is sda5. You’ll need it later.
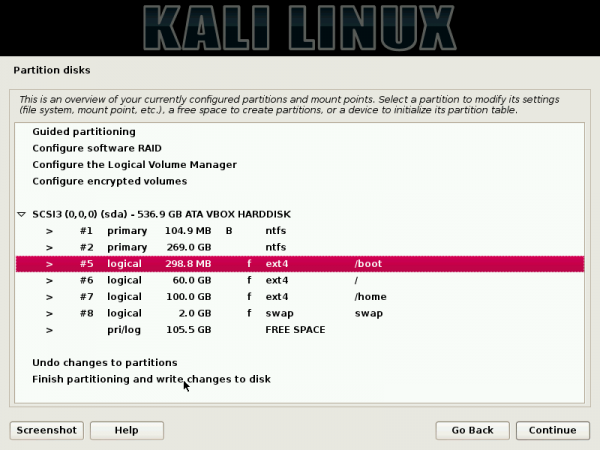
Select “Yes.” Continue.
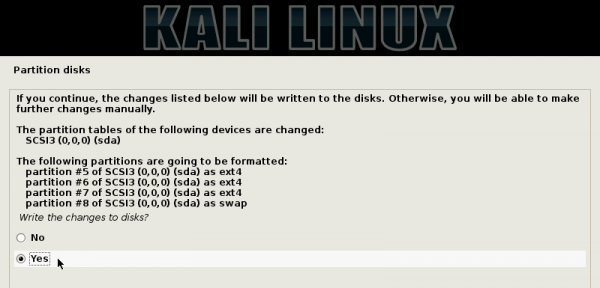
By default, the installer will want to install GRUB, the boot loader, in the Master Boot Record (MBR). However, for setting up this dual-boot system, we want GRUB in the boot partition. So, select “No.” Continue.
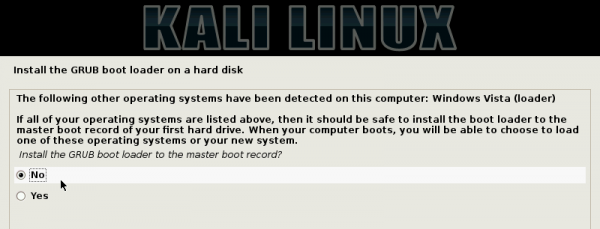
This is where you have to specify where GRUB should be installed. For this test system, it is /dev/sda5. Continue.
After installation, the computer will reboot into Windows 7. The next task involves add an entry for Kali Linux in Windows 7’s boot menu.
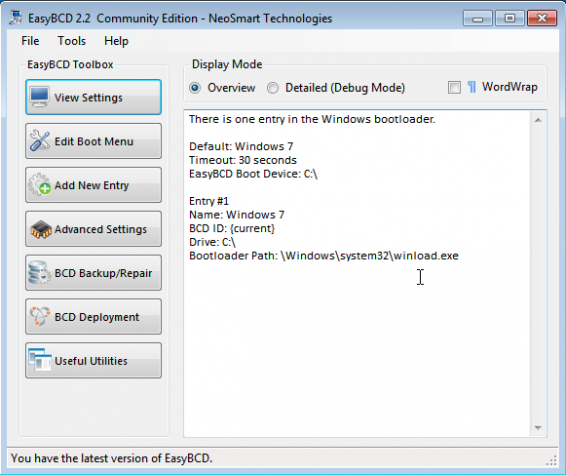
3. Add Kali Linux to Windows 7’s boot menu: The simplest graphical application for modifying the Boot Configuration Data of Window that I know, is EasyBCD. It is free for personal use. You may download it from here. Install it as you would any other Windows application. The main window is shown below. To add an entry for Kali Linux in the boot menu, click on the Add New Entry tab.
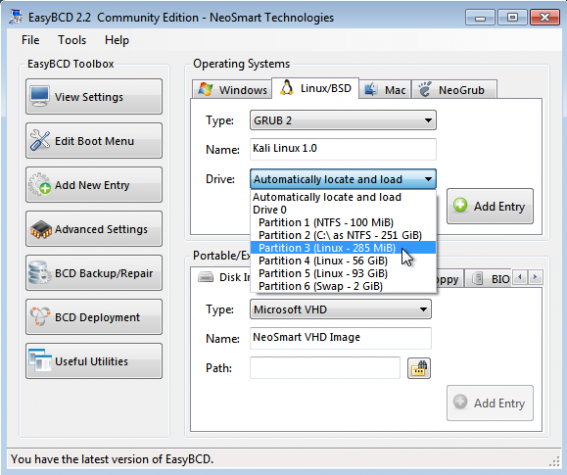
Then click on the Linux/BSD tab. From the Type dropdown menu, select GRUB 2. Modify the name field to reflect the name of the distribution you are adding. From the Drive menu, you can either select the specific partition corresponding to the boot partition of the Kali Linux installation or let EasyBCD automatically locate and load it. Either one will work. Note that EasyBCD’s drive numbers and the device numbers of the Linux partitions do not match. For example, in this test installation, the boot partition is /dev/sda5, but the corresponding drive number in EasyBCD is Partition 3. The size of the partition helps to determine which one it is. Click the Add Entry button when wll the options have been specified.
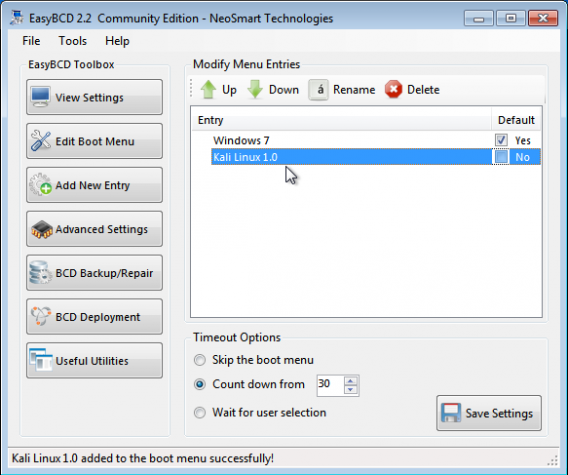
From the Edit Boot Menu tab, you can see a preview of the entries that will appear in the Windows 7 boot menu. Exit EasyBCD and reboot the computer. That should do it.
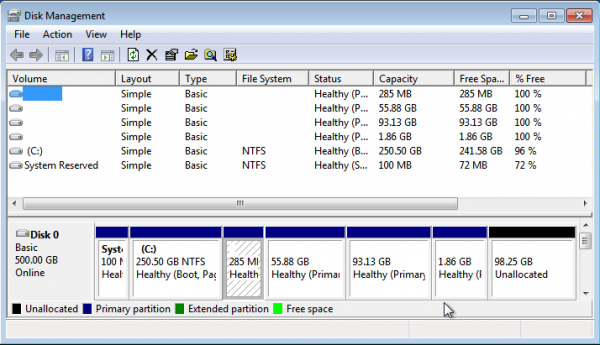
Extra: Here are all the partitions on the HDD as seen from the Windows 7 partition manager.




Hi, I have installed kali successfully but my problem am unable to boot kali. It says “Oh no! Something has gone wrong. A problem has occurred and the system can’t recover. Please contact admin”.. what should I do? Thanks
i have also download linux latest iso file and make booteble using power iso then process installation , i have done finish installation without any error , then login page not show display .
please help me what I do and how.
and my all personal data is missing.hard disk is format
I have no idea what you did. How did you get to format all your hard disk?
Hi. I have downloaded the 64 bit version of the Kali Linux ISO image and stored it in a flashdrive and set it as priority when booting. I get an error saying ‘BOOTMGR is missing Press Ctrl + Alt + Del to restart’. I know it should’ve booted to the installation menu when I run it but unfortunately that’s not the case. Please help.
Try transfering the image again. Perhaps it was not done properly the first time. What program did you use to transfer it?
did you make it bootable? storing the iso in flashdrive wont allow it to be used as booting, it should be made bootable. use universal usb installer, search the process of making bootable flashdrive of kali linux with universal usb installer or UUI.
The installation image is bootable. You don’t need to do anything special after it’s been transferred to a USB stick.
I know this thread is a little old, but I’m trying to dual boot kali and win 7, I don’t have a flash drive or a disk drive, so I’m using WinISO to mount the iso file and I’m obviously running into the issue of not having the files during installation. Is there a work around for this?
Not that I’m aware of. Do you at least have an external DVD drive that you can connect to the PC?
I am using a dual boot system, after installing the Kali linux, i was able to use it well that i could access my hard disk which are in three partitions and could access then all. on the third boot on kali linux, i access my file and this is what appears:
Error mounting /dev/sda6 at /media/root/LIMIT: Command-line `mount -t “ntfs” -o “uhelper=udisks2,nodev,nosuid,uid=0,gid=0,dmask=0077,fmask=0177” “/dev/sda6” “/media/root/LIMIT”‘ exited with non-zero exit status 14: The disk contains an unclean file system (0, 0).
Metadata kept in Windows cache, refused to mount.
Failed to mount ‘/dev/sda6’: Operation not permitted
The NTFS partition is in an unsafe state. Please resume and shutdown
Windows fully (no hibernation or fast restarting), or mount the volume
read-only with the ‘ro’ mount option.
what should i do help me.
As the message indicates, that can be caused when windows was in hibernate or suspend state, or when faststarting is enabled before you booted into Linux. So log back into Windows, shut it down correctly and make sure that fastboot is disabled (I think that’s in the BIOS).