Now, you are set to start setting up the logical volumes. Two actions are required here before you start. One, select the Volume Group you just created by clicking on the tab with its name, then click on Toggle to expert mode. Once those actions are completed, click Create.

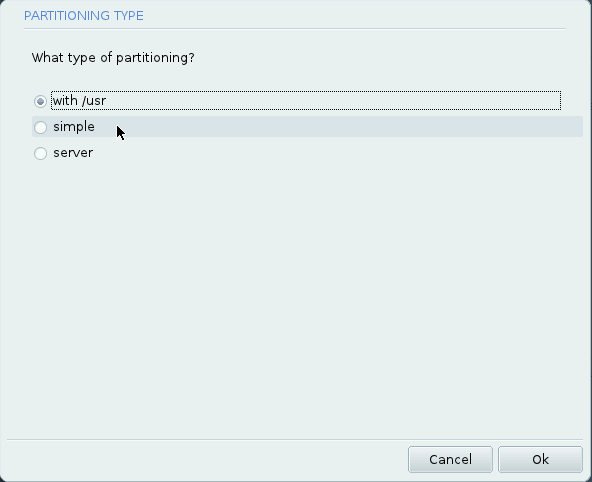
Note: If you click on the Auto allocate button on the previous step, the installer will give you three more options. “simple” will give you three logical volumes; one each for /, Swap, and /home. “with /usr” will configure a separate Logical Volume for /usr, besides those created under “simple.” “server” gives you separate logical volumes for /tmp and /var, besides those created under “with /usr.”
The problems with these auto-allocate options are inefficient allocation of disk space, and the numeric names given to the logical volumes. That is why it is better to configure the logical volumes manually.

You can create the logical volumes in any order, but for this tutorial, the one for /, the root file system, will be created first. Ext4 is the default file system, but you may select another one from the dropdown menu. The default name is “1.” Select a name matching the mount point from the menu. A disk space of 5 GB or 5000 MB is enough to install the system. Ok.
Keep in mind that with LVM, you only need to allocate just enough disk space required to install the system. You can always increase or grow a Logical Volume afterwards. Also, because the Physical Volume has been encrypted, it is not necessary to encrypt the logical volumes.

The second Logical Volume will be for Swap. A disk space of 2 GB is good for it. The default is 4 GB. For “Filesystem type,” select “Linux swap.” Choose a matching name for it. Ok.

The last Logical Volume will be for /home. Allocate the disk space based on your needs. Use the default file system, and select a matching name for it. Ok.

With all three logical volumes configured, click on Done to continue with the rest of the installation. Note that by default, the installer will install GRUB, the default boot loader (LILO is the other option), in the Master Boot Record (MBR ) of the disk. If you are installing this on a disk with an existing installation of another operating system, you may want to consider installing GRUB in the boot partition. After installation, reboot.

Every time the computer is rebooted, the disk encryption passphrase you specified during installation will be needed before the system can boot completely. Do not forget it. Unlike Fedora and other distributions derived from it, and PC-BSD, Mageia will keep you at this window until you specify the correct passphrase. Without it, you will not b able to boot into the system, which means no access to your data. If it makes you happy (it should), your data will not be accessible if the computer is lost or stolen. You may configure up to 7 backup passphrases. How to manage disk encryption passphrases and key slots, is a recommended tutorial, if you wish to configure backup passphrases.

You can have quality articles like this delivered automatically to your Feed Reader or Inbox by subscribing via RSS or email. This website now has a Question and Answer section. Use the commenting system for simple comments, but for more involved assistance, please use the Question & Answers section.


Well I’ve been distro hopping for a long time, and no people i dont want to use Arch, not yet, and i need to find a way to dual boot this distro with my ubuntu 11.04 installation