This is the latest article in the series on dual-booting Linux and BSD desktop distributions with Windows 7. And this one provides step-by-step directions on how to dual-boot Linux Mint Debian Edition (LMDE) with Windows 7 on a computer with a single hard drive. LMDE is the branch of Linux Mint that is based on Debian, rather than on Ubuntu.
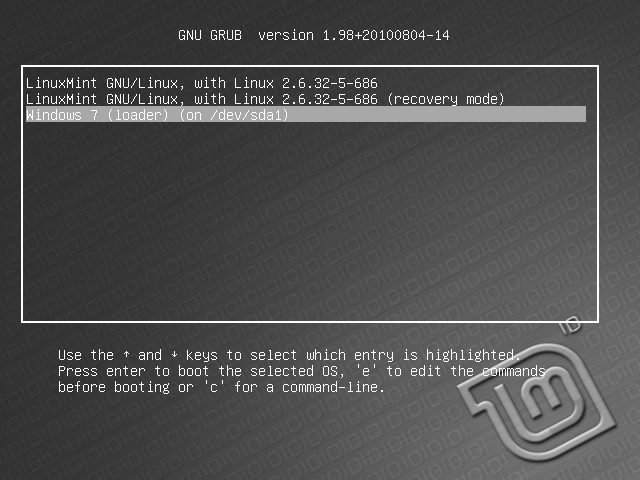
If attempting to dual-boot a distribution with Windows 7, it is highly recommended that you try as much as possible to keep them completely isolated. And if installation is on a single hard drive, that means letting the Windows 7 boot manager be responsible for dual-booting such that when you restart the computer, the Windows boot menu will look just like the one below.

Following the recommended method, LMDE’s bootloader, GRUB, will be installed in the boot partition of the LMDE installation. Setting up dual-booting in this manner ensures that neither OS will interfere with the other’s boot programs when it comes time to upgrade.
The directions provided in this tutorial presents specific instructions on how to make space for LMDE when installing Windows 7 anew, or when installing on a computer with an existing installation of Windows 7.
Let’s start with the case where LMDE is going to be installed on a disk with an existing installation of Windows 7. If you want to install Windows anew, just scroll down to that section.
Existing Installation of Windows 7: If your computer has an existing installation of Windows 7, and there is no unallocated space on the hard disk, then you need to free up space before LMDE can be installed. Because LMDE’s installer is still very crude, the safest method of freeing up space is from inside Windows 7. The images in this segment show how to proceed.
The first step is to boot into Windows 7, and type diskmgmt.msc or partitions in the menu’s search field. The Disk Management tool, shown below, will open. In the example used in this tutorial, there are just two disk partitions. The data partition, drive C, is what we can shrink to make space for LMDE. To have Windows shrink it, right click on drive C and select “Shrink Volume…”

The system will then present the best option for you. Unless you know what you are doing, stick with this option. Windows has already determined by how much it can shrink the partition without blowing itself up. In this example, drive C is about 100 GB, and Windows has freed up about half, or about 50 GB. That half will be used to install LMDE. Click on Shrink.

Here is the result of the surgery Windows 7 just performed. You can see that there are now three partitions, where there used to be just two. The freed up space is shown as the “unallocated” partition. Exit the Disk Management tool, insert an LMDE installation DVD in the optical drive and reboot the computer. Scroll down to the section on Installing LMDE Alongside Windows 7 to continue with the second stage of this tutorial.

New Installation of Windows 7: Boot the computer from the Windows 7 installation CD and click to the disk partitioning step. If the hard drive is not partitioned, that is, if it is a new disk, the image below represents what you will see. If there are existing partitions on the disk and you want to overwrite their contents, select each one and click on Delete. Note: The Delete button is visible only after you click on Drive options (advanced).

Now, you will have to determine how much space to use for Windows 7, and how much for LMDE. This segment of the tutorial was carried out in a virtual environment with about 100 GB of disk space, and I chose to use half for Windows 7 and the other half for LMDE.

Here is the same step after changing the disk size to my specification. Click on Apply.

By default, the Windows 7 installer will create two partitions as shown. Partition 2 is the main Windows 7 partition, and that is what has to be selected before clicking Next. The free space where LMDE will be installed is shown as Unallocated Space. Click Next.
After Windows 7 installation is completed, boot the computer from the LMDE installation DVD.

Whether you installed Windows 7 anew or just freed up space from an existing installation of Windows 7, you are now ready to install LMDE alongside Windows 7.
Installing LMDE Alongside Windows 7: After installing Windows 7, or after freeing up space on a disk with an existing installation of Windows 7, boot the computer from the LMDE installation DVD. Click until you get to the disk partitioning step. Unlike the Linux Mint installer, LMDE’s installer does not have an automatic disk partitioning option; disk partitioning must be done manually. Click on the Edit Partitions button to start.

GParted is the application used for disk partitioning. Select the unallocated space and click on the create new partition button.
Note: When installing LMDE or any other Linux distribution, it is recommended that four partitions be created for the following file system directories:
- /boot – This should always be the first partition created on the Linux side of the installation. It is where boot-related files will be located.
- Swap – Unformated space used by the system as virtual memory
- / – The root directory. This is where almost every thing needed to run the system will be installed. Unless a separate partition is created for them, the other major file system directories, like /usr, /opt, /tmp, /var and /usr, will be located under /.
- /home – Your home directory will be located here. When you are logged in to the system, files and folders that you create will be, by default, in your home folder under /home.


What about multi boot with Mint on secondary disk?
That’s even simpler. Install Windows on disk 1, then install Mint on disk 2. Expect a tutorial on that soon. I’m assuming your PC has Windows 10 or 11, right?
Thank you for an excellent guide!
There are so many ‘tips’ on this topic and incomplete guides out there on this topic.
Your setup is the best and your steps very well explained. I couldn’t have done it without you.
For those looking for a video… This same method is shown by Matthew Moore on You Tube, where he explains exactly why this is superior to other methods:
Mint Debian here we go!
Thanks a million for a good and easy to understand guide to set up LMDE along side with Windows 7. I especially appreciate your idea of keeping the two completely separated and keeping grub on /boot 😀
It doesn’t work. I’m not able to choose /dev/sda5 (my /boot partition) for GRUB installation. In dropdown list I have only /dev/sda or /dev/sda1 (windows boot partition).
Strange! Do you see the partitions you created in the list above the dropdown menu?
No. I see only sda (whole) and sda1 partition.
In disk manger I see everything. In Gparted I see all the partitions. But not in dropdown menu. I use live image on USB.
It shouldn’t matter whether you are using a live image from USB or from a CD/DVD. There should be a list of created partitions in that menu.
Note that this tutorial is from 2011, so if you are using a recent edition of LMDE, it is possible that there is a bug in the installer. I’ll have to attempt an installation using it to see what’s going on.
What edition of LMDE are you trying to install?
The latest – 201303. I’m trying to make something with it. So I will report it.
I get a grub> command line instead of GUI?
What’s the size of your disk, the size of the Windows partitions, etc
Thanks a Tonnnnnnnnneeeeeeeeee.
It was just Great.
Thanks for the tutorial. It worked perfectly! 😉 I wish I would have left some space in my HDD to try Linux Mint 13 when its released… Would I be able to partition more space from the Linux partition we created here?
If you have unallocated space or unused space left, yes.