![]() In continuation of a series of articles on dual-booting Linux and BSD desktop distributions with Windows 7, this article presents a step by step guide on how to dual-boot the latest stable release of PC-BSD, PC-BSD 8.2, on a computer with an existing installation of Windows 7.
In continuation of a series of articles on dual-booting Linux and BSD desktop distributions with Windows 7, this article presents a step by step guide on how to dual-boot the latest stable release of PC-BSD, PC-BSD 8.2, on a computer with an existing installation of Windows 7.
This is a 3-stage process. In stage one, unused space is reclaimed from the Windows 7 installation. Stage two involves the installation of PC-BSD on the reclaimed space. And finally, in stage 3, an entry for PC-BSD is added to the Windows boot menu.
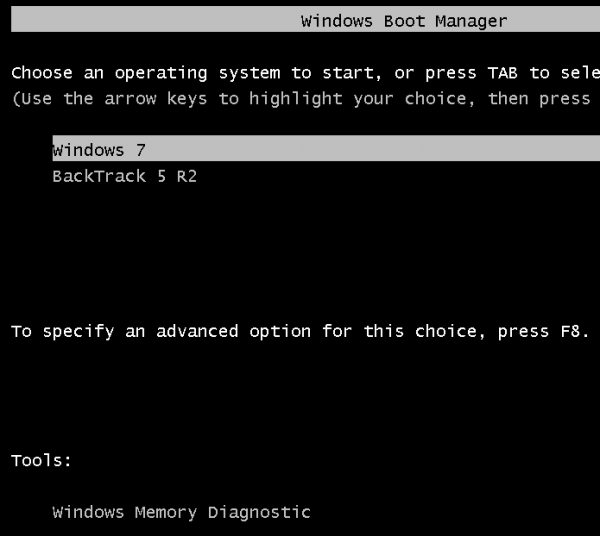
When completed successfully, the Windows boot menu will be just like the one shown below, with entries to boot into Windows 7 or PC-BSD 8.2.

If you would like to do this using a fresh installation of Windows 7, you can skip stage 1 by leaving enough unused space to install PC-BSD. You can also skip stage 1 if your computer has a secondary drive that you would like to install PC-BSD on.
One of the compelling reasons for using PC-BSD is ZFS, an advanced file system that has been described as a file system on steroids. If offers many features not available on any Linux file system, and the installer on PC-BSD 8.2 makes it very easy to install PC-BSD on a ZFS file system.
Stage One – To start, log into Windows. Click on the menu and type diskmgmt.msc or partitions in to the menu’s search field. The screen shown below should open. It will show a list of disk partitions on the system. The objective here is to shrink the main partition, the other one is the “System Reserved” partition, freeing up enough space that will be used to install PC-BSD.
So, right-click on the partition and select “Shrink Volume…”

In this example, which was done in a virtual environment with 200 GB of disk space, Windows automatically shrank the partition by half. By how much it is able to shrink the partition on your system will depend on what it considers safe. Click Shrink if you are satisfied with the suggested size.

This is the result of the “surgical” operation. Here, about 100 GB is now available for installing PC-BSD 8.2. Close the screen and reboot the computer. Be sure to insert the PC-BSD 8.2 installation DVD that you made into the optical drive.

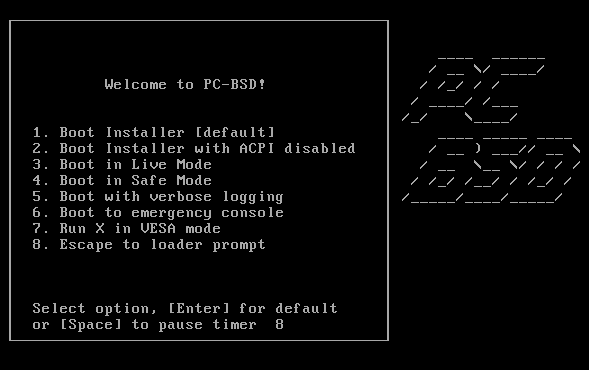
Stage Two – On the PC-BSD boot screen, the default is to boot directly into the installer. There is also a Live Mode option. However, from all the test installations that I have attempted, on real hardware and in a virtual environment, the system boots directly into the installer, even if the Live Mode option is selected.

The PC-BSD installer, pc-sysinstall, is a very user-friendly graphical installation program. It is both simple and advanced. The rest of this tutorial continues at the disk partitioning phase of the installation process.
This is the disk partition screen and the partitions as seen by the installer. The first two partitions are the NTFS partitions of Windows 7. The installer does not “know” that exactly, but those are the Windows 7 partitions. The third partition is the unused space, and that is the partition that will be used to create the partitions for PC-BSD 8.2.
The default file system is “UFS + Softupdates” (UFS+S). For this tutorial, the installation will be using ZFS, a file system ported from Oracle Solaris.

Click “Customize Disk Partitions (Advanced),” then on the add button to start creating partitions. This step will have to be repeated for all the partitions that are going to be created. The partition that are going to be created are for:
- /boot
- Swap
- ZFS Pool. File system mount points for /, /var, and /usr will be added under the ZFS Pool.
Note: Installation using ZFS could fail if “Partition with GPT for full disk install” is not checked. So, be sure to enable it.


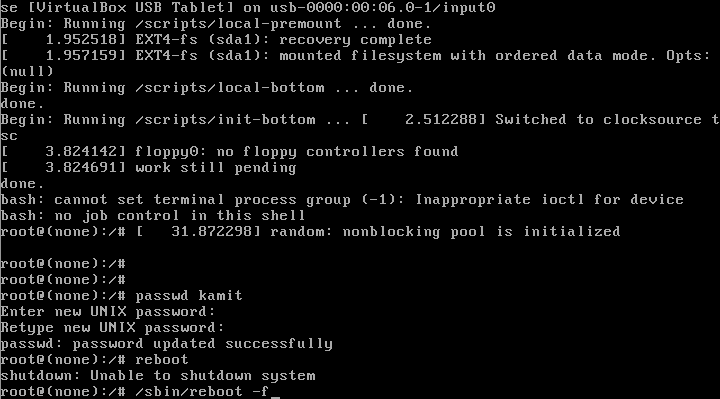
Oh! More than 19 hours wasted.
Point 1. this tutorial based on 2 partition only. my 320 gb have 5 partitions. And BSD only recognize 1st two parts i.e. C: & D:. Ans as I have only one laptop, I can’t be able to offer BSD nothing but E: . So, story over!
Point 2: Follow your tut religiously on External drive. But after installing when I tried to make new entry by easyBCD, it can’t recognize the partition type.
Point 3: Install on external with default setting. When boot from external, just ‘blink of curser’.
********
Just wanted to taste some new flavor. 🙁
8.1 was buggy, 8.2 repeat problems. Installation time just OMG! No, thats enough. I don’t have time left to waste on PC-BSD.
Before flaming other OSs they should concentrate on their work. “why BSD is better than linux” “why BSD is better than winduze” type of threads are just F.
Now ‘ll just stick with my stable with Windows 7 (VM-Win XP) & Linux Mint 10 machine.
********
Sorry bro, bookmark removed. 🙁
Tutorial is very well elaborated. thanks.
But, I got some problem. I installed PC-BSD on one partition of external drive. When I add an entry by EasyBCD I got the partition as ‘Unknown format, K:’ (K: my Pc-BSD partition), select that. But after restart when I boot on PC-BSD entry shows boot error.
Re-enter into windows, open EasyBCD, in advance tab I found that there is no entry of K:, the drive automatically turns C:. And as the PC-BSD partition is not ntfs I can’t see the partition in easyBCD.
Please help.
If PC-BSD is installed on an external drive, then dual-booting is not necessary. And that might be the cause of the problem – installing in an external drive.
Other than PC-BSD, what else do you have on the external drive?
Note: Dual-booting is best used if you are installing multiple operating systems on one or more hard drives on a computer. If installing to an external drive, then there is no need for dual-booting. Just install to the external drive as normal and change the BIOS to boot from the external drive when needed.
Thanks for reply, ‘m still struggling. Re-checking if I have done any mistake or not.
No other os on external. 2 partition. 1 ntfs for storage, 1 for Pc-bsd.
Still on trial & error, ‘ll reply later.
awesome article !