 Linux Mint 10, aka Julia, is the latest stable release of Linux Mint, a desktop-oriented distribution based on Ubuntu. Just like earlier releases of Linux Mint, Linux Mint 10 is installed on a partitioning scheme with just one root file system, no separate /boot and /home partitions.
While this may seem convenient, it is not the recommended method of partitioning a disk for the installation of a Linux distribution, even a desktop-oriented distribution. This tutorial presents a step by step guide on how to create the recommended number of partitions for installing Linux Mint 10 on a computer with a single hard disk.
The image below shows the partitions on a new installation of Linux Mint 10. This is on a computer with a hard drive of about 640 GB. Notice that there is no /boot partition. The system is installed on a single file system, with a 12 GB swap space.
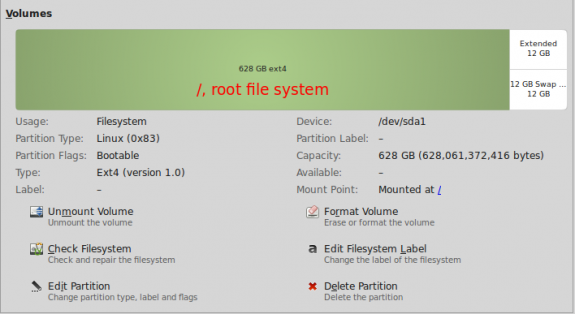
Default partitions on Linux Mint 10
This image shows the partitions we are going to create. There will be a separate partition for /boot, /home, / and, of course, swap. And the swap space will be nowhere near the 12 GB allocated to it in a default installation.
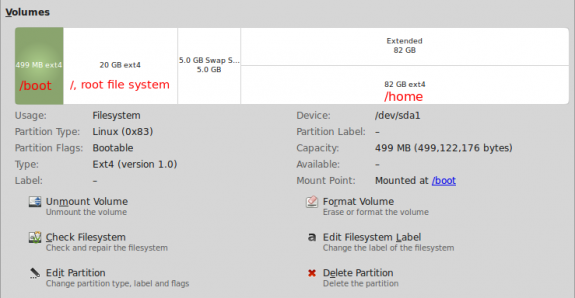
Custom partitions on Linux Mint 10
Note: This tutorial involves manual partitioning of a single disk for installing Linux Mint 10. A future article will cover manual partitioning for a dual-boot configuration.
To reduce the number of images used, only the steps relevant to disk partitioning have been included in this tutorial. We, therefore, begin at the step in the installation process where disk partitioning starts. Depending on the state of the hard drive on your computer, you will see the window shown below. The option to check at this step is “Specify partitions manually (advanced).” Forward.
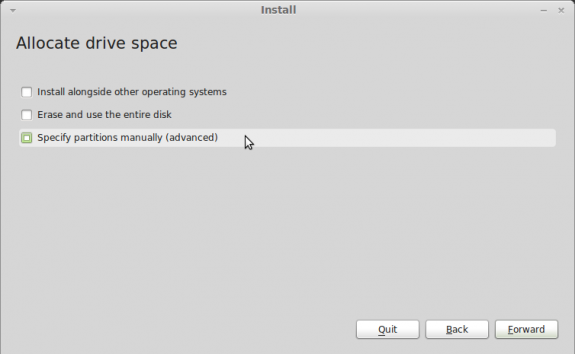
Select partitioning method
If there are existing partitions on the hard drive, they will have to be deleted. Also, if there is an existing OS on the hard drive and you do not wish to dual-boot, it will also have to be deleted. When you have freed up enough space to use for the installation, select it as shown below and click on the Add button.
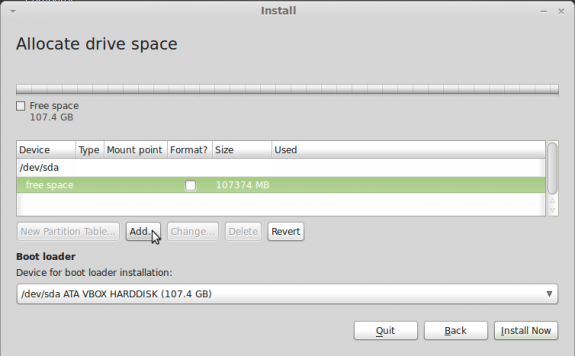
Select free space to begin creating partitions
Before proceeding, decide how many partitions you need to create, and how much disk space you need to allocate to each. For guidance, the Mint 10 installer create just two partitions by default. The root partition and swap space. And the default installation takes up less than 3 GB of disk space, if you install from the CD image. Installation from the DVD image takes up about 4.5 GB of disk space. For this tutorial, I am going to create four partitions. One each for /boot, root, /home and swap space. For a purely desktop system, those are the recommended partitions.
So let us continue by creating the first partition, which will be for /boot. Because it is the first partition, the installer will set it as a primary partition. Ext4 is the default file system for all Linux partitions, and the mount point is, of course, /boot. Recommended size is 500 MB. If you are short on space, you can allocate a much lower amount. Click OK if you are satisfied with your choices.
Note: Though ext4 is the default file system type on most Linux distributions, it has been suggested that /boot does not need a journaling file system. Ext3 and ext4 are journaling file systems. Many are of the opinion that ext2, a non-journaling file system, will do just fine.
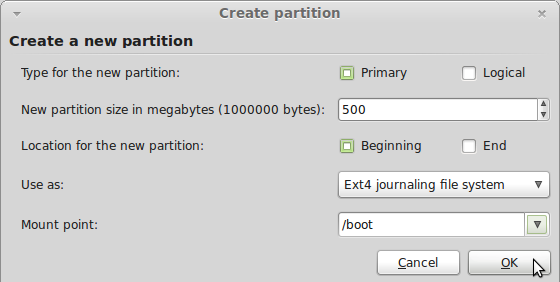
Create /boot partition
With the first partition created, select the remaining free space and click Add. Note that you will have to repeat this step to create the remaining partitions.
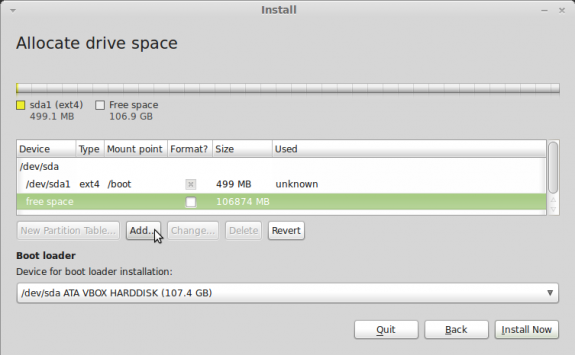
Select free space to create partition




500MB boot seems large from what I have read. Maybe I am misunderstanding; does this contain the necessary files to get linux running or the who of the linux OS?
I think Fedora was the first Linux distribution to assign 500MB disk space to a boot partition, when it was recognized that upgrading a system uses up far more than the usual default disk space assigned to boot, so those system tend to have issues during an upgrade. While 500MB over-compensates to solve the problem, it doesn’t hurt the system in any way. Consider it an insurance policy.
Keep in mind that less than about 30MB of the disk space assigned to the boot partition is typically used up on new Linux installations, so you can go lower than 500MB if you do not have the disk space to spare.
And yes, it contains “the necessary files to get linux running.”
Hi, I’m a new user to Linux… I have downloaded Linux mint 10 from the Linux website but, when i tried to install it on my Desktop, i’m unable to complete the installation because when it comes to the window “”who are you?”” My forward button shows as Unavailable… I have filled all the fields correctly but still no result…. Please Help….
I think you use uppercase in “Pick a username”. Use lowercase letters.
– this newbie lesson is super: short & sweet
-thanks to it,at long last, the penny has dropped & my numbskull brain’s door has creaked open! ManyThanks
cheers