With /boot created, click on the “+” button to create the next partition, which will be for swap. After swap has been created, you are going to repeat this step to create the ZFS root pool.
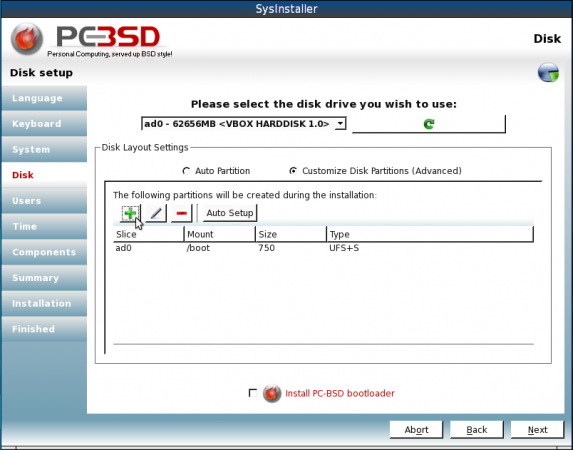
With /boot created, select to create swap
The partition we are going to create here is for swap. So under Type, select SWAP, and assign the disk space. On a production system, I would normally encrypt swap, and any other partition or file system that can be encrypted. Your choice, but since we are going to create an encrypted ZFS system, it is better to encrypt whatever you can. SAVE.
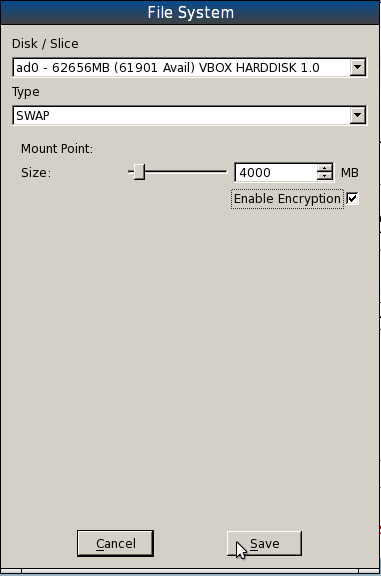
Creating swap
Time to create the third partition, which is going to be used for the ZFS root pool. Under Type, select ZFS. Allocate all the available disk space to this partition, enable encryption, and type in the encryption key or passphrase when prompted.
Under ZFS Pool Type, the available options are basic, mirror and raidz. The default is basic and since this installation is on a single-disk system, that is what we are going to use.
Below the ZFS File Systems/Mount Points section, click on the “+ Add” button to add the ZFS mount points.
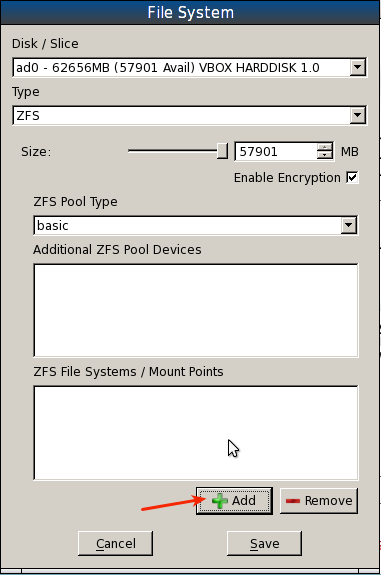
Creating the storage pool and filesystems
Clicking the “+ Add” button in the image above will bring up this window. This is where you specify the mount points, and you can specify all on the same line, separated by commas. You have to at least add the / mount point, but to take advantage of PC-BSD’s security system, it is recommended that you add /, /var and /usr. These are the same file systems created on a default installation. Keep in mind that if you create a separate mount point for /home, you will be putting it outside PC-BSD’s jail system. So I prefer to specify the three mount points shown. “+ Add.”
Note: ZFS has a jail feature, so you could still specify a separate mount point for /home, and use ZFS’s jail to confine it.

Specifying the file systems
All is set. Save.
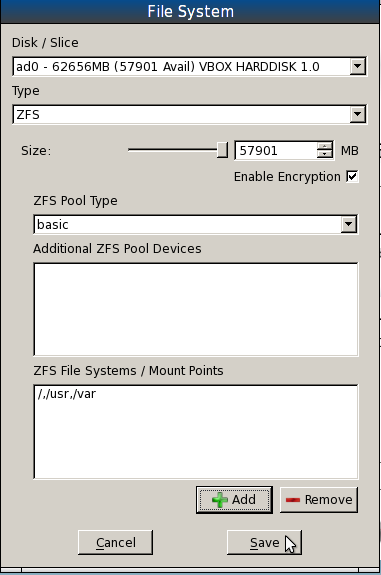
Root pool and file systems created
Click Next to continue the installation. The next steps after this are where you create the root password, create a user, install, if you like, optional applications. The rest of the installation should take about 15 minutes. Then reboot.
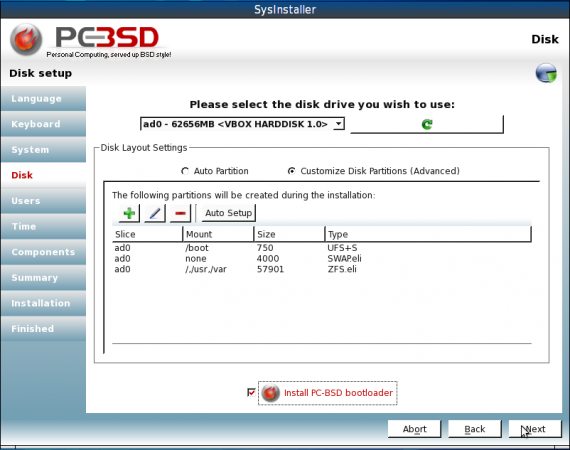
All partitions have been created
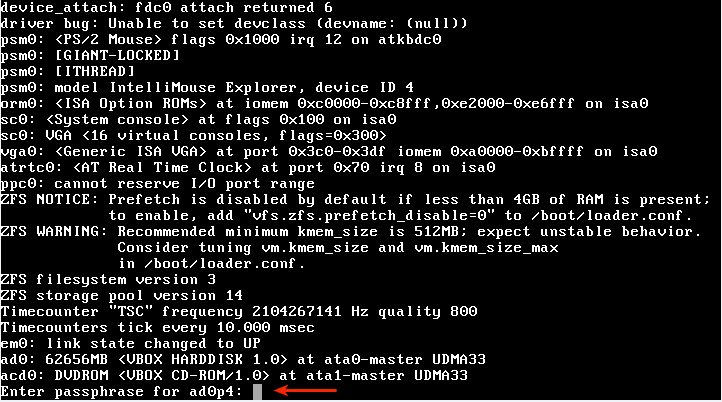
During the process of rebooting, you will be prompted for the passphrase that was used to encrypt the ZFS file system. Hope you did not forget it. Once rebooting has completed and you have logged in, you can start playing with ZFS. All the ZFS zfs, zpool commands will have to be run as root.
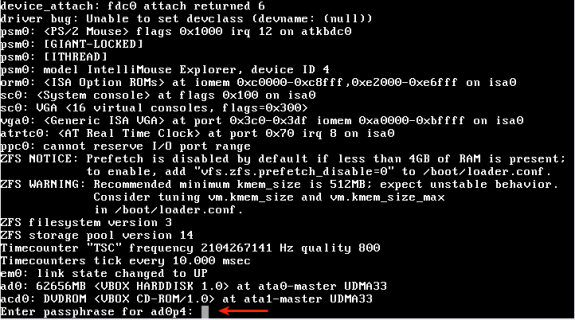
Passphrase request on boot
That is how easy it is to install PC-BSD on an encrypted ZFS file system. Next time, we will look at how to install PC-BSD on a mirrored ZFS file system, and then on how to manage ZFS. To whet your appetite, here is a ZFS management tip: All the disk space available in the ZFS pool is accessible and usable by all the datasets (mount points). So on a ZFS system with /, /var ,and /usr mount points, and, say, 600 GB of available disk space, all the available disk space can be used by /var for example. However, you can use ZFS’s quota feature to set a specific size for /var. To do that, issue the following command – zfs set quota=5G tank0/var. Tank0 is the name of the pool, which is the default name on PC-BSD.



awesome walkthrough. thanks!