With /boot created, select the unallocated space, then click the Create button to create the swap space.
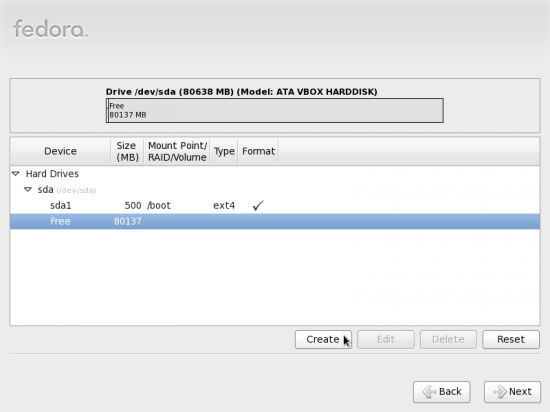
With /boot created, time to create swap
Again, we want to create a standard partition. Create.
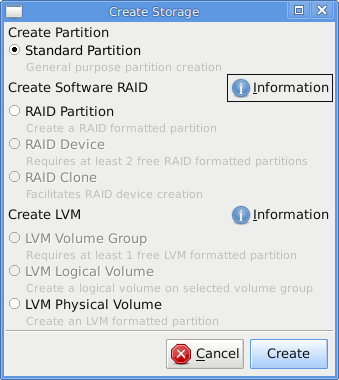
Create partition type
For this test installation, 2000 MB, or 2 GB, has been allocated to swap, and that should be sufficient for most systems. OK to continue.
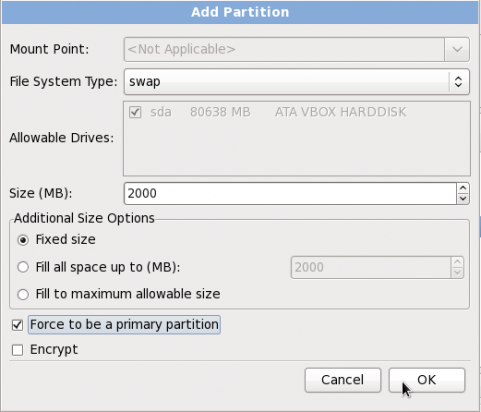
Creating swap
Now that /boot and swap have been created, select the remaining free space to create the btrfs-formatted root partition.
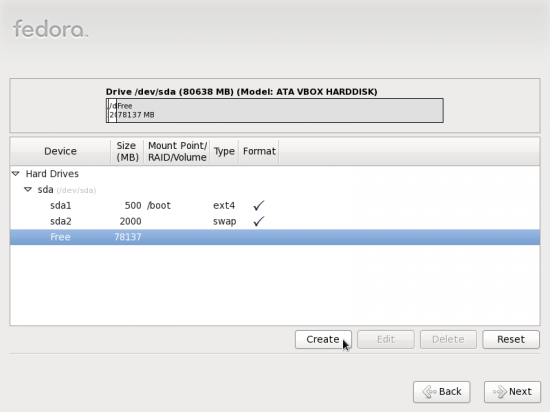
Time to create the btrfs-formatted root partition
Once more,, we want to create a standard partition. Create.

Create partition type
For Mount Point, select /, and btrfs for File System Type. If you intend to use all the unallocated space, click on the radio button next to Fill to maximum allowable size. OK.
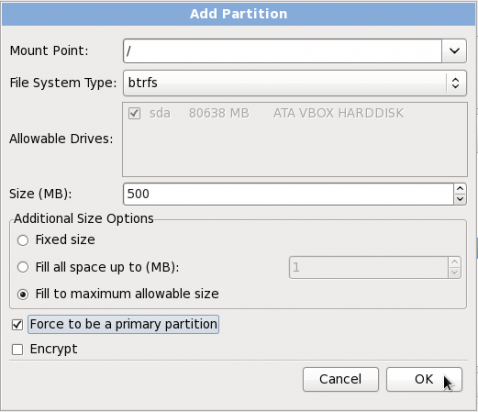
Creating the btrfs root partition
All the partitions have been created, click Next to continue with the rest of the installation.
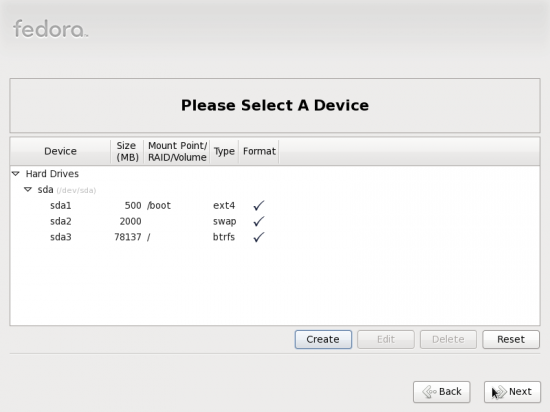
/boot, swap and a btrfs-formatted root have been created




Respected Fedora Members,
it was nice documentation on fedora 13 installtion part.
I really liked it.
will implement it in my system.
Thank You.
karan doshi.
Redhat ceritfied engineer.
This makes me almost want to try out Fedora, especially since Ubuntu takes that f**ing long to implement such basic features. I wonder if you can set the btrfs “compress” option here though.
(But, the first Anaconda screenshots looks like low usability. Why is it “Basic Storage Devices” and not just “Hard Disk” or mentioning the second with “… (Datacenter)”. And why make users guess with “If you’re not sure… this is probably it”?)
Well, if you are not sure of what option(s) to choose, it’s always safe to go with the default(s). When it doubt, take the road oft recommended.