 Pardus is a desktop-oriented Linux distribution sponsored and developed by the Scientific & Technological Research Council of Turkey. Pardus 2009.2, the latest release, reviewed here, leaves plenty of room to customize the desktop’s features. If you are new to Linux and to Pardus, this simple tutorial will help you learn the different ways you can customize your desktop.
Note that because Pardus uses KDE as the default desktop environment, most of the tips presented in this guide may be used to customize any other KDE-based distribution. Most of the administrative tools used in this guide can be found in the control center, or more correctly, the System Settings. You can access the System Settings from Menu > System Settings.
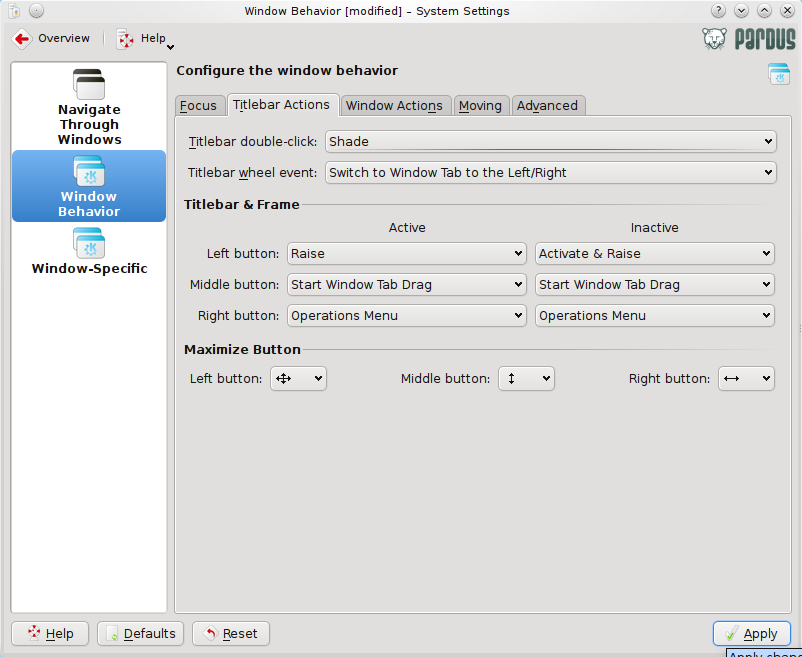
If you are new to KDE, it is recommended that you take the time to get to know the tools in System Settings, a screenshot of which is shown below. Most of the customization tips in this tutorial will be performed by accessing System Settings tools.
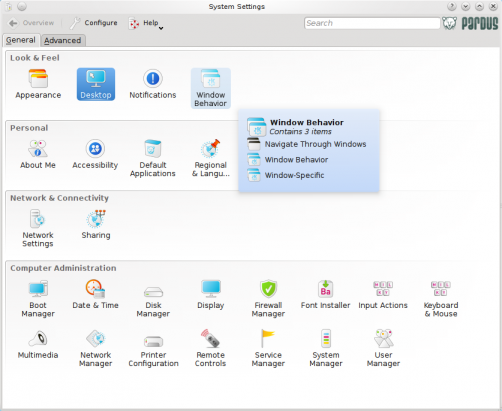
KDE Control Center
When you first boot into Pardus, the first application you’ll get to use is Kaptan. It is designed to help you customize your desktop. One of the task you’ll need to perform before you can get on the Internet is configure the network interface(s) on the computer. If you have never configured a network interface on Linux, the next three images will provide some assistance.
-
Configure Network Interface – This image is the step in Kaptan when you have the option to configure network interfaces. Begin the configuration by clicking on the Create Profile button. All the network interfaces, wired or wireless, on the computer should be visible. Then select the one you’ll like to configure. For this example, only one network interface is on this test machine.
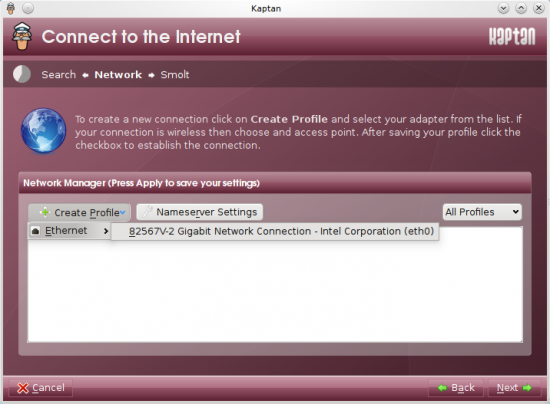
Selecting the default network interface for configuration.
Once the interface has been selected, you should see the page below. Here you’ll need to specify how the interface you want to configure should get its IP address. The easiest method is via DHCP (Dynamic Host Configuration Protocol). To use this method, select “Use DHCP,” then click OK.
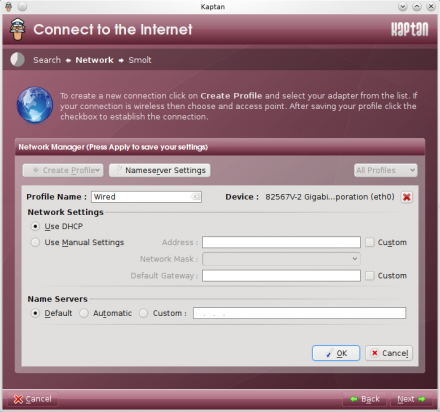
Configure address configuration mode
After a few seconds, you should see the page below. Select the interface by clicking on the check box next to it, and click the Next button to move on to the next step. Note that if you need to configure another interface after this, you do not need to run Kaptan again. You can access the Network Manager interface by right-clicking on the Network Manager applet’s icon in the system tray and select “Open Network Manager.”
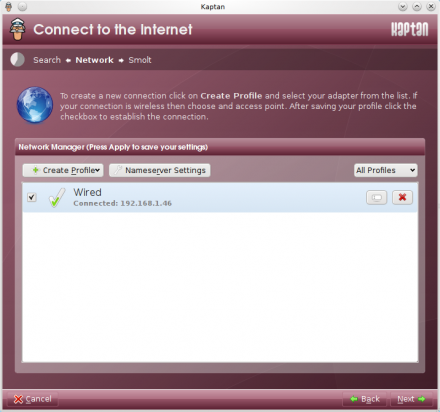
Enable the network interface
- Configure the Firewall – After configuring the network interface, the next task that’s recommended you perform is enable and configure the graphical firewall manager. Pardus ships with a very easy to configure graphical firewall manager. It’s not as advanced as what’s available on Fedora or Mandriva, but it works. For basic firewall configuration and setup on Pardus, it’s all you need. Read how to configure the graphical firewall manager on Pardus for a detailed instruction of how to enable this tool.
-
Enable Network Time Protocol – Enabling the Date & Time utility to use NTP, the Network Time Protocol, to set system time is optional, but very highly recommended. It allows the computer to keep very accurate time by syncing its clock with that of NTP servers on the Internet. On Pardus, the NTP client is already installed. All you need to do is configure the Date & Time tool to use it.
To do this, access the Date & Time tool in the Computer Administration section of the General tab of System Settings. The screenshot below represents the page that’ll load. Check “Set date and time automatically,” then click Apply. That’s all there is to enabling NTP (client) on Pardus 2009.2.
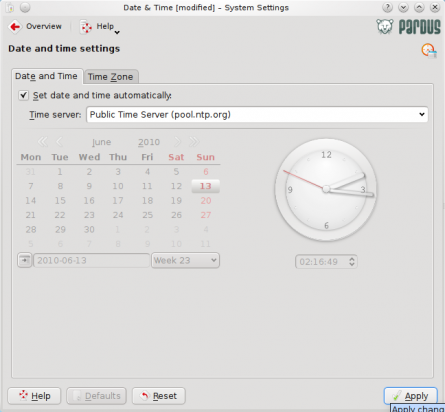
Enabling NTP on Pardus

