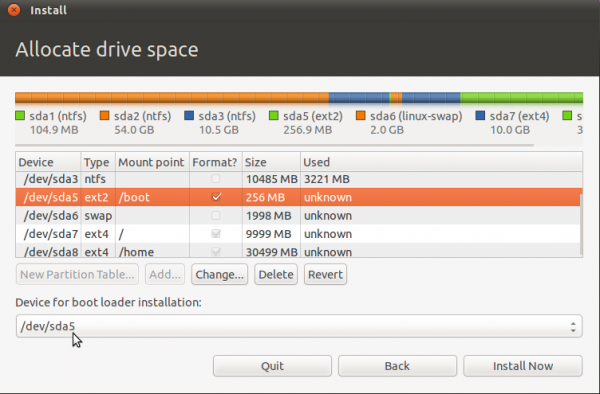
All the partitions have been configured. You may continue with the rest of the installation. But before you do, decide where you want to install GRUB, the boot loader. You may install it in the Master Boot Record (MBR), the default, or in the boot partition (/dev/sda5 in this example). A good case can be made for either choice.
If you install GRUB in the MBR, it will overwrite Windows’ boot programs. This is the most common and requires no other configuration on your part. However, upgrading or reinstalling Windows, or even installing a Service Pack can overwrite certain aspects of GRUB. Restoring GRUB is not a very difficult task, but you can save yourself the trouble by installing GRUB in the boot partition of Ubuntu. This is the recommended method because it completely separate the two operating systems, even as they co-exist on the same disk. It does requires additional configuration on your part. That, however, is nothing compared to the potential headache of the other option.
For this tutorial, I will follow my recommendation and install GRUB in /dev/sda5, the boot partition. Note that the version of GRUB used by Ubuntu 11.04 is GRUB 2.
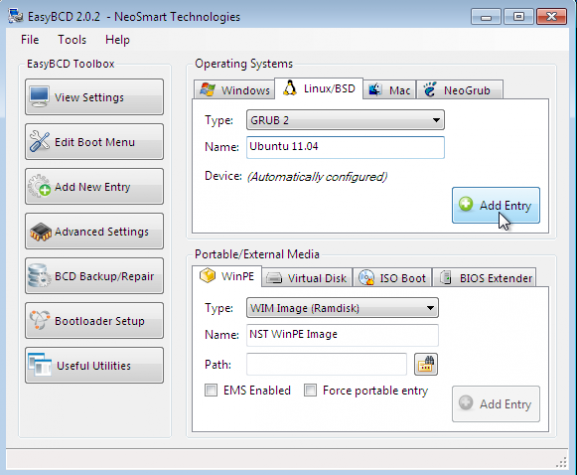
After installation and reboot, the computer will reboot into Windows. The final task then is to add an entry for Ubuntu in the boot menu of Windows 7. For that, the easiest program to use is EasyBCD, a free program by NeoSmart Technologies. Download and install it like you would any Windows 7 application. Start it and click on the Add New Entry tab, then on the Linux/BSD tab. From the “Type” dropdown menu, select “GRUB 2,” the version of GRUB used by Ubuntu 11.04. Click on the “Add Entry” button. Click on Edit Boot Menu tab to view the new configuration.
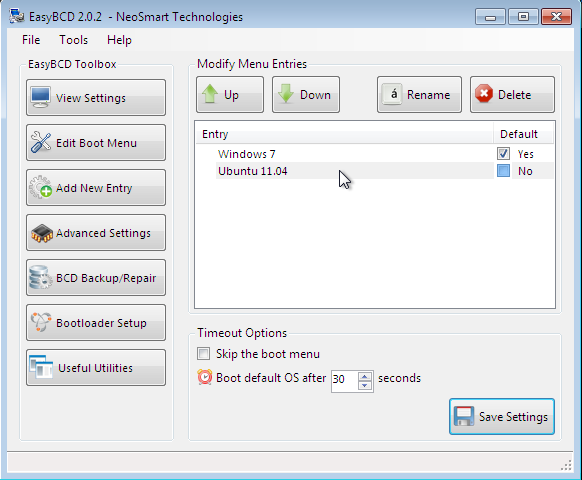
These are two entries you will see every time you boot the computer. The default is Window 7, but you can change it to Ubuntu 11.04 if you like. Exit EasyBCD and reboot.
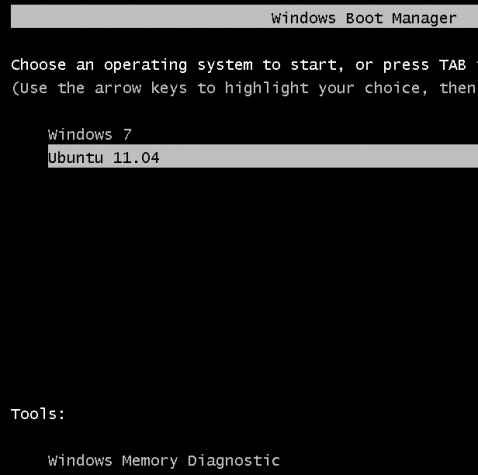
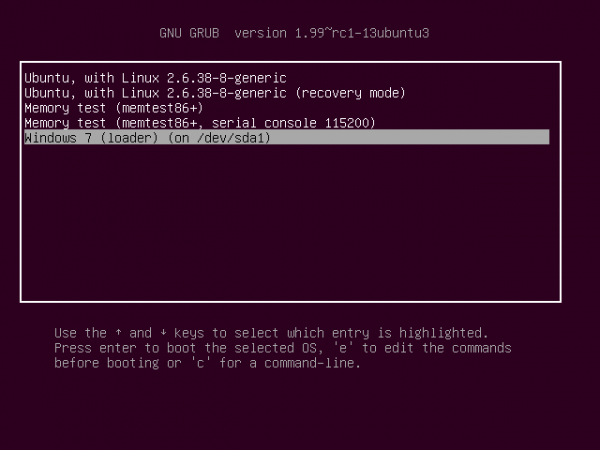
This is the boot menu you will see.
And this, when you attempt to boot into Ubuntu. Note: If at any time you decide to have GRUB be responsible for dual-booting, you can do so easily. Just log into Ubuntu and write GRUB to the Master Boot Record, or MBR. And if you want to switch back to Windows’ boot manager, log into Windows 7, start EasyBCD and use it to overwrite GRUB.
You can have quality articles like this delivered automatically to your Feed Reader or Inbox by subscribing via RSS or email. This website now has a Questions and Answers section. Use the commenting system for simple comments, but for more involved assistance, please use the Questions and Answers section.




sorry for previous comment. i am find 2 page and solve the above doubt, but i need to change booting options without using easybcd software, and i need default OS is win7
What Linux distribution did you install. Is the PC using UEFI firmware?
what is nest step for this process, i find one screen and which i select ‘device for boot loader selection’, in dual boot win 7 and ubuntu
very very thank for your kind information to how dual boot system in a single system with windows and ubuntu by manually .this is very useful for me now and future.
I gave 6 gb space for Ubuntu form total 20gb space . . .n for window 7 it is 100 gb
I am installing Ubuntu 12.10 and I have followed all your steps n it went well till EasyBCD, after configuring EasyBCD i got Boot menu too but when i clicked on Ubuntu i got blank screen with showing
GRUB4DOS 0.4.4 2009-10-16, Memory: 625K / 2865M, MenuEnd : 0x48f93
[ Minimal BASH-like line editing supported. For the first word, TAB list possible command completions. Anywhere else TAB lists the possible completions of a device/filename. ]
grub>
is there any solution for that . . .plz help me
What type of hardware do you have, and what are the disk partitions and sizes for both OSs?