What is a VPN
A virtual private network (VPN) is a service that takes a device’s connection, routes it through a third party server and then has it continue on its path to the public Internet. Through this process, the device appears like it has a new location, which is a useful function in many ways. VPN services improve user privacy and security, though in most cases, the VPN service provider can see all the traffic flowing through its servers.
VPNs can be set up on all operating systems, including Linux. The setup process is relatively simple and control of the VPN may take place through a graphical application, via the command line or both.
The Benefits of Using a VPN
VPN services benefit a wide variety of people, especially as businesses overstep through data collection, hackers are hitting every system they can get their hands on and governments implement restrictions on the Internet. Here are a few benefits to consider when looking at a Linux VPN.
1. Accessing locked content
Since the device’s location shows up as the VPN’s server location, geographic locks on streaming video sites and similar online media sources are eliminated. There are a few great uses associated with this benefit. The first is checking out the shows and movies from other countries to get exposure to a broad range of cultures and content. The second is being able to continue accessing content from the user’s home country when they are out of the country.
2. Improving privacy
It seems like every company and government agency is looking over the shoulder of Internet users. Their actions impinge on people’s privacy and there are no guarantees how they’re using all the massive amounts of data being collected. VPNs encrypt the connection so limited information is available. In some VPN services, only the most basic information is on file about the user, and some VPN services have a no-logs policy, so even if they get subpoenaed, the user connection data and browsing history are not available.
3. Accessing a free and open Internet
Another area where the government overreaches is in censoring legal content due to it critiquing the government or otherwise catching the ire of entities in charge. The government itself may head up the push or Internet service providers may control censorship on a server level. A VPN may not allow either of these entities to see what a user is doing or the content they access, so it’s unlikely to be blocked.
4. Improving data security
Hackers are opportunistic and have many ways of trying to break into devices. While they face a harder environment to access Linux machines, the risk is still important to consider. By having powerful encryption that protects Internet browsing, these attackers don’t have a way to get any information that they could use against the person.
Installing Surfshark VPN client
In this section, I’ll show you how to install Surfshark’s VPN client on a Debian- or Ubuntu-based distribution. Then after the installation has been completed, you’ll learn how to control the VPN client from the command line. The Surfshark VPN service is a paid service, so you’ll need an account on the platform to use it. There’s a 24-month plan that’s on sale right now for $1.99/month. If you haven’t already, you may sign up for it by clicking here.
After signing up, you’ll then have to perform the following steps to install the Surfshark VPN client:
- Add the Surfshark VPN Debian or Ubuntu repository to your package database from a GUI interface.
- Add the Surfshark VPN Debian or Ubuntu repository to your package database from the commannd line.
- Install the Surfshark VPN client from the command line client. Note that this is the only method of installing the client in Linux.
- Use the Surfshark VPN client.
Add the Surfshark VPN Debian or Ubuntu repository
So to begin the installation process, download the .deb file that will aid in adding the Surfshark VPN repository to your system by clicking the Download now button at Linux VPN. If you have the GDebi Package Installer installed on your system, you’ll be promoted to open the .deb file with it. Click OK. If you do not have the GDebi Package Installer on your machine, you’ll be prompted to save the .deb file. Then scroll further down to learn how to add the repository and install the Surfshark VPN client from the command line.
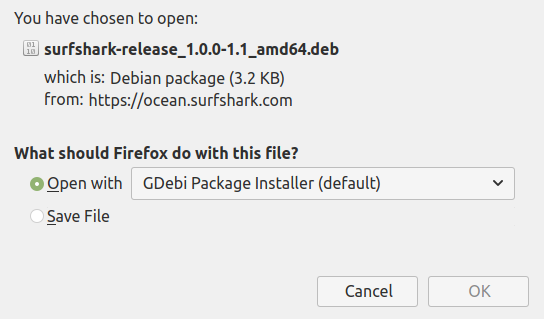
Downloading Surfshark’s VPN Linux repository installer
Then click Install Package on the next prompt.
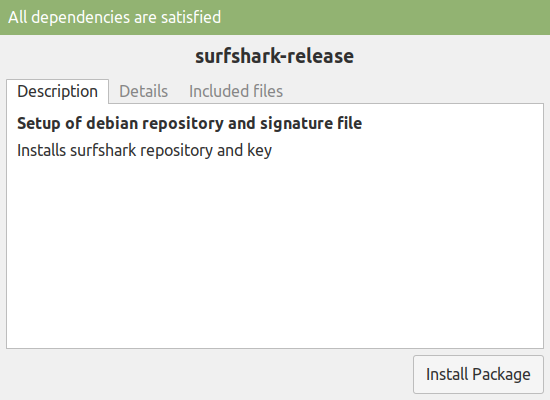
Using GDebi Installer to install the Surfshark VPN Linux repository
After installation, close the last window that opens. Do not click the Reinstall Package button on that last window. With that, the Surfshark VPN repository has been added to your package database.
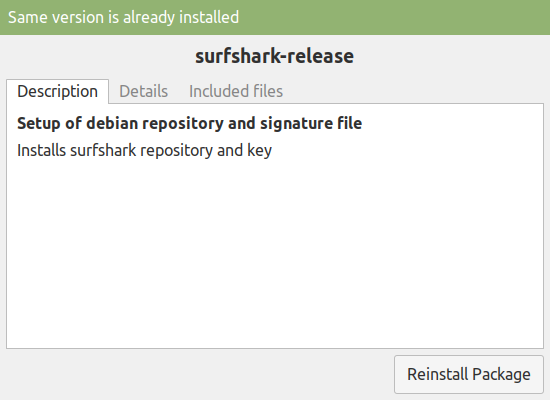
Completed installation of the Surfshark VPN Linux repository using the GDebi Installer
Add the Surfshark VPN Debian or Ubuntu repository from the CLI
If you do not have the GDebi Package Installer on your machine, you’ll be prompted to save the .deb file. Save it to a suitable location. Navigate to the folder you saved the package from a terminal application, then type the following commands below:
# Use the following commands to update the package database, add the Surfshark VPN repository
# and install the Surfshark VPN client to your system.

# This command will update the package database and perform available upgrades
sudo apt update && sudo apt upgrade -y

# While this will actually add the Surfshark VPN repository
sudo apt install surfshark*.deb

# Finally, use the following to install the VPN client itself
sudo apt install surfshark-vpn

##
That’s the end of this section. In the next section, I’ll show you the common commands of the Surfshark VPN client on your machine. So be sure to keep the terminal application open, because you’ll need it in the next section.
Using the Surfshark VPN client
Once the VPN is installed, the command to access it is surfshark-vpn. You’ll need root (sudo) access to use it. The following command show the basic command line utilities you need to use the application. Keep in mind that you’ll be prompted for your Surfshark VPN account’s email address and password to use the application for the first time. Those credentials will then be cached for future use.
# Using the Surfshark VPN client on Linux

# To access general info about the application and list available commands
$ surfshark-vpn help

# The output should be just like this.
> ...
> ...
> surfshark-vpn help - shows this message
> surfshark-vpn attack - quick connects to nearest server
> surfshark-vpn multi - connects to a MultiHop server
> surfshark-vpn down - kills already runnning vpn vlient
> surfshark-vpn status - show status
> surfshark-vpn forget - logoout from the app
> surfshark-vpn version - shows version


# Using the multi command gives you the ability to choose which server to connect
# to and which protocol to use, as shown in the following example to
$ surfshark-vpn multi

> 0. France
> 1 Germany
> 2 Hong Kong
> 3 Netherlands
...
...
> 5 Portugal
> 6 Singapore
> 7 Sweden
> 8 United Kingdom
...
...
> 12 United States
>
> Enter a number to select the location
12
> Enter a number to select the VPN connection type. For default UDP, press ENTER
> 0. TCP
> 1 UDP
> 1 selected
>
> Checking for connection status...
That’s how you install and use Surfshark VPN client on any Debian or Ubuntu-based distribution.




I run the watch command in linux to continuously view the status of the surfshark-vpn connection when connected i.e. “watch -n 5 surfshark-vpn status” . The linux app for surfshark is otherwise not very informative when connections go down.